How to automatically update Google Chrome with Microsoft Intune. When securing you organization it is important to make sure, that all the applications are up to date. One application almost everyone is using is Google Chrome. In this blog post we are going to have a look on How to automatically update Google Chrome with Microsoft Intune.
Table of Contents
What are we going to set up?
If you are installing Google Chrome default the application auto update is activated. So you dont need to do anything. But you might just want to make sure, that this applies to all devices or you want to change the auto update feature. In this blog post we will have a look on How to automatically update Google Chrome with Microsoft Intune. We are going to make the following configuriations:
- Step 1: Download ADMX files: In this step we are going to download the ADMX file for Google Chrome, Google Chrome Update and Windows ADMX. If you have already installed them into Microsoft Intune you can skip this step.
- Step 2: Import ADMX files: In this step we are going to import the downloaded ADMX files from step 1. If you have already installed them into Microsoft Intune you can skip this step.
- Step 3: Create new configuration policy: In this step we are going to configure the setting to configure the Update behavior.
How to automatically update Google Chrome with Microsoft Intune
Step 1: Download ADMX files
Unfortunataly the settings are not yet available in the Microsoft Intune Settings cataloge. So we first need to download the ADMX file and than import it into Microsoft Intune. Just follow the steps below.
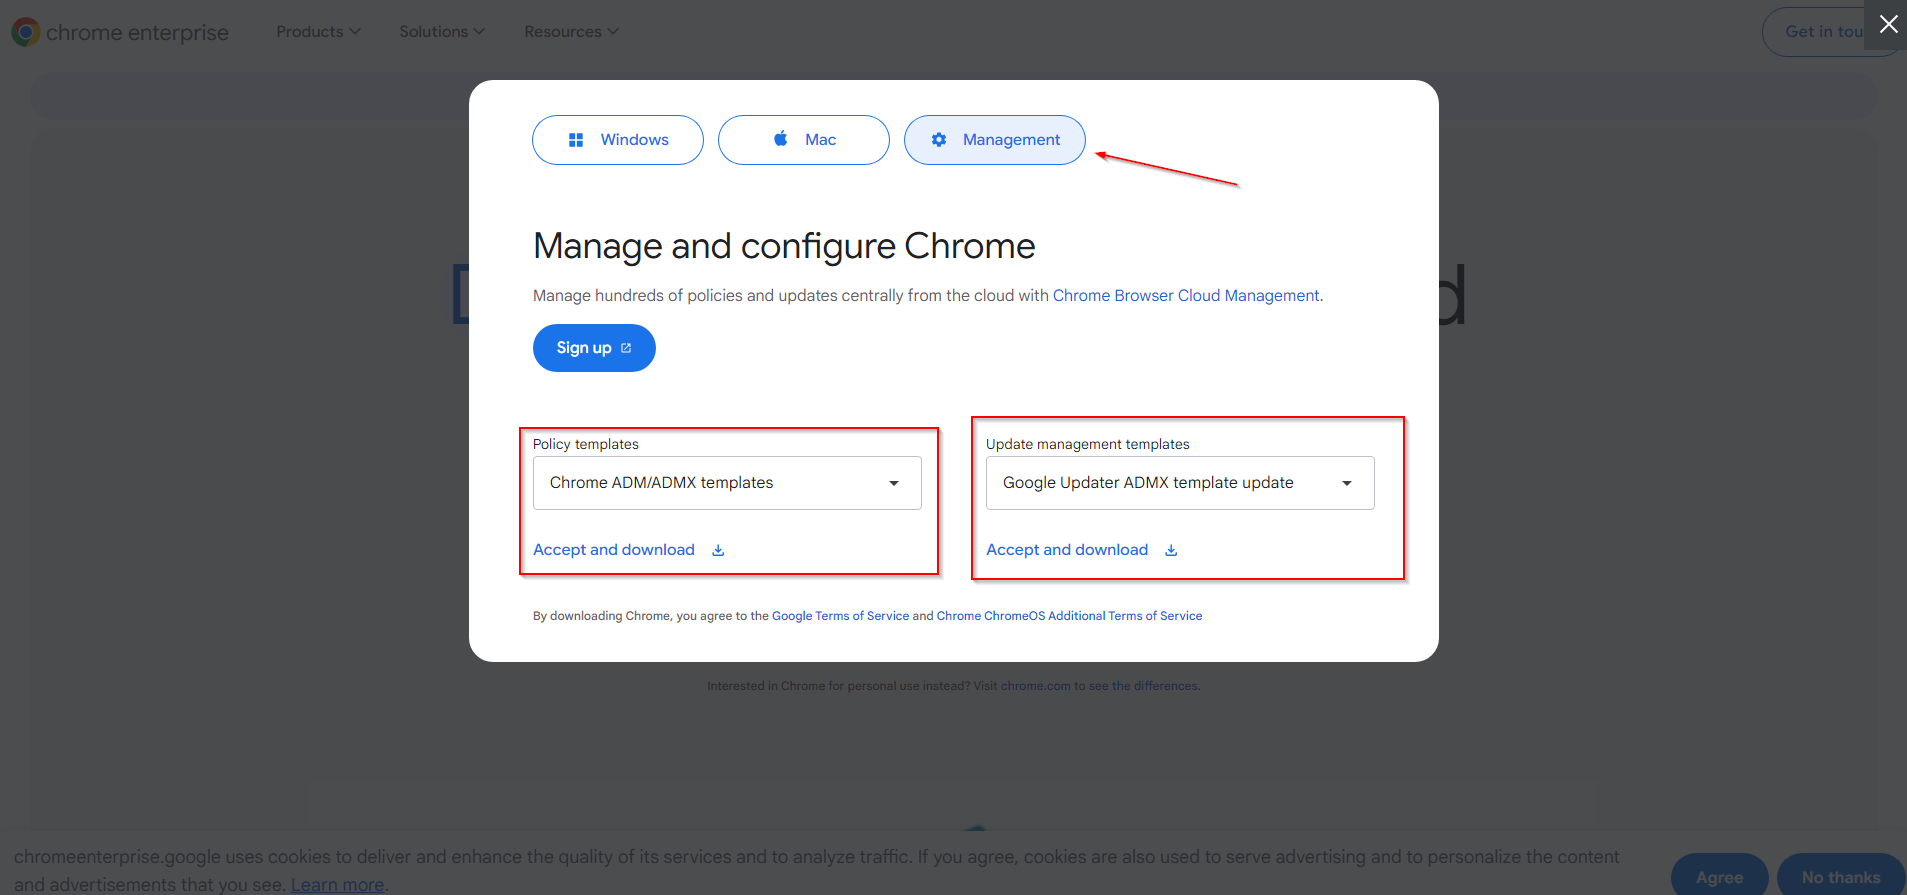
- Go to https://chromeenterprise.google/intl/en_en/download/?modal-id=download-chrome#management-download
- Click on Download for the Chrome ADM/ADMX templates and the Google Updater ADMX template update.
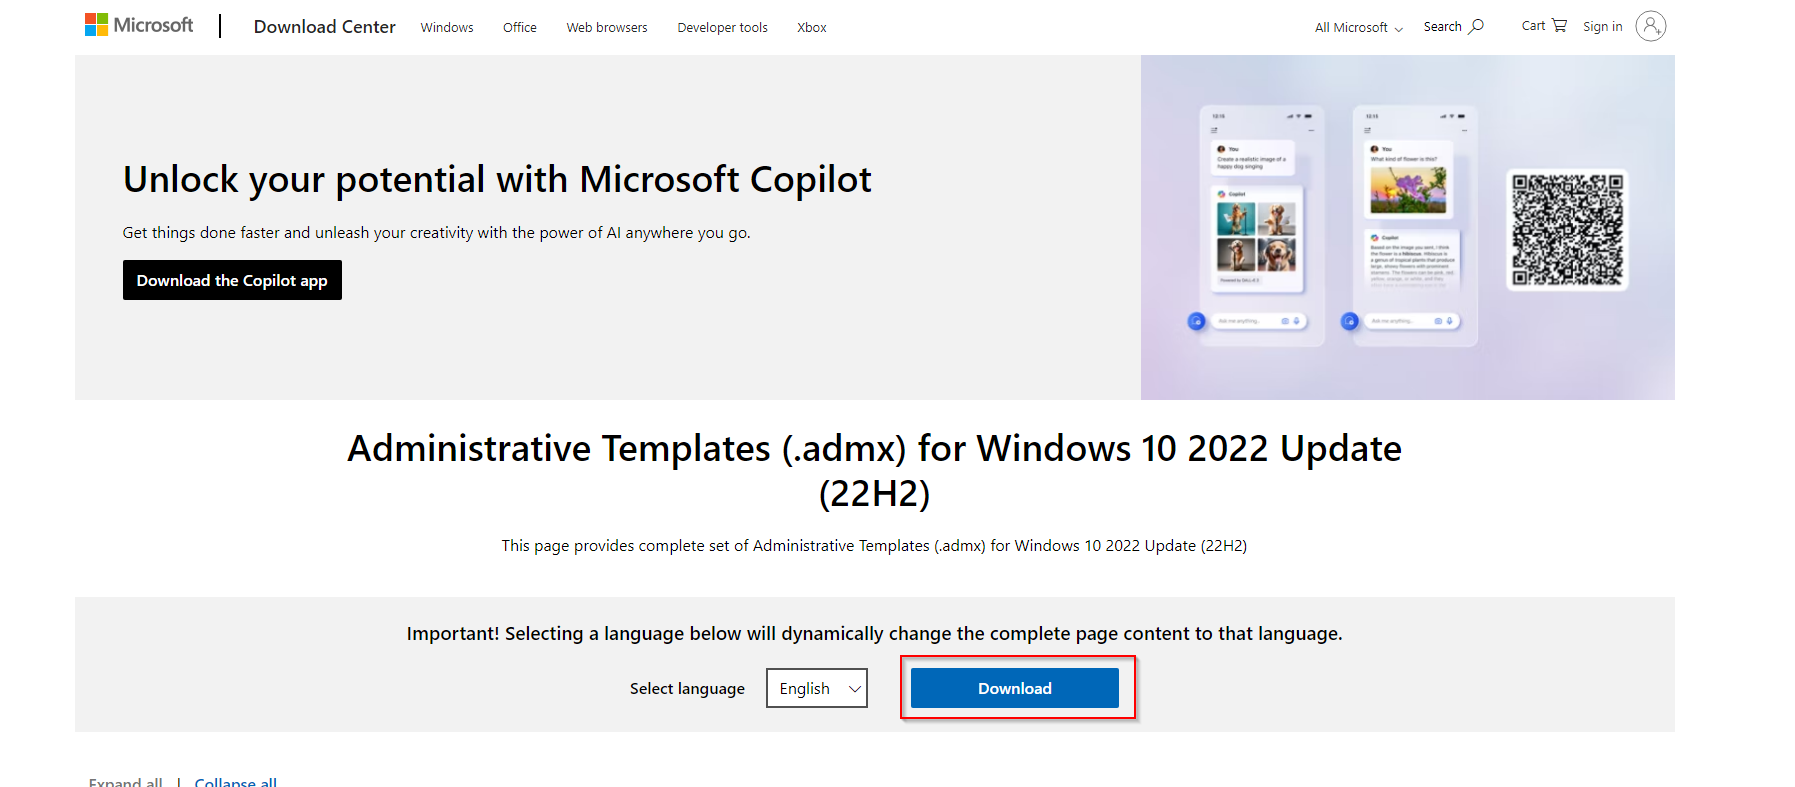
We also need to download the windows ADMX template.
- Got to https://www.microsoft.com/en-us/download/details.aspx?id=104677
- Click on Download
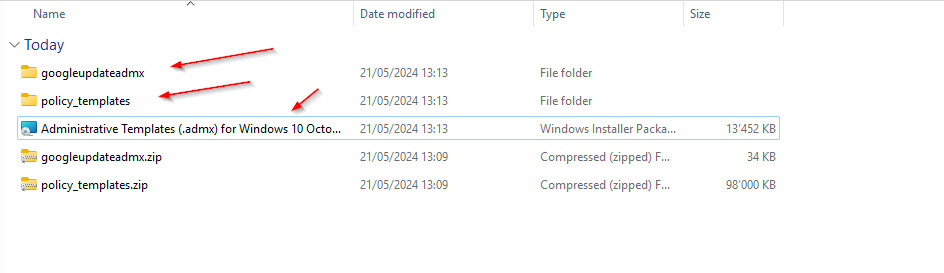
Now you should have two new zip file and a msi executable.
- Extract both folder
- Install the msi executable. Just click through the installation.
Step 2: Import ADMX files
In this section we will import the downloaded ADMX files to Microsoft Intune. Just follow the steps below.
- Go to intune.microsoft.com
- Click on Devices
- Click on Windows
- Click on Configuration profiles
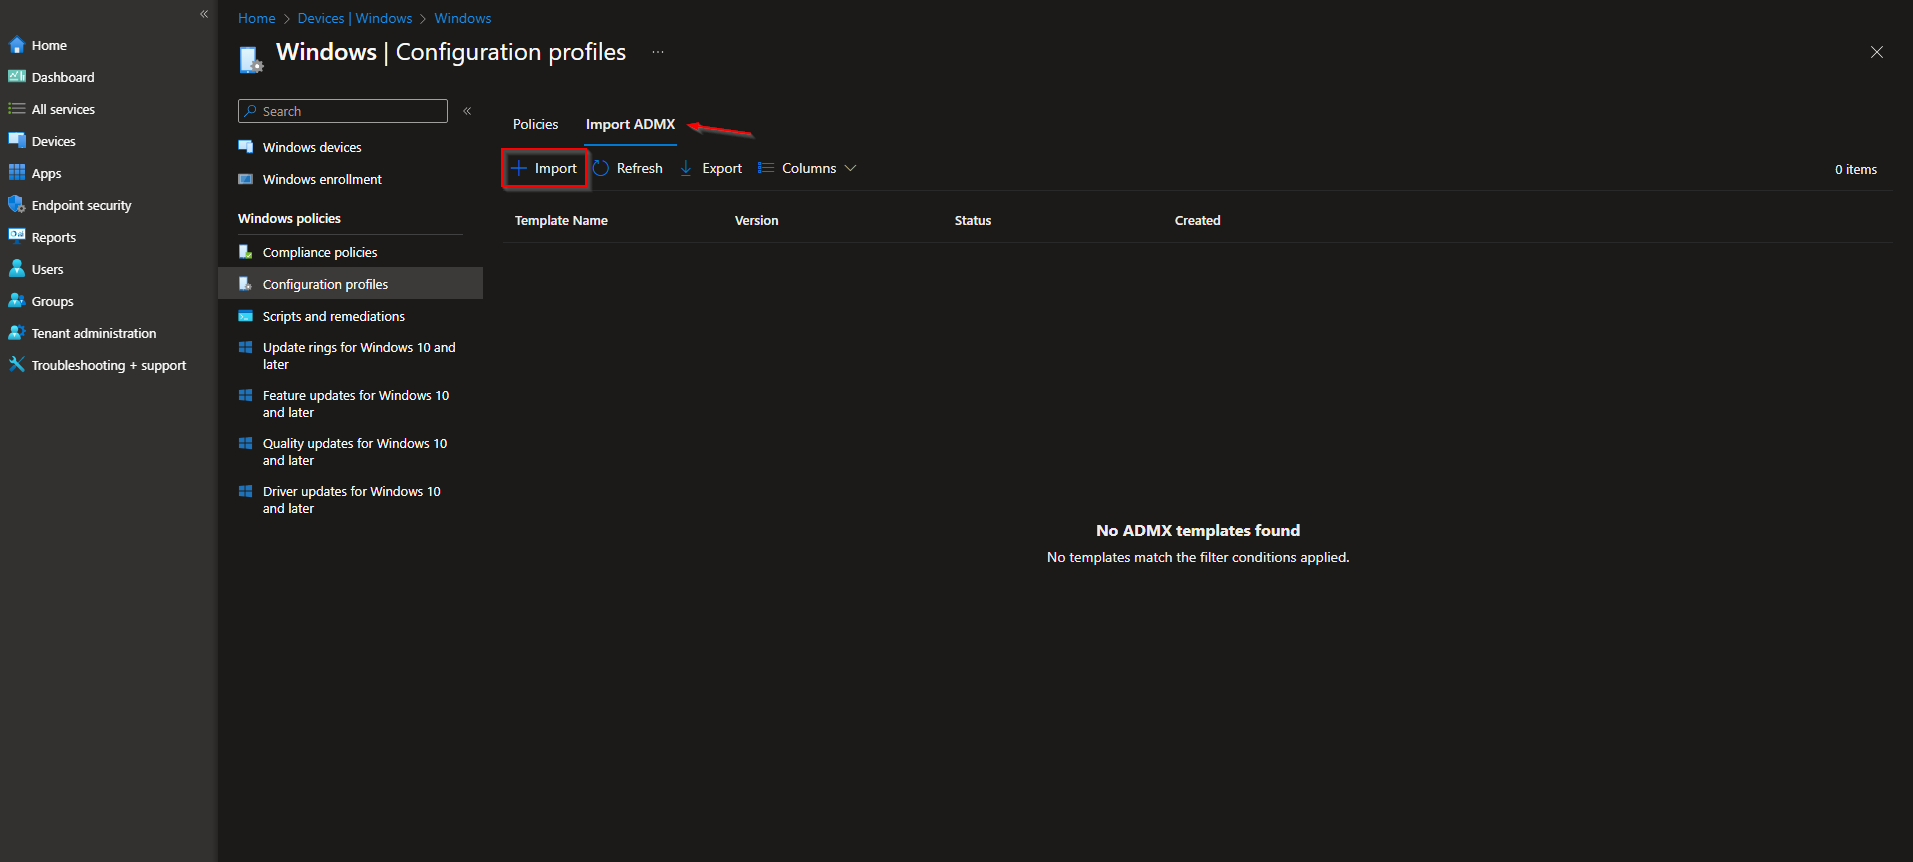
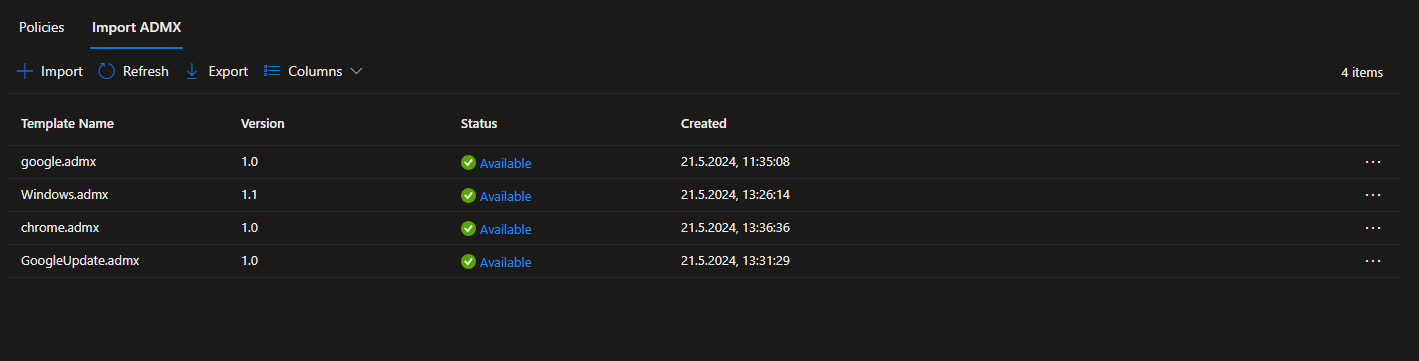
- Click on Import ADMX
- Click on Import
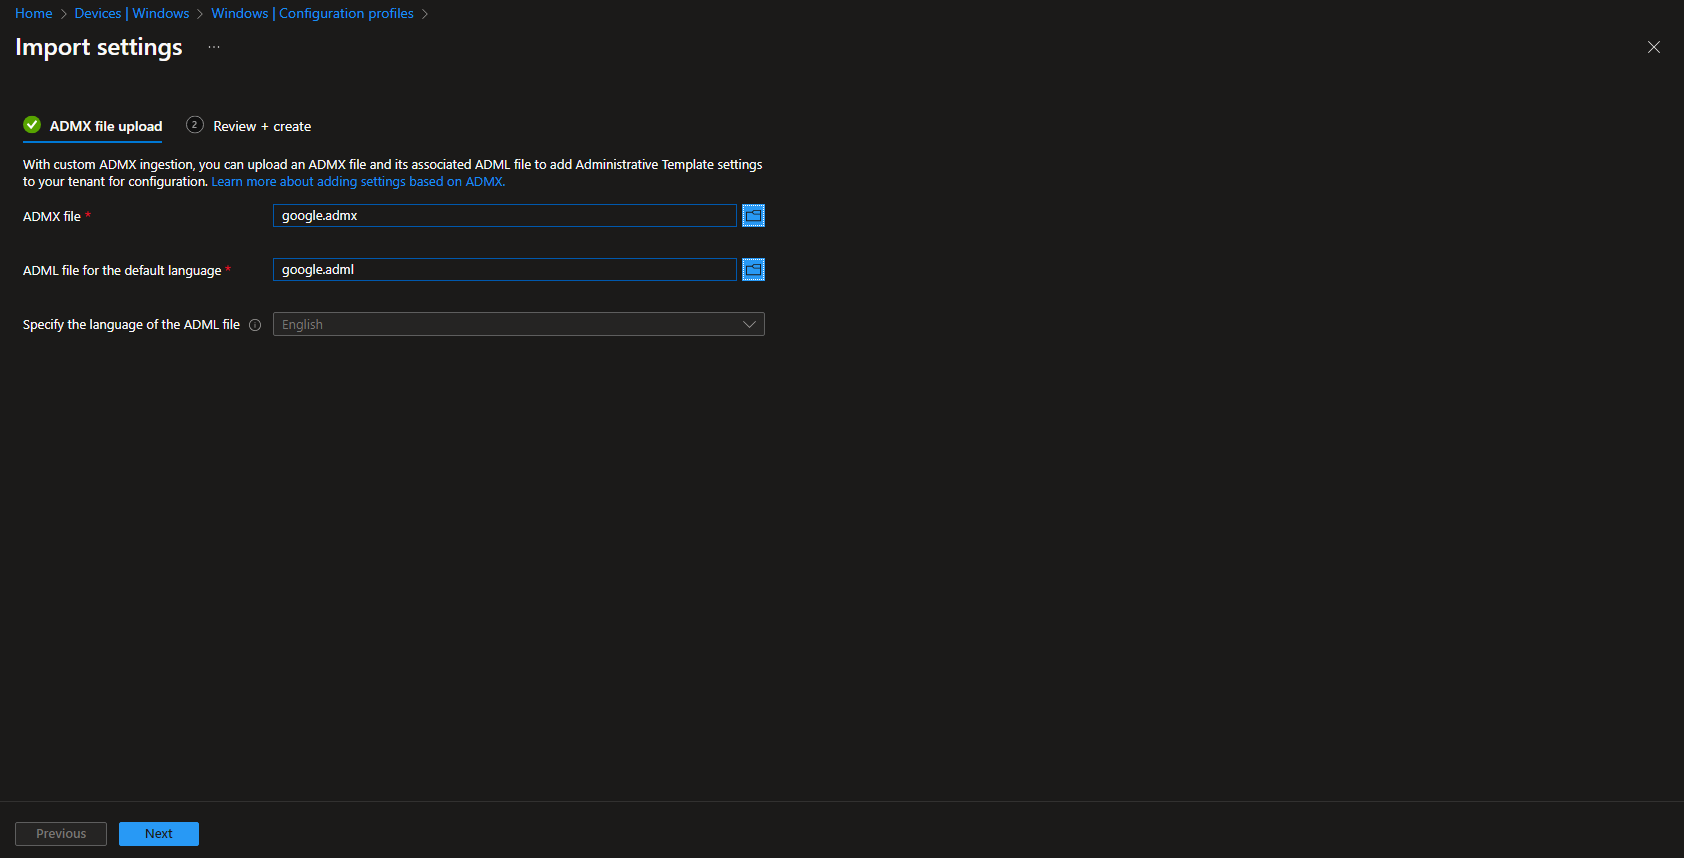
We will now first need to upload the google.admx and the google.adml
- Click on the ADMX file and upload the google.admx from the downloaded folder \policy_templates\windows\admx\google.admx
- Click on the ADML file and upload the google.adml from the downloaded folder \policy_templates\windows\admx\en-US\google.adml
- Click on Next and Create
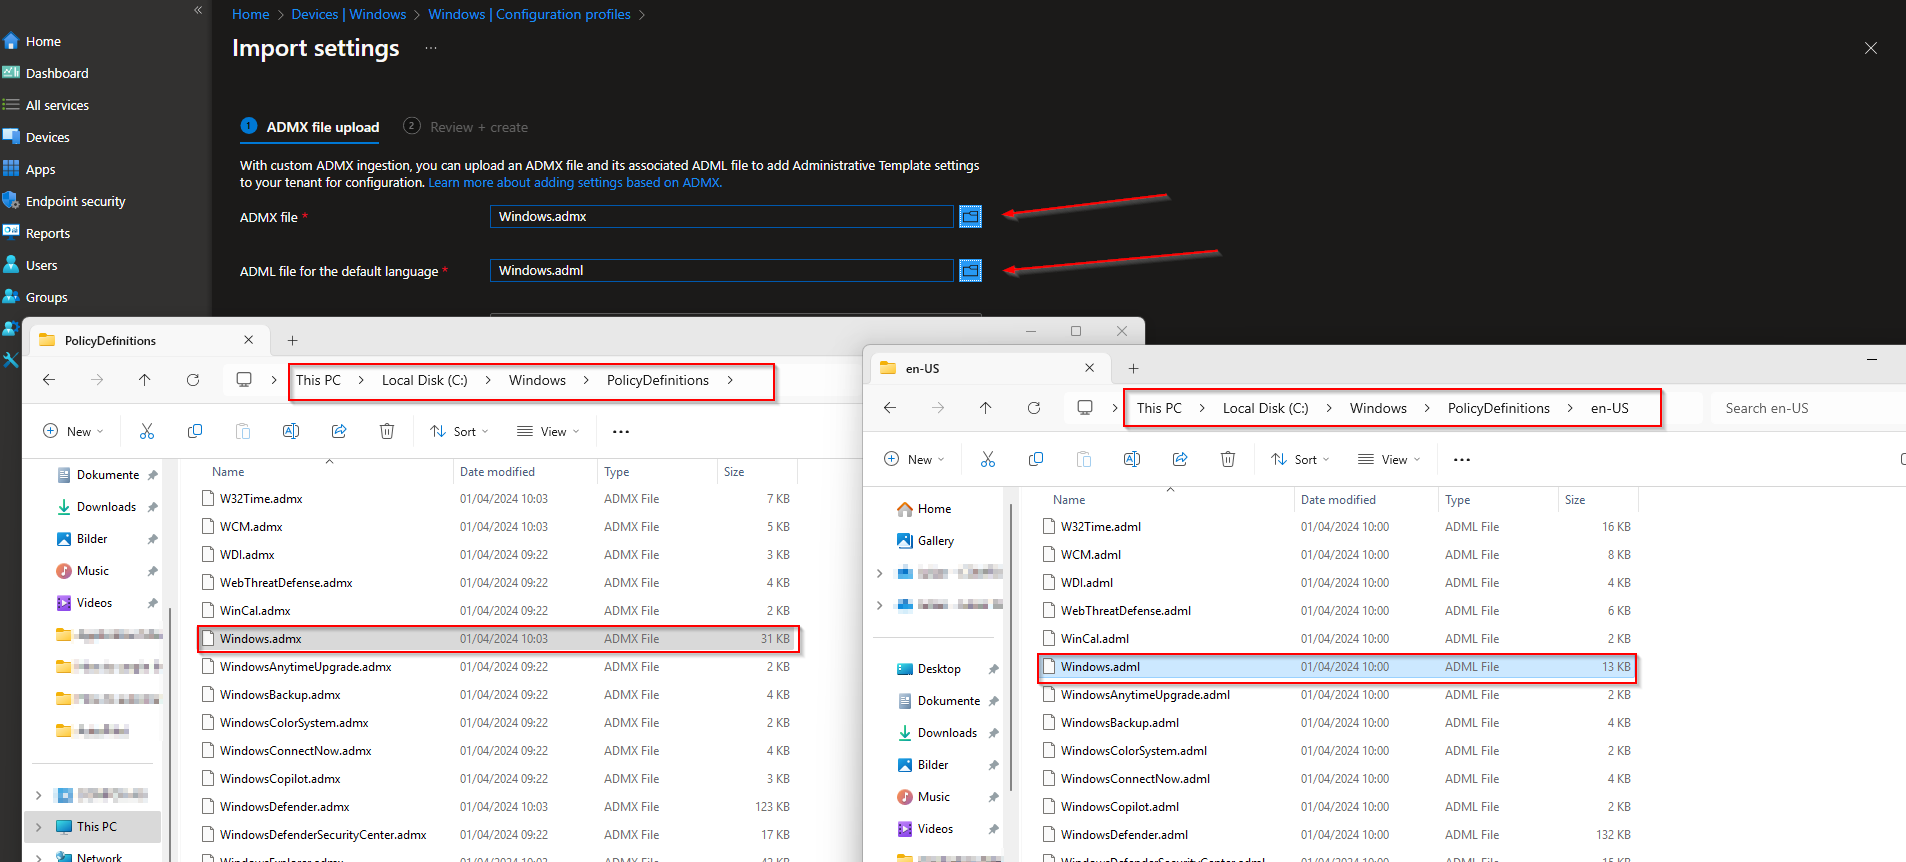
We now need to upload the windows.admx. This ist saved under C:\Windows\PolicyDefinitions\. Just click again on Import on the Microsoft Intune portal and follow the steps.
- Click on the ADMX file and upload the windows.admx from the following folder C:\Windows\PolicyDefinitions\windows.admx
- Click on the ADML file and upload the windows.adml from the following folder C:\Windows\PolicyDefinitions\en-US\windows.adml
- Click on Next and Create
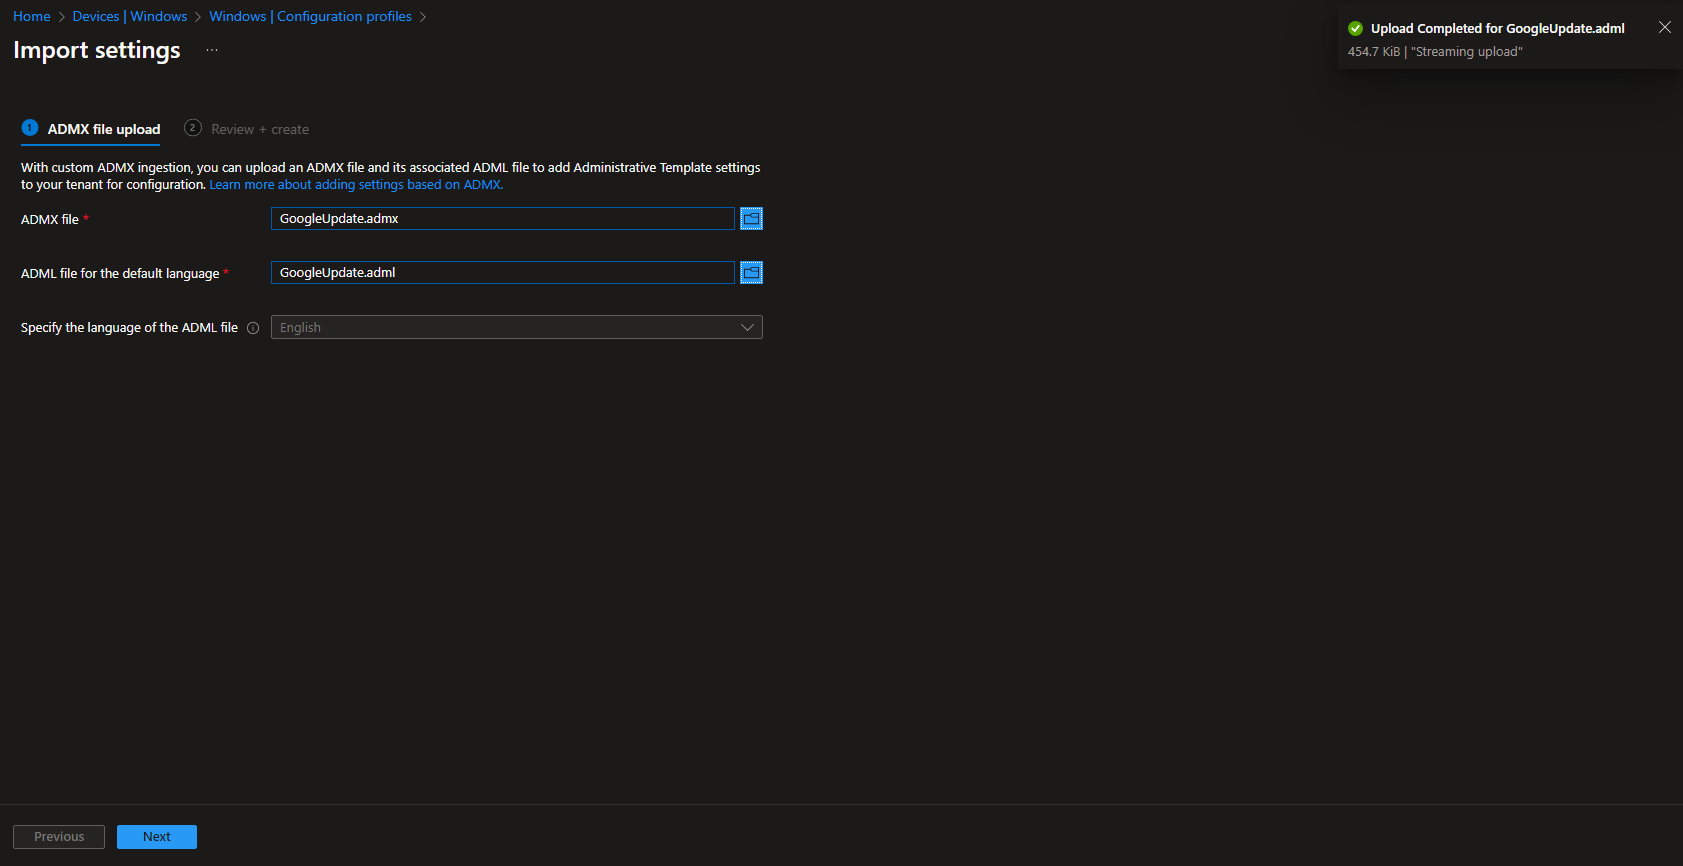
Nest we will need to upload the import the GoogleUpdate.admx and GoogleUpdate.adml files. Do the same as already and click on Import and follow the steps. We will now first need to upload the google.admx and the google.adml
- Click on the ADMX file and upload the google.admx from the downloaded folder \googleupdateamdx\googleupdateadmx\GoogleUpdate.admx
- Click on the ADML file and upload the google.adml from the downloaded folder \googleupdateamdx\googleupdateadmx\GoogleUpdate.adml
- Click on Next and Create
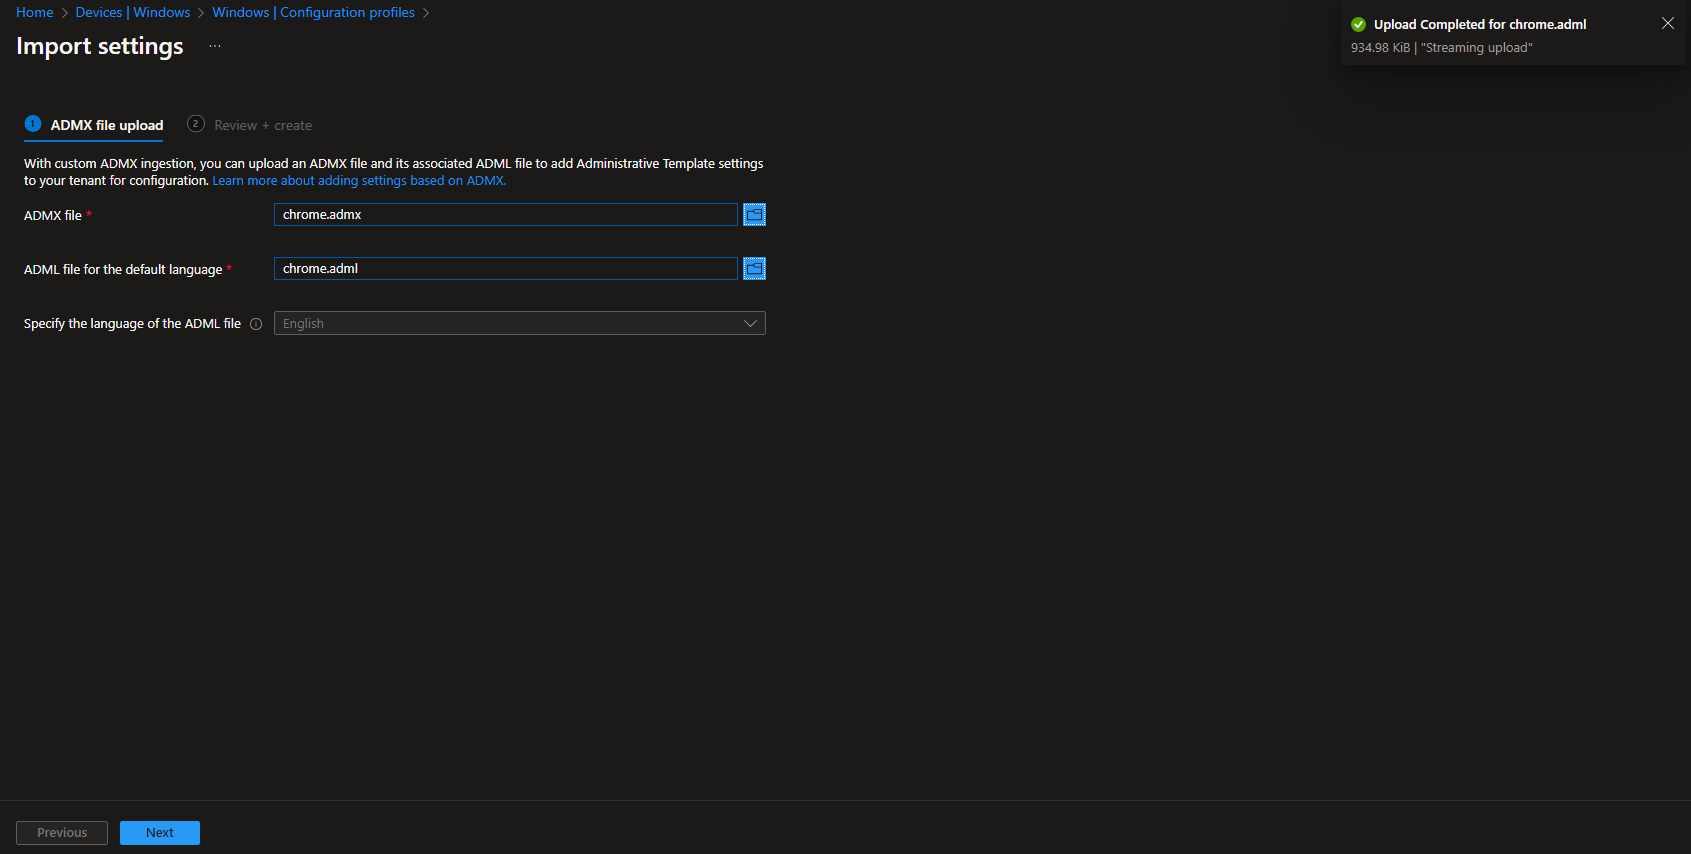
Last but not least we need to import the last one named chrome.admx and chrome.adml. Just follow the steps below.
- Click on the ADMX file and upload the chrome.admx from the downloaded folder \policy_templates\windows\admx\chrome.admx
- Click on the ADML file and upload the chrome.adml from the downloaded folder \policy_templates\windows\admx\en-US\chrome.adml
- Click on Next and Create
Step 3: Create new configuration policy
In this section we will show you the process of How to automatically update Google Chrome with Microsoft Intune. Just follow the steps below.
- Go to intune.microsoft.com
- Click on Devices
- Click on Windows
- Click on Configuration profiles
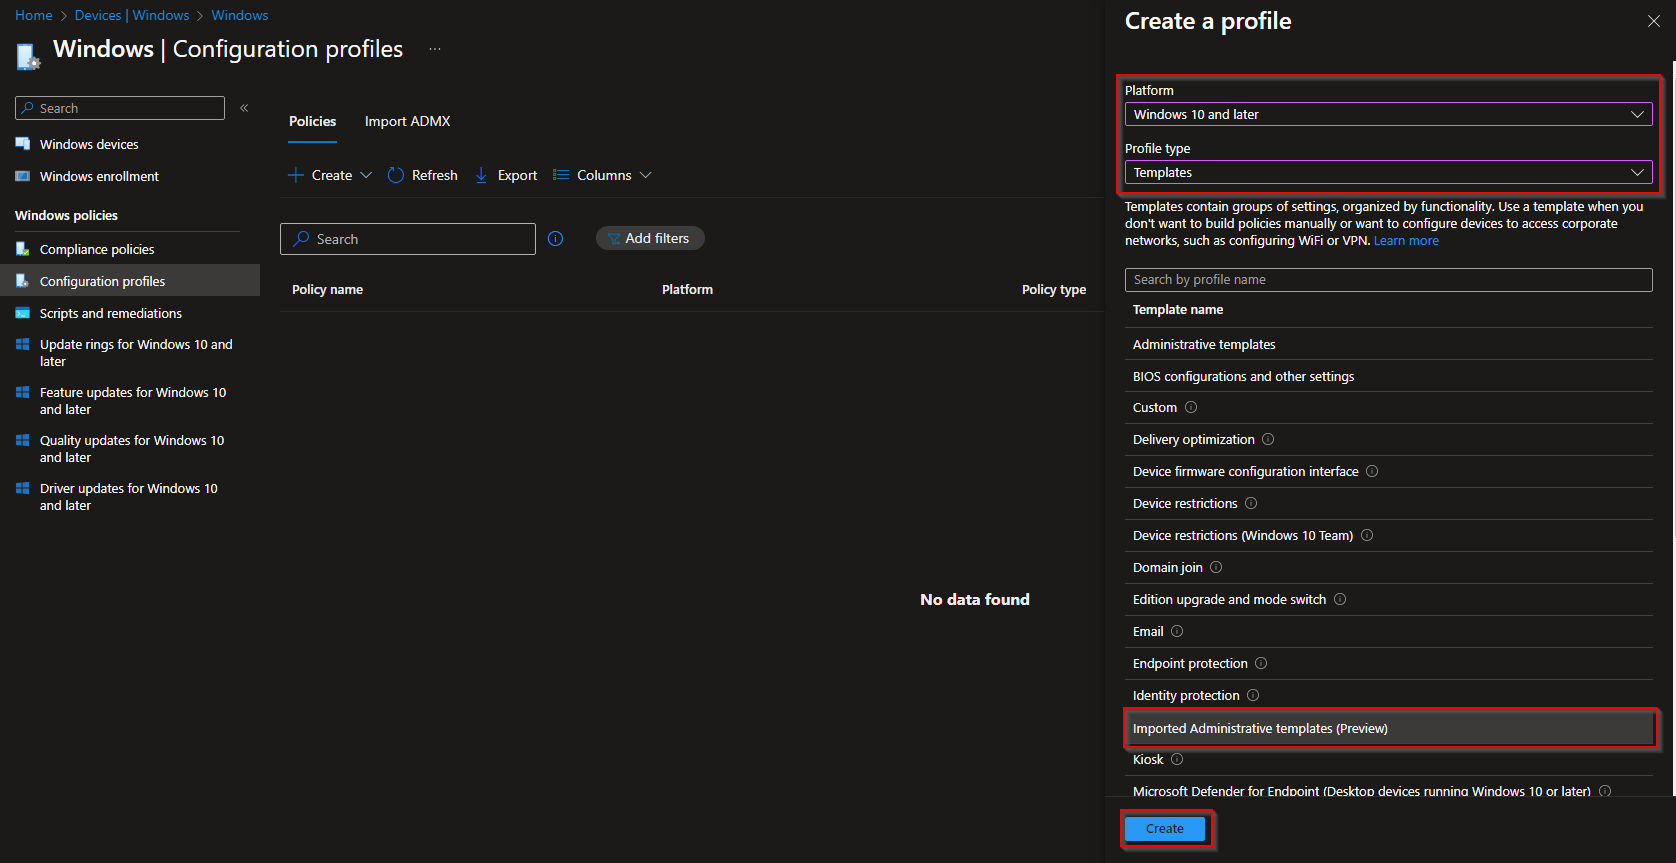
- Click on Create
- Click on New Policy
- Platform: Windows 10 and later
- Profile type Templates
- Click on Imported Administrative templates
- Click on Create
Give it a meaningful name and description. Click on Next.
On the Configuration settings tab do the following:
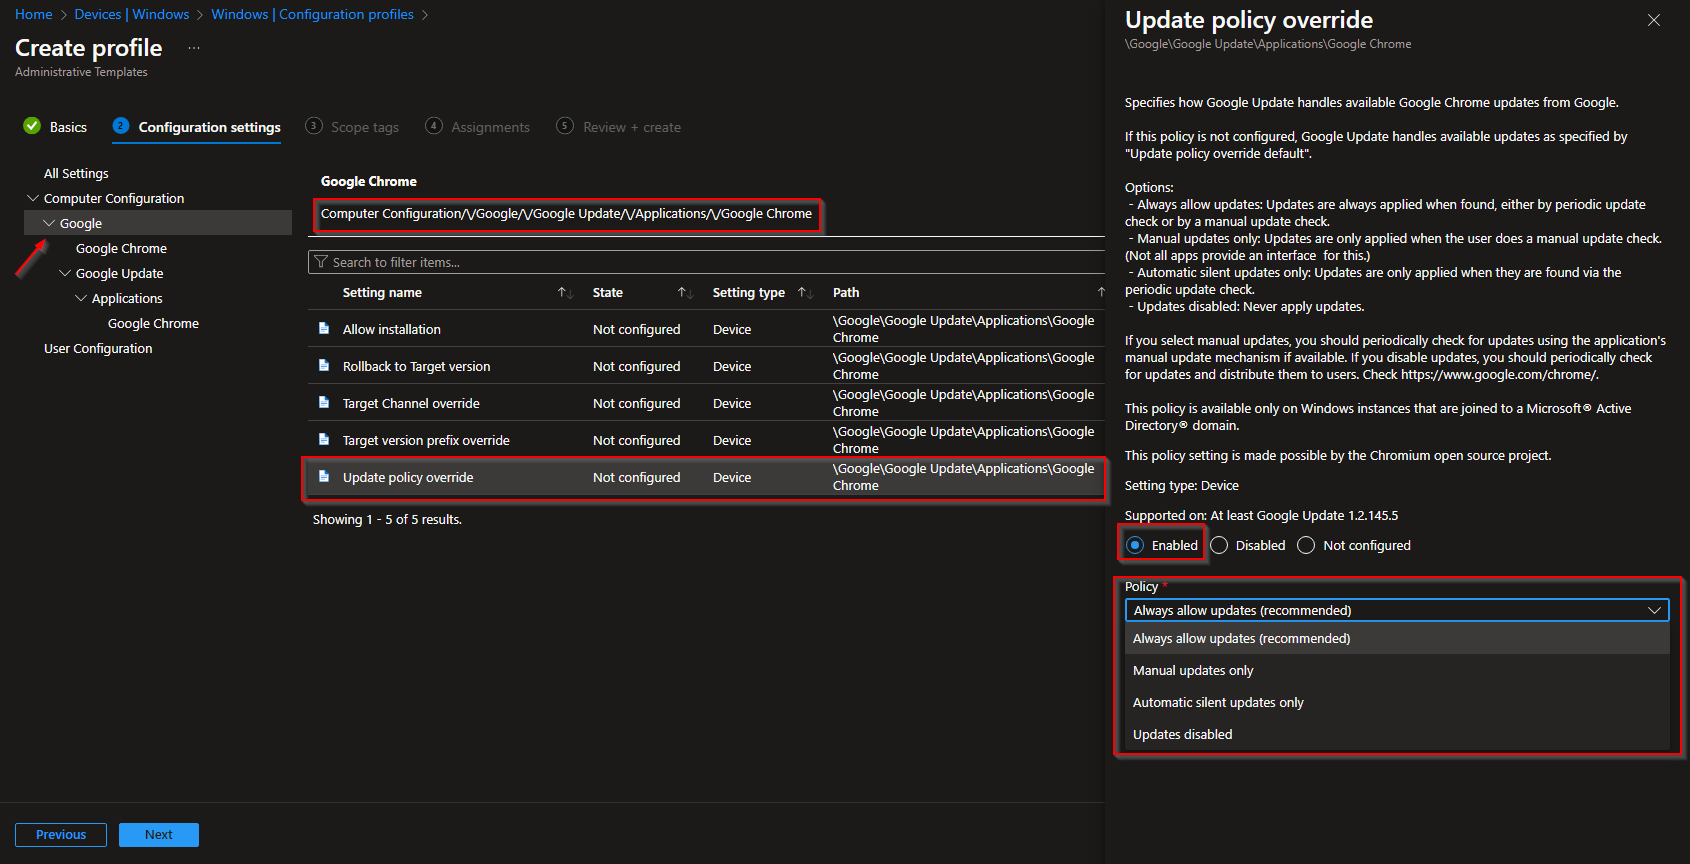
- Navigate to Google\Google Update\Applications\Google Chrome
- Click on Update policy override
- Turn on the policy
Now you have different options to set the update policy. Here a quick overview:
- Always allow updates (recommended): Updates are always applied when found, either by periodic update check or by a manual update check.
- Manual updates only: Updates are only applied when the user does a manual update check. (Not all apps provide an interface for this.)
- Automatic silent updates only: Updates are only applied when they are found via the periodic update check.
- Updates disabled: Never apply updates.
- Define your Scope if applicable and click on Next
- On the Assignments tab assign the Policy to a Group or to All Users / All Devices
- And Review + Create the Policy
Congratulations! You have successfully deployed the policy.
Conclusion
You learned How to automatically update Google Chrome with Microsoft Intune. We first downloaded the ADMX files from the official website. We than imported the ADMX file to Microsoft Intune. With the imported ADMX we created a new configuration policy and defined the settings. Did you enjoy this article? Dont forget to follow us and share this article. You may also like the following articles.


