Changing your SharePoint domain in Microsoft 365 is a task that many organizations eventually consider especially after rebranding, mergers, or simply for consistency across services. While Microsoft has made it possible to update your SharePoint domain, it’s not a routine operation and requires careful planning. In this guide, we’ll walk you through what the SharePoint domain is, how to locate it, and the key considerations before initiating a domain change.
Table of Contents
What is the SharePoint Domain and Where Can You Find It?
Your SharePoint domain is the unique part of your organization’s SharePoint Online URL in Microsoft 365. It typically follows the format: https://yourdomain.sharepoint.com and is created when your Microsoft 365 tenant is first set up. This domain is used across SharePoint Online sites and OneDrive for Business URLs. You can locate your SharePoint domain by logging into the Microsoft 365 admin center, navigating to SharePoint under the “Admin centers,” and looking at any of the URLs listed under active sites. The part before .sharepoint.com is your current SharePoint domain name. It’s important to note that this is separate from your email or primary domain and requires a different process to change.
How to change SharePoint Domain in Microsoft 365
Step 1: Find OneDrive and SharePoint URL Domain
Before you make any changes, you need to confirm your current SharePoint and OneDrive domain. This ensures you’re targeting the right domain and helps avoid confusion during the renaming process.
- Go to the Microsoft 365 Admin Center: Log in at https://admin.microsoft.com using your admin credentials.
- Open the SharePoint Admin Center: In the left-hand menu, scroll down to Admin centers, then select SharePoint.
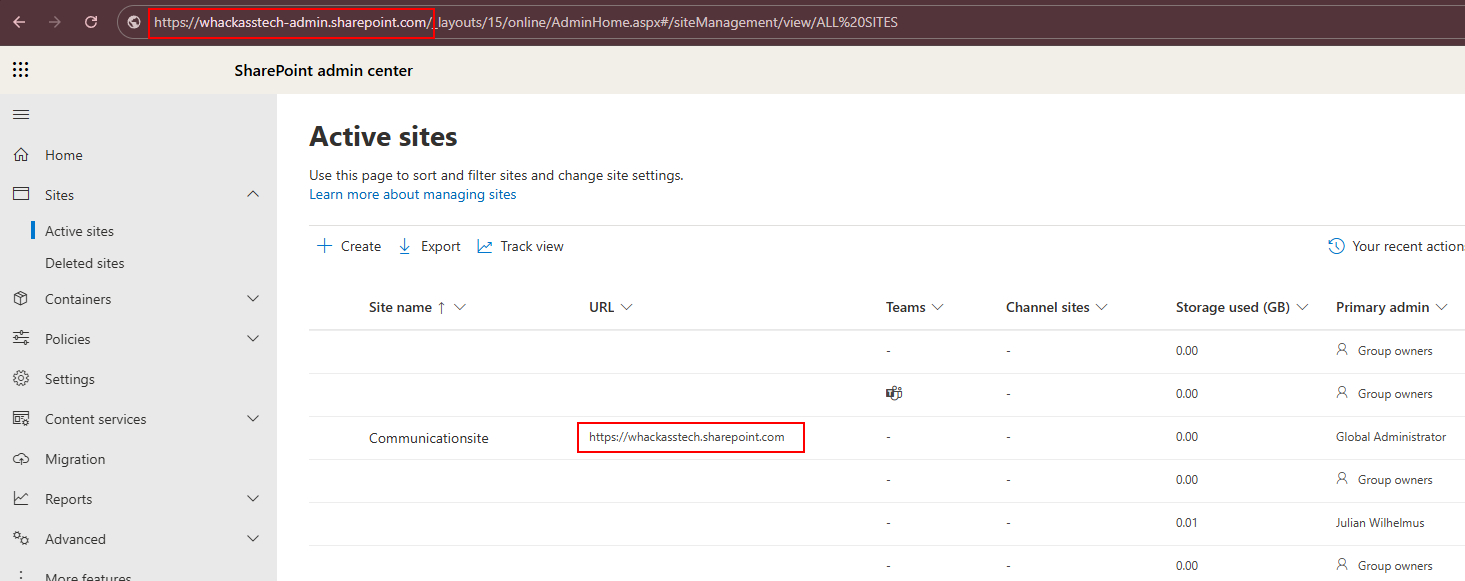
- Check the SharePoint Site URL: In the SharePoint admin center, go to Active sites. You’ll see URLs listed like https://whackasstech.sharepoint.com. The part before .sharepoint.com is your SharePoint domain.
Step 2: Add New SharePoint onmicrosoft.com domain
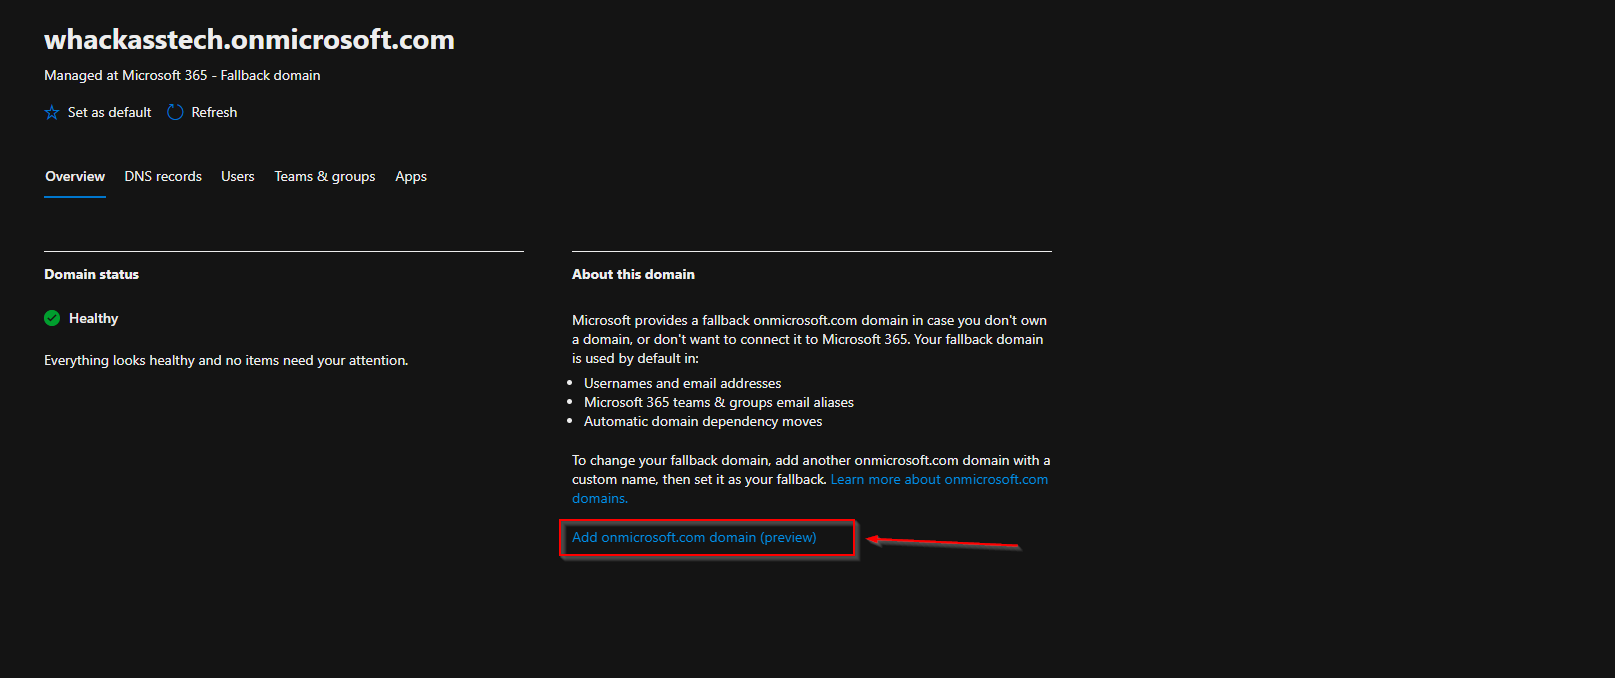
To change your SharePoint domain, Microsoft requires that you use another available onmicrosoft.com domain within your tenant. So we will first need to add our new SharePoint domain as an onmicrosoft.com domain. I have already created a Blog post, How to change onmicrosoft.com Domain in Microsoft 365. In this step we will add the new SharePoint domain to our tenant before changing it. To add a new SharePoint domain follow the steps below:
- Go to the Microsoft 365 admin center
- Click on Settings
- Click on Domain
- Click on your onmicrosoft.com domain name
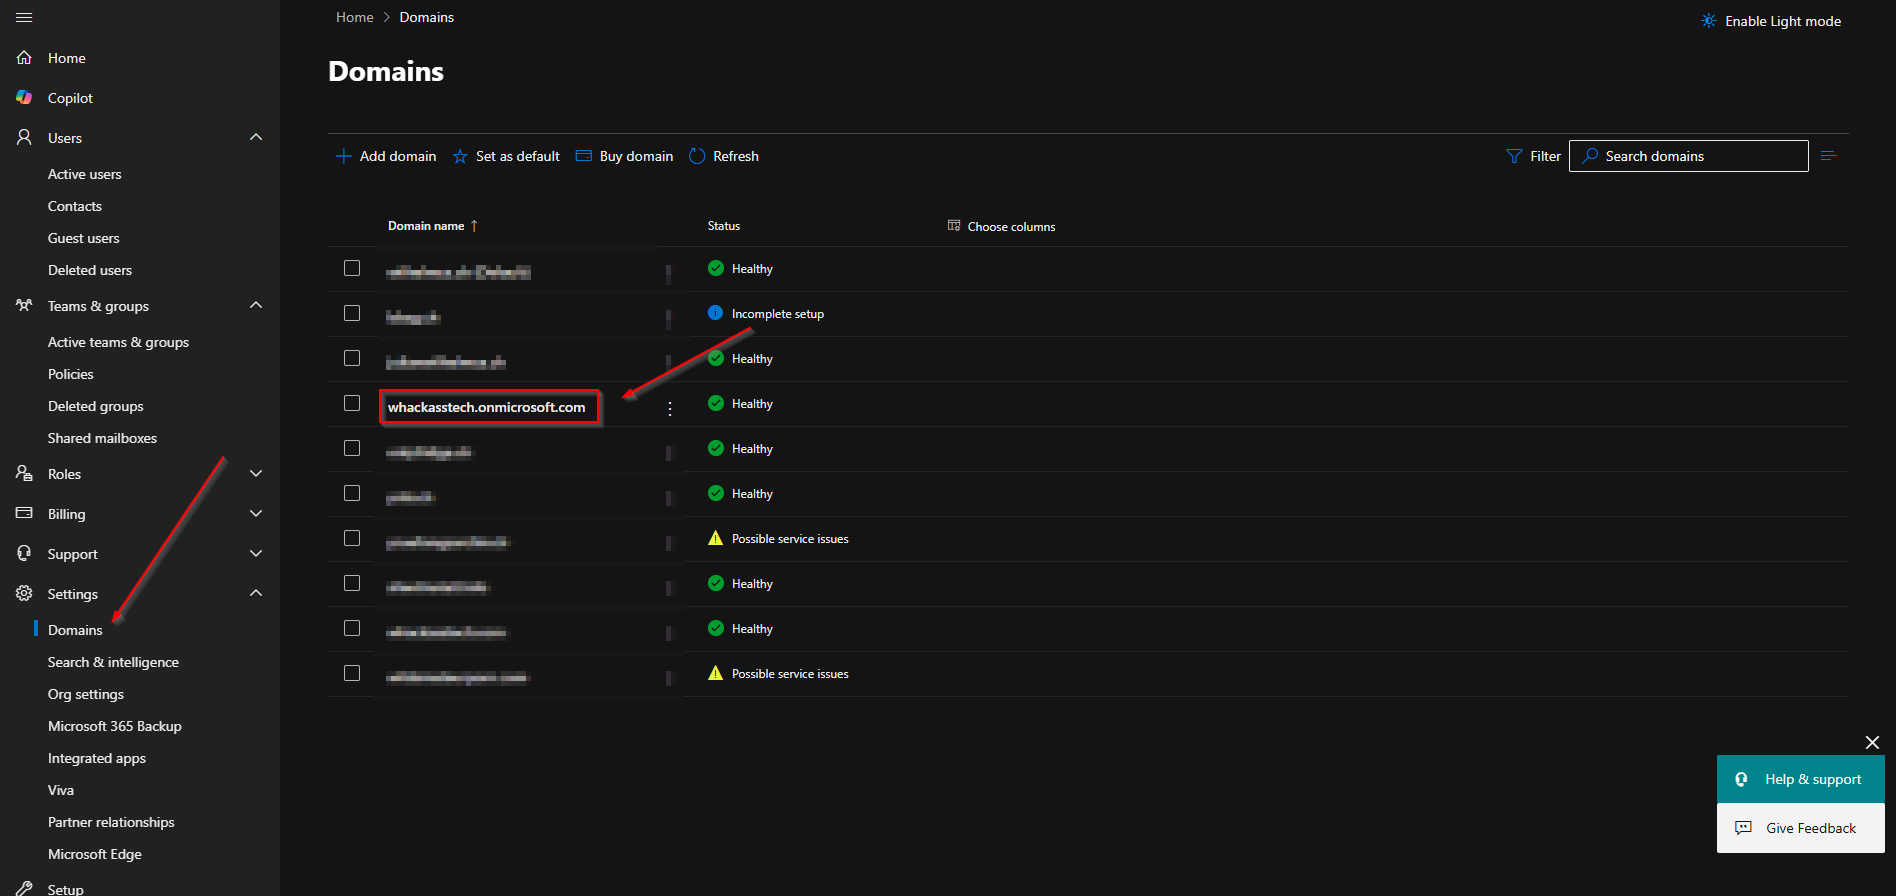
- Click on the tab Overview
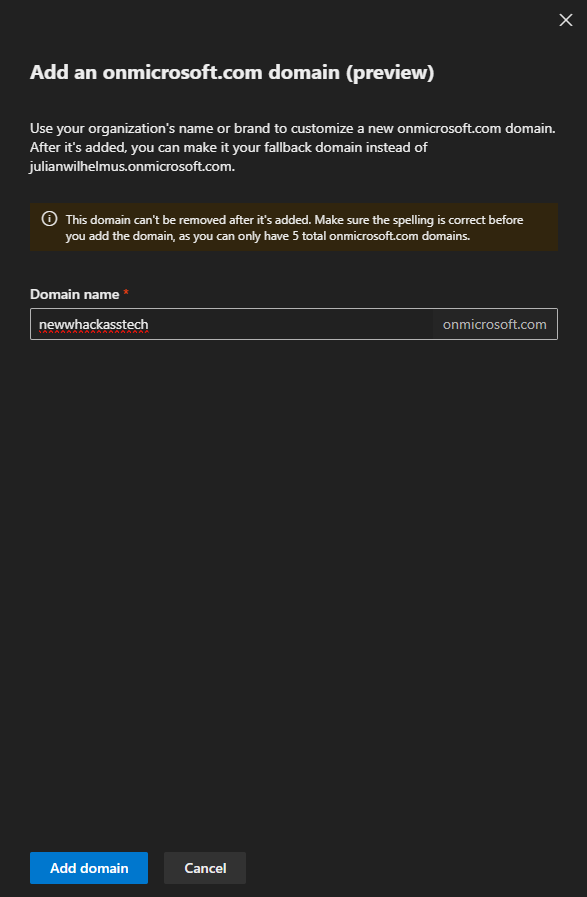
- Click Add onmicrosoft.com domain
- Type a new Domain name. Enter here the new SharePoint domain you want to use.
- Click Add domain
Step 3: Switch SharePoint onmicrosoft.com domain with PowerShell
In this section we will change the SharePoint domain for all users. We will need to do this change with the help of the SharePoint Powershell module. We will first install the module and connect to our tenant. Last we will run a command to change to the new SharePoint domain. Just follow the steps below.
- Open PowerShell 7 as an administrator
To install the SharePoint Module go to the following website and download the SharePoint Management Shell.
- Go to https://www.microsoft.com/en-us/download/details.aspx?id=35588 and download the SharePoint Online Management Shell.
- Open the new Application SharePoint Online Management Shell
Now we will connect to the SharePoint PowerShell Module. Make sure you have you Microsoft 365 administrator ready. We will need this to authenticate. To connect to your SharePoint environment just enter the following command into the PowerShell session.
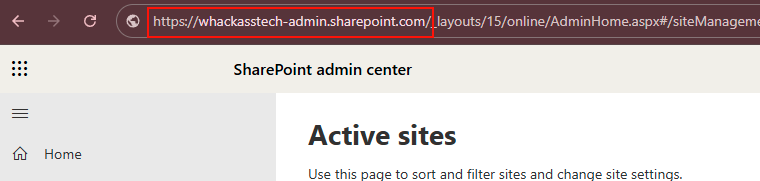
Connect-SPOService -Url "https://whackasstech-admin.sharepoint.com"
For the Url enter your SharePoint admin url. You can find this on the SharePoint Admin Portal in your Address bar.
After you have entered the command you will be asked to login with your Administrator. After login, you should be back on the SharePoint Online Management PowerShell Session. Now we can start changing the SharePoint domain to the new one. We will need to run a command with the new domain. Make sure you enter the same domain name as you have entered in step 1.
Start-SPOTenantRename -DomainName "newdomain" -ScheduledDateTime YYYY-MM-DD HH:MM:SS
Make sure you enter your new Domain Name and the Date / Time you want the switch to take place. So for example, my command would look something like this.

The change will need some time. To check your status of the change you can enter the following command.
Get-SPOTenantRenameStatus
After some time the SharePoint tenant rename status will change from Queued to Success.
Step 4: Verify OneDrive and SharePoint domain name changed
After the domain rename process is complete, it’s important to check that the change was successfully applied. Visit your SharePoint and OneDrive URLs and confirm they now reflect the new domain name for example, https://yournewname.sharepoint.com for SharePoint sites and https://yournewname-my.sharepoint.com for OneDrive. You can do this by navigating to the SharePoint admin center and reviewing the URLs under Active sites, or by checking a user’s OneDrive profile in the Microsoft 365 admin center. Microsoft also provides automatic redirects from the old URLs, but it’s a good idea to test a few to ensure everything is resolving correctly and that content remains accessible.
Conclusion
In this blog post we Learn about How to change SharePoint Domain in Microsoft 365. Changing your SharePoint domain in Microsoft 365 is a powerful way to align your cloud environment with your organization’s evolving identity—whether due to a rebrand, merger, or simply to streamline your naming conventions. While the process is straightforward with the right preparation, it’s important to remember that the rename can only be done once, so careful planning is essential. Always verify the new domain is active, double-check the URLs after the change, and communicate clearly with your users. With the right approach, your SharePoint and OneDrive environments can reflect your updated brand seamlessly and without disruption. Did you enjoy this article? Dont forget to follow us and share this article. If you have any questions or need further assistance, feel free to reach out or leave a comment below.