
Managing the layout of Windows 10 devices in an enterprise environment can be a daunting task, especially when you need to ensure a consistent user experience across multiple devices. That’s where Microsoft Intune comes in – it’s a powerful tool that can help you configure and manage Windows 10 devices remotely.
One of the key features of Microsoft Intune is the ability to change the Taskbar and Start Layout on Windows 10 devices. With Intune, you can ensure that all your devices have a consistent layout, which can help streamline productivity and reduce confusion for users.
In this blog post, we’ll show you how to change the Taskbar and Start Layout in Microsoft Intune, step-by-step. Whether you’re a system administrator or an IT manager, this guide will provide you with the knowledge and skills you need to streamline the process and save time.
We’ll cover everything from creating a custom Start Layout to deploying the layout to your devices using Intune. By the end of this guide, you’ll have a deep understanding of how to configure and manage the Taskbar and Start Layout on your Windows 10 devices using Microsoft Intune.
So, if you’re ready to streamline your device management process and ensure a consistent user experience, let’s get started!
Table of Contents
What are we going to set up?
In the first step, we will export a XML file from a reference computer. We then have a complete copy of the settings which we can change when needed. In the second step, we will upload this file to Intune and configure the parameters. This allows us to achieve a smooth installation on the clients.

Create XML file
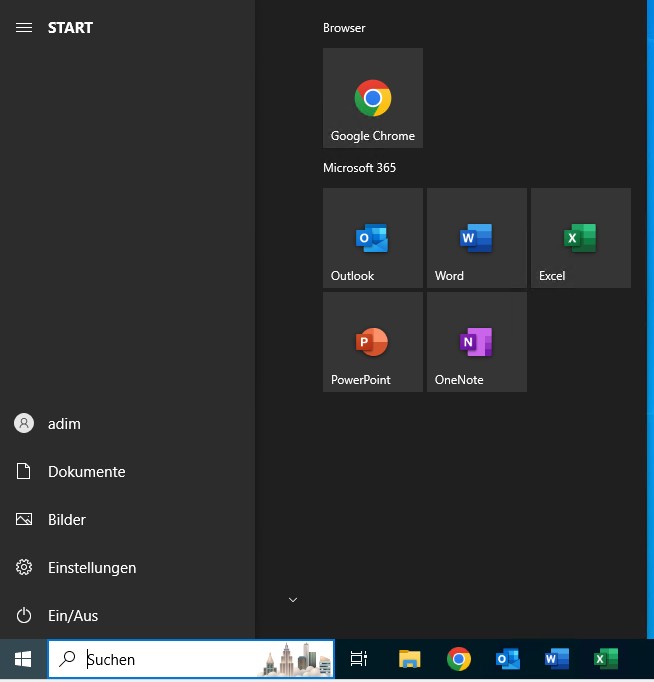
In the first step, we will export the start menu from an existing PC. It’s best to do this directly on your own Device. Go to your start menu and add the apps you want. This will be the layout we deploy later. We will manually add the taskbar in the second step.
After you have customized it to your preference, open PowerShell as an administrator. (This is very important, otherwise you will receive an error message.)
Execute the following command:
Export-StartLayout -UseDesktopApplicationID -Path C:/layout.xml
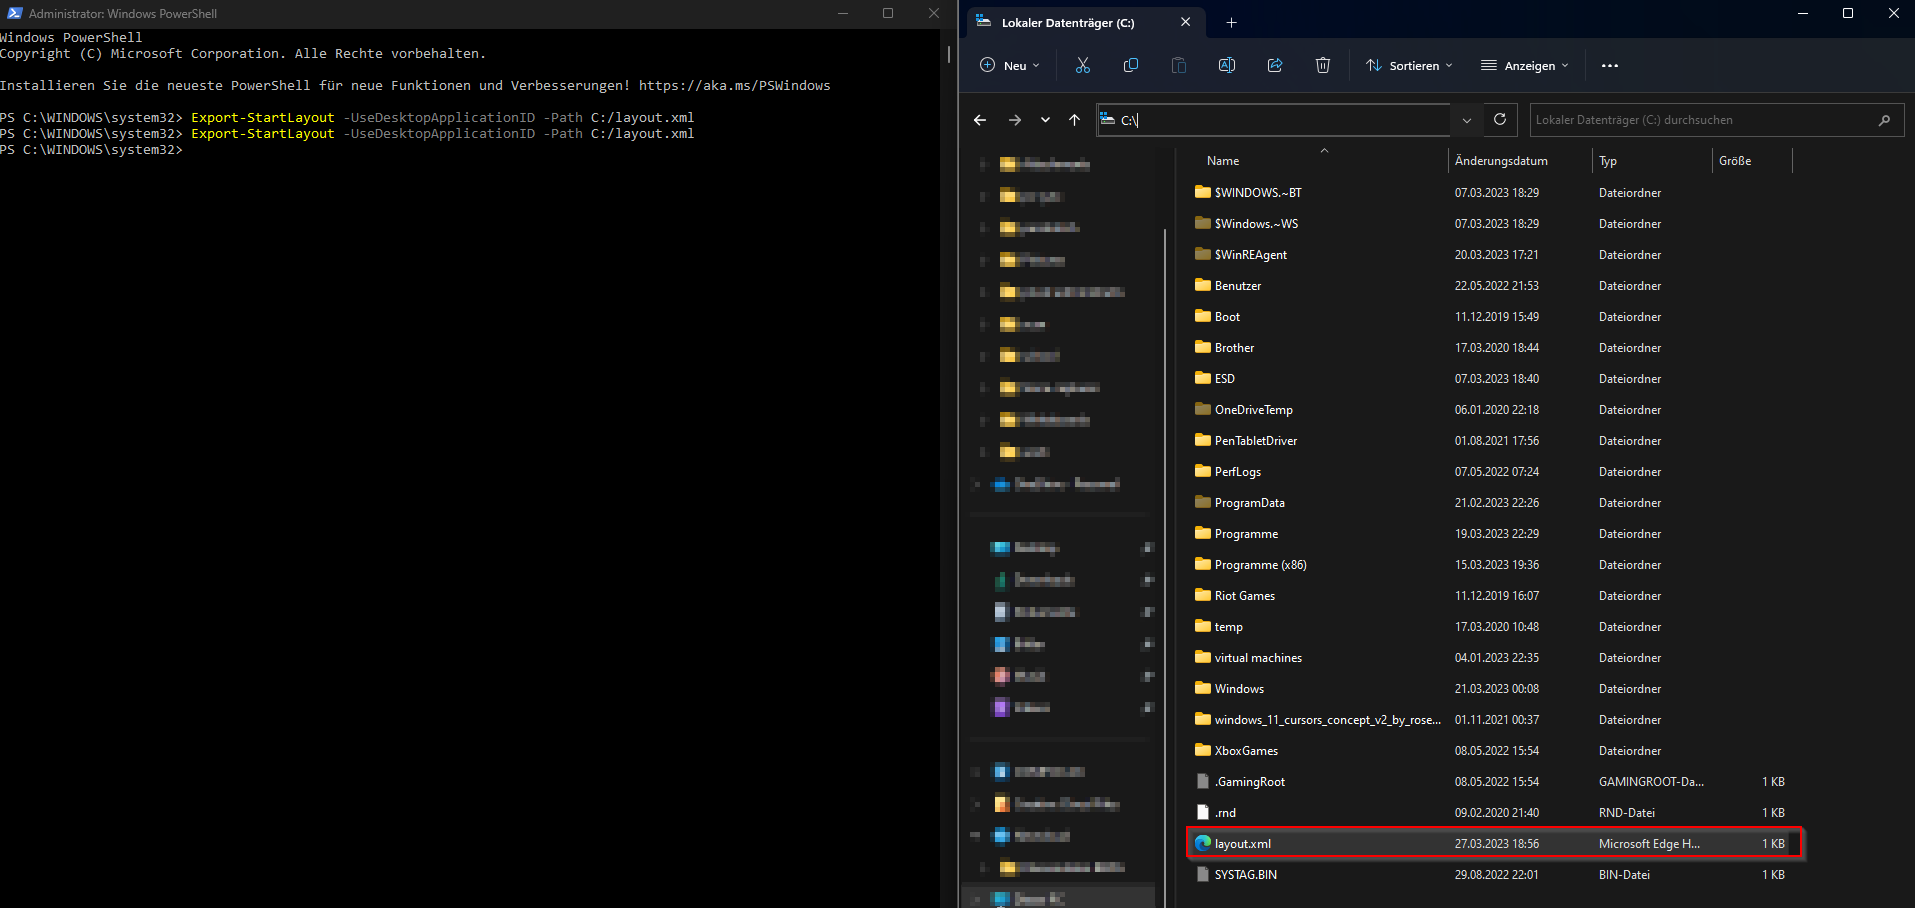
If everything worked properly, you should now have a new file called layout.xml under C:.
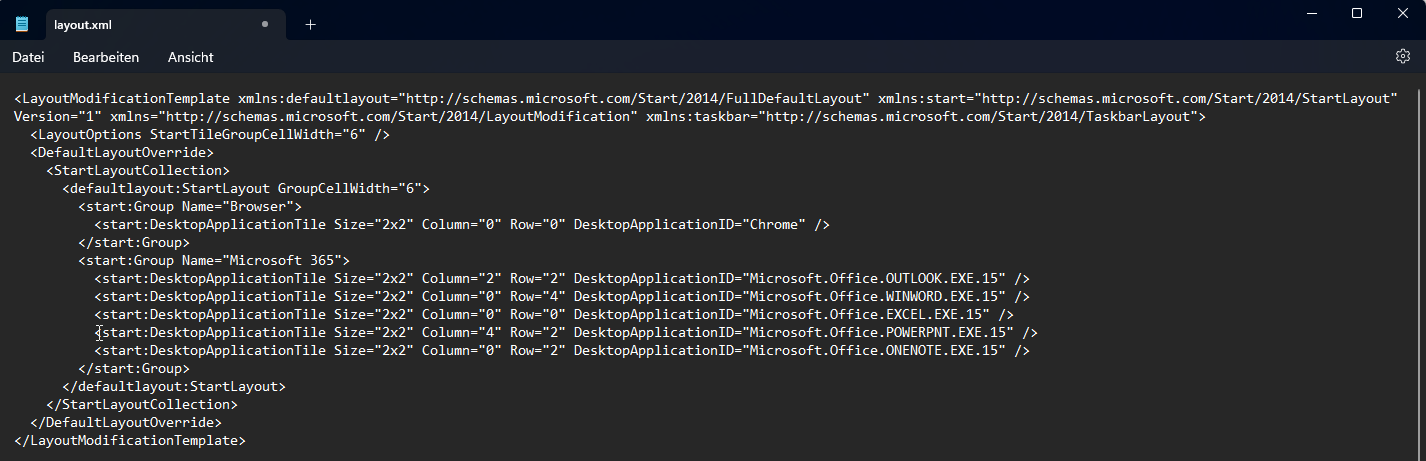
Now open the XML file with an editor of your choice. I am using the Windows editor.
“Now we need to add the taskbar configuration. To do this, insert the following code at the very bottom before </LayoutModificationTemplate>.
 <CustomTaskbarLayoutCollection PinListPlacement="Replace">
<defaultlayout:TaskbarLayout>
<taskbar:TaskbarPinList>
<taskbar:DesktopApp DesktopApplicationLinkPath="%APPDATA%\Microsoft\Windows\Start Menu\Programs\System Tools\File Explorer.lnk" />
<taskbar:DesktopApp DesktopApplicationLinkPath="%ALLUSERSPROFILE%\Microsoft\Windows\Start Menu\Programs\Google Chrome.lnk" />
<taskbar:DesktopApp DesktopApplicationLinkPath="%ALLUSERSPROFILE%\Microsoft\Windows\Start Menu\Programs\Outlook.lnk" />
<taskbar:DesktopApp DesktopApplicationLinkPath="%ALLUSERSPROFILE%\Microsoft\Windows\Start Menu\Programs\Word.lnk" />
<taskbar:DesktopApp DesktopApplicationLinkPath="%ALLUSERSPROFILE%\Microsoft\Windows\Start Menu\Programs\Excel.lnk" />
</taskbar:TaskbarPinList>
</defaultlayout:TaskbarLayout>
</CustomTaskbarLayoutCollection>
</LayoutModificationTemplate>
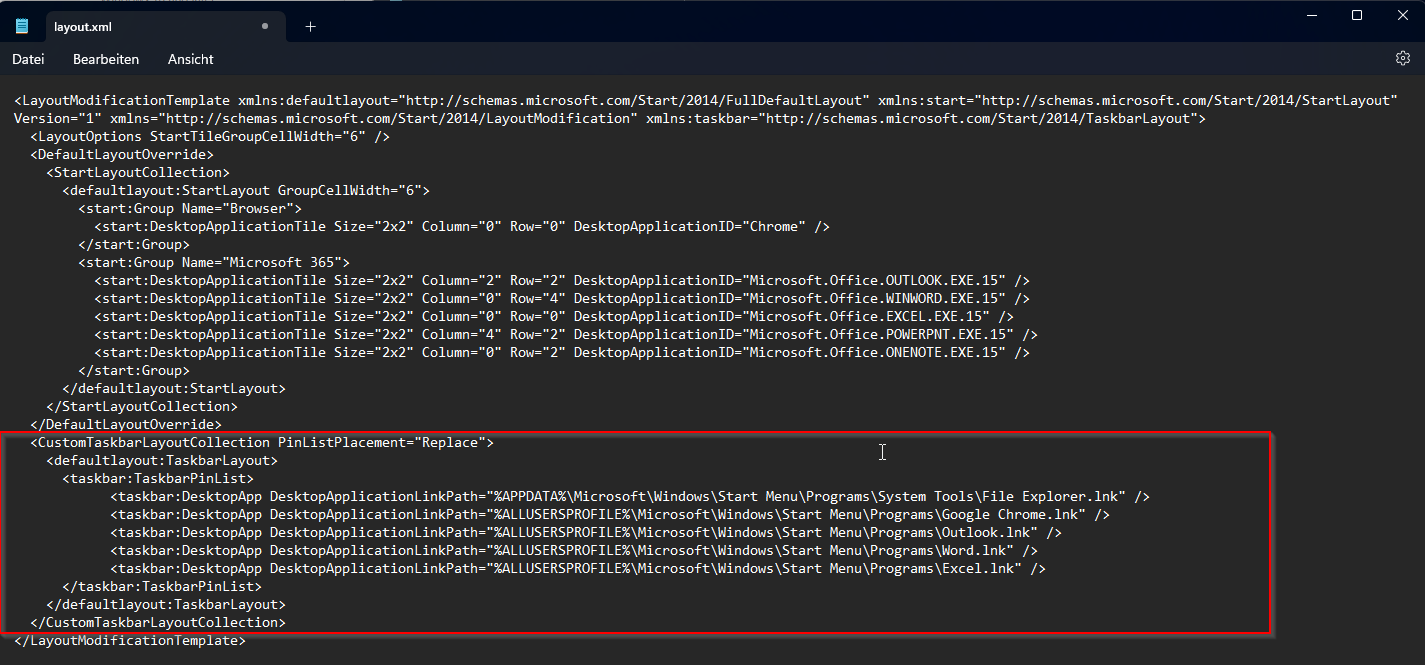
For the taskbar, we have added a few programs (Explorer, Google Chrome, Outlook, Word, and Excel). However, you can customize this as you wish by simply modifying the link to the program.

Save this XML file. We have successfully created the file and can now move on to step 2. Here’s our example again:
Example
<LayoutModificationTemplate xmlns:defaultlayout="http://schemas.microsoft.com/Start/2014/FullDefaultLayout" xmlns:start="http://schemas.microsoft.com/Start/2014/StartLayout" Version="1" xmlns="http://schemas.microsoft.com/Start/2014/LayoutModification" xmlns:taskbar="http://schemas.microsoft.com/Start/2014/TaskbarLayout">
<LayoutOptions StartTileGroupCellWidth="6" />
<DefaultLayoutOverride>
<StartLayoutCollection>
<defaultlayout:StartLayout GroupCellWidth="6">
<start:Group Name="Browser">
<start:DesktopApplicationTile Size="2x2" Column="0" Row="0" DesktopApplicationID="Chrome" />
</start:Group>
<start:Group Name="Microsoft 365">
<start:DesktopApplicationTile Size="2x2" Column="0" Row="0" DesktopApplicationID="Microsoft.Office.OUTLOOK.EXE.15" />
<start:DesktopApplicationTile Size="2x2" Column="0" Row="2" DesktopApplicationID="Microsoft.Office.WINWORD.EXE.15" />
<start:DesktopApplicationTile Size="2x2" Column="0" Row="4" DesktopApplicationID="Microsoft.Office.EXCEL.EXE.15" />
<start:DesktopApplicationTile Size="2x2" Column="2" Row="0" DesktopApplicationID="Microsoft.Office.POWERPNT.EXE.15" />
<start:DesktopApplicationTile Size="2x2" Column="2" Row="2" DesktopApplicationID="Microsoft.Office.ONENOTE.EXE.15" />
</start:Group>
</defaultlayout:StartLayout>
</StartLayoutCollection>
</DefaultLayoutOverride>
<CustomTaskbarLayoutCollection PinListPlacement="Replace">
<defaultlayout:TaskbarLayout>
<taskbar:TaskbarPinList>
<taskbar:DesktopApp DesktopApplicationLinkPath="%APPDATA%\Microsoft\Windows\Start Menu\Programs\System Tools\File Explorer.lnk" />
<taskbar:DesktopApp DesktopApplicationLinkPath="%ALLUSERSPROFILE%\Microsoft\Windows\Start Menu\Programs\Google Chrome.lnk" />
<taskbar:DesktopApp DesktopApplicationLinkPath="%ALLUSERSPROFILE%\Microsoft\Windows\Start Menu\Programs\Outlook.lnk" />
<taskbar:DesktopApp DesktopApplicationLinkPath="%ALLUSERSPROFILE%\Microsoft\Windows\Start Menu\Programs\Word.lnk" />
<taskbar:DesktopApp DesktopApplicationLinkPath="%ALLUSERSPROFILE%\Microsoft\Windows\Start Menu\Programs\Excel.lnk" />
</taskbar:TaskbarPinList>
</defaultlayout:TaskbarLayout>
</CustomTaskbarLayoutCollection>
</LayoutModificationTemplate>

Import XML and deploy with Intune
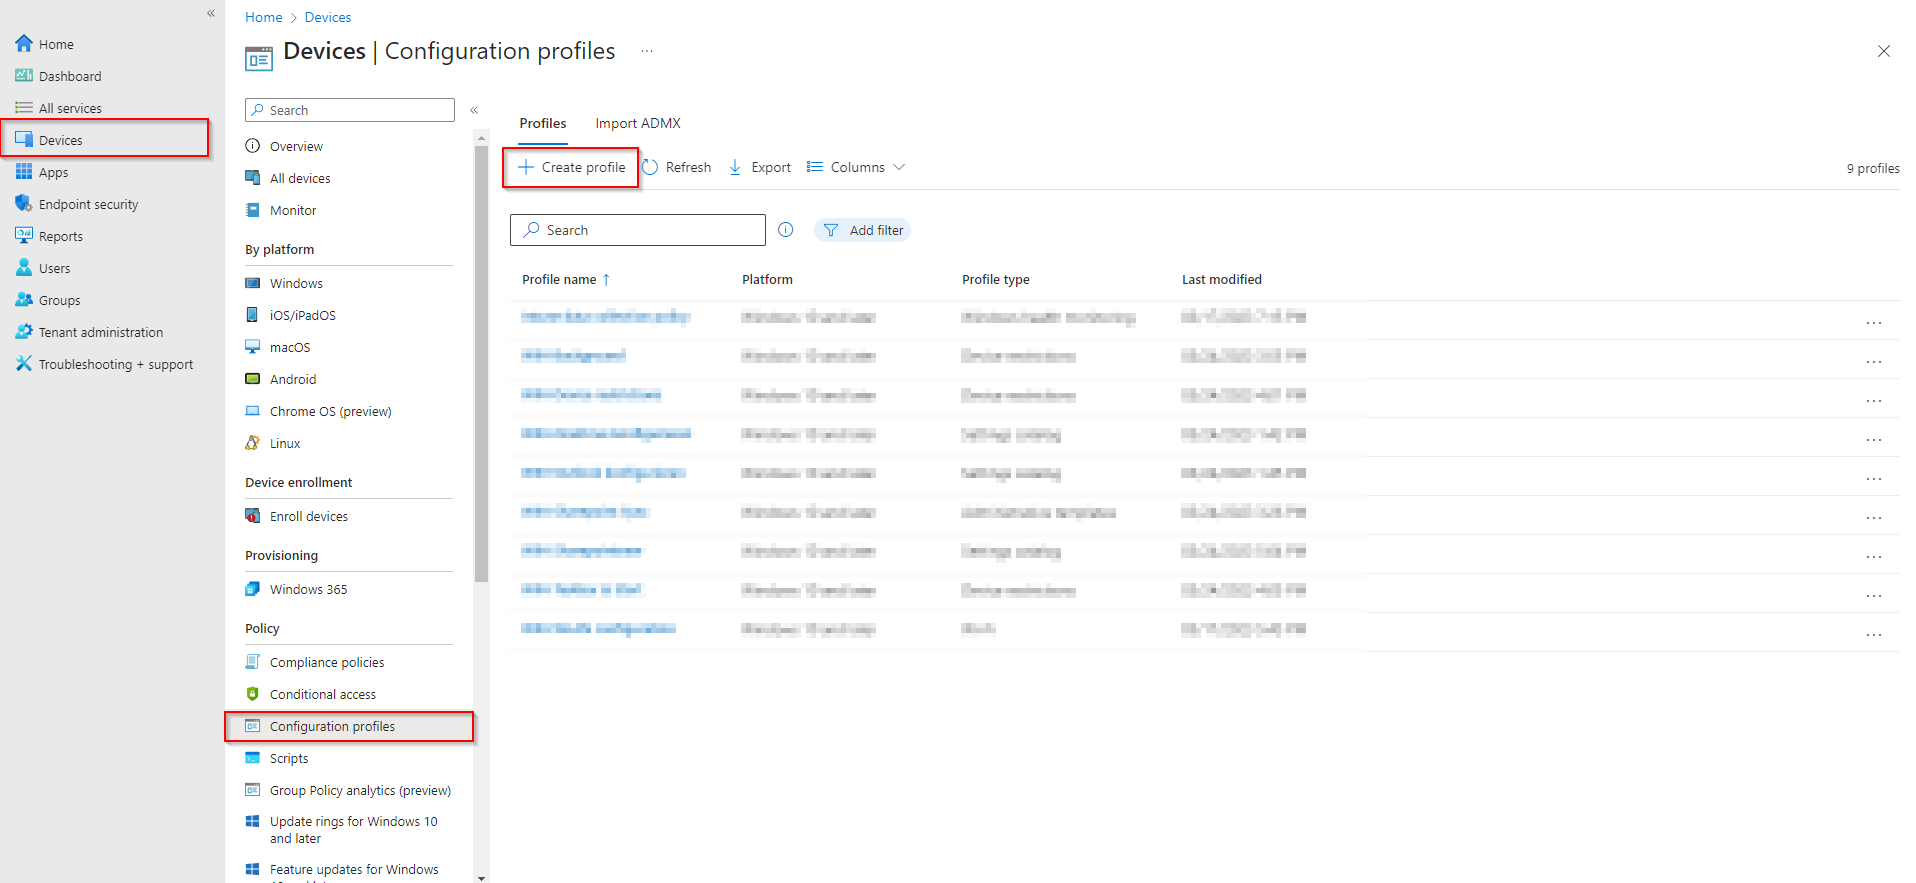
Once you have finished the XML file, we can upload it to the Endpoint Manager (Intune). To do this, go to
- Go to https://endpoint.microsoft.com
- Click on Devices
- Click on Configuration profiles
- And create a new profile
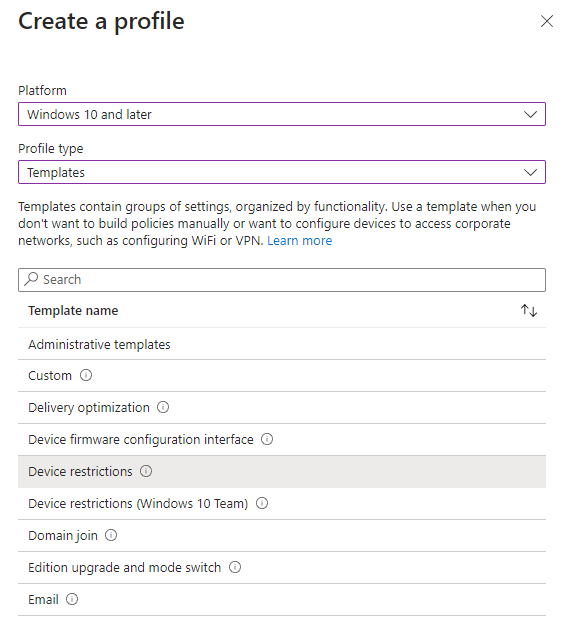
- Select Windows 10 and later platform
- Chose profile type: Templates
- Highlight the Device restrictions template
- Click on next
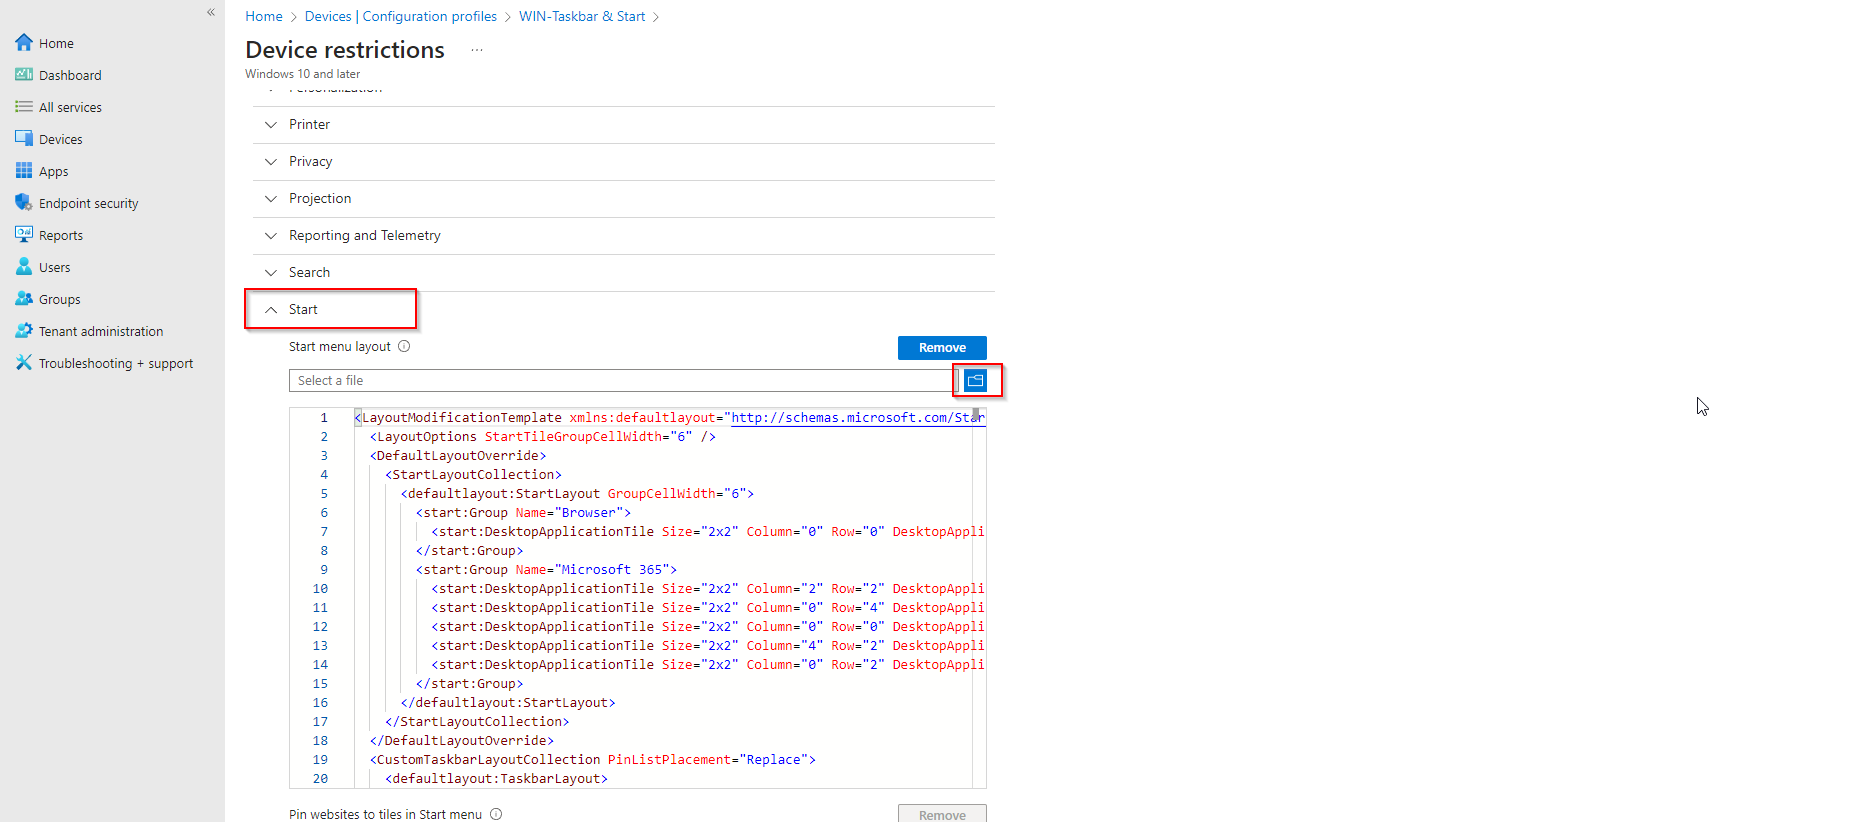
Give it a meaningful name, such as “WIN-Start & Taskbar”. Click Next. Under the Configuration Settings, scroll down to “Start”. Upload your XML file there. You can preview it again, but you cannot edit it. Click on next.
Add a group where the policy should take effect. You can also choose All Users / All Devices.
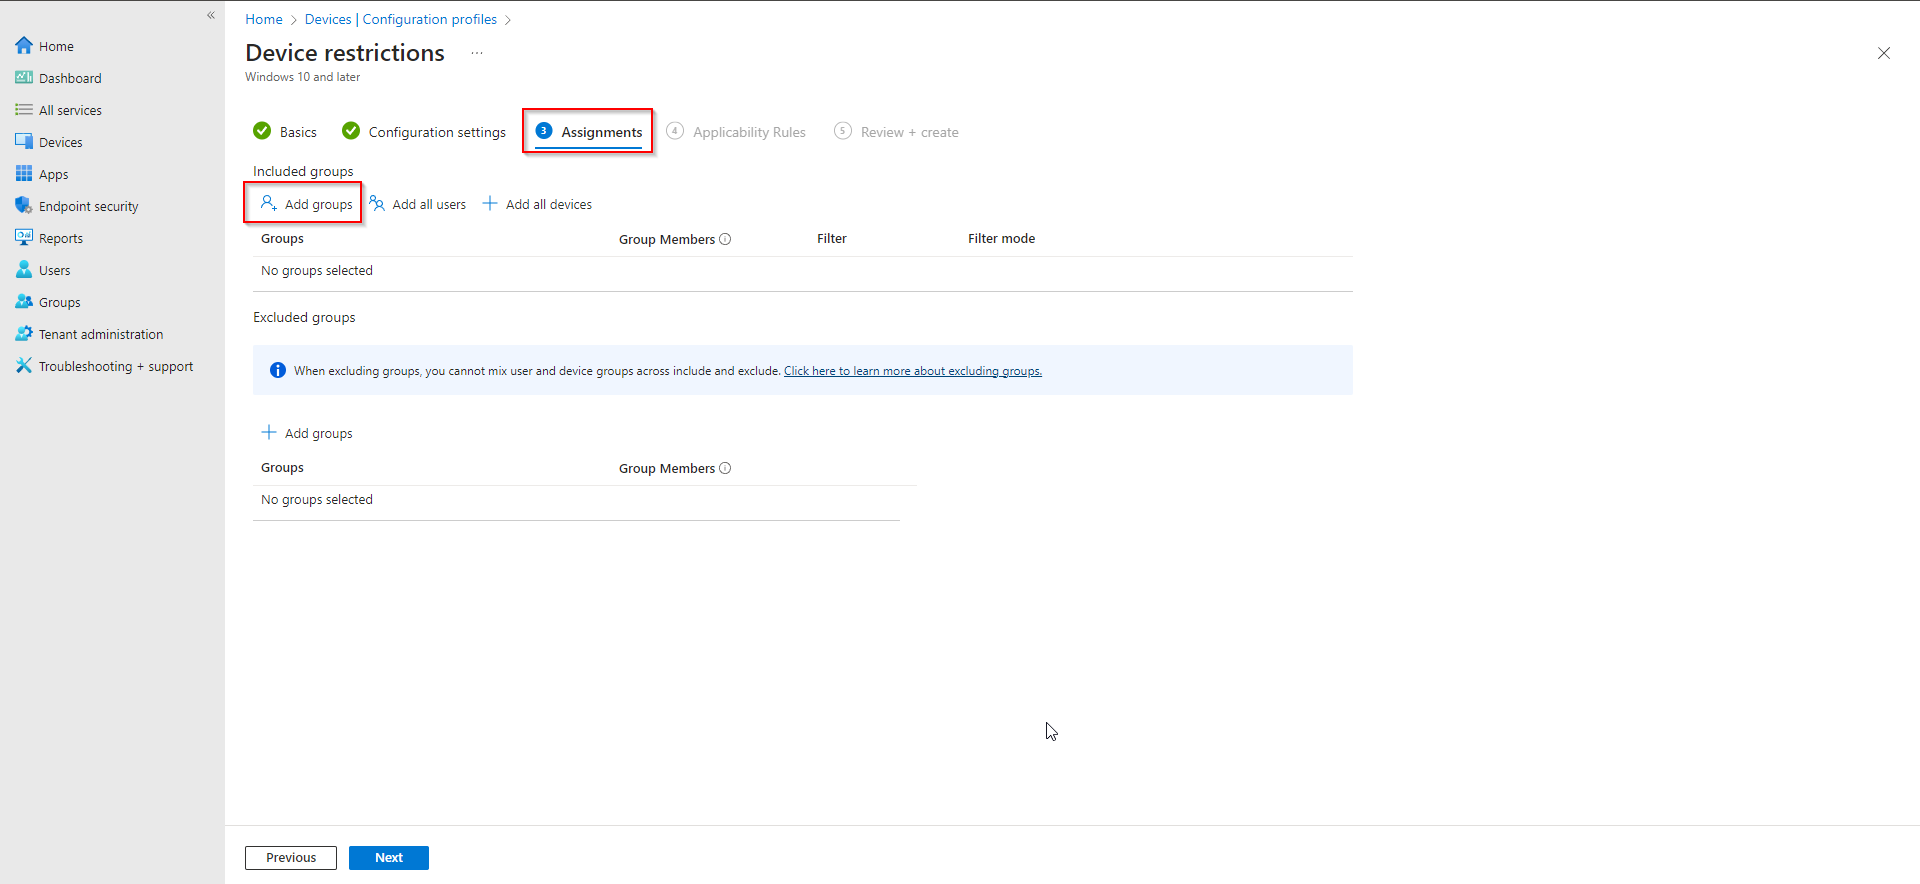
You can skip the Applicability Rules. Finally, review and create the policy at Review + create.
Congratulations! You have successfully deployed the policy.


Thanks for the post. It’s actually a shame that we still have to work with XML files here : )