Welcome to our new blog post about How to deploy PowerShell scripts with Microsoft Intune. In this article, we’ll explore the best practices for deploying PowerShell scripts, helping you to get the most out of Microsoft Intune. Whether you’re new to Intune or looking to enhance your existing setup, these tips will guide you toward a more secure and efficient management experience.
Table of Contents
What are we going to set up?
In this article we will show you, how you can deploy PowerShell scripts in Microsoft Intune. We will first create a PowerShell script which we are going to upload and deploy with Microsoft Intune. Just follow the steps below, it’s very easy :).
How to deploy PowerShell scripts with Microsoft Intune
In this section we will walk you through, how you can deploy a PowerShell script. It’s really easy.
First just make sure you have a PowerShell script ready which you can upload to Microsoft Intune. If not, create one real quick.
Now visite the Microsoft Intune Portal and follow the steps below:
- Go to intune.microsoft.com
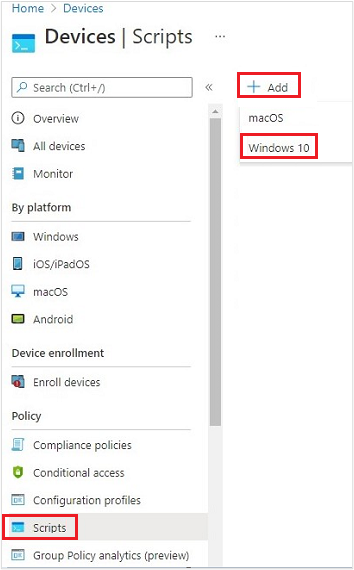
- Click on Devices
- Click on Scripts
- Click on Add
- Click on Windows 10
In the new windows we will be guided through the deployment of a PowerShell script. On the Basics tab enter the following:
- Enter a Name for the PowerShell script
- Enter a Description for the PowerShell script. This setting is optional, but recommended.
- Click on Next
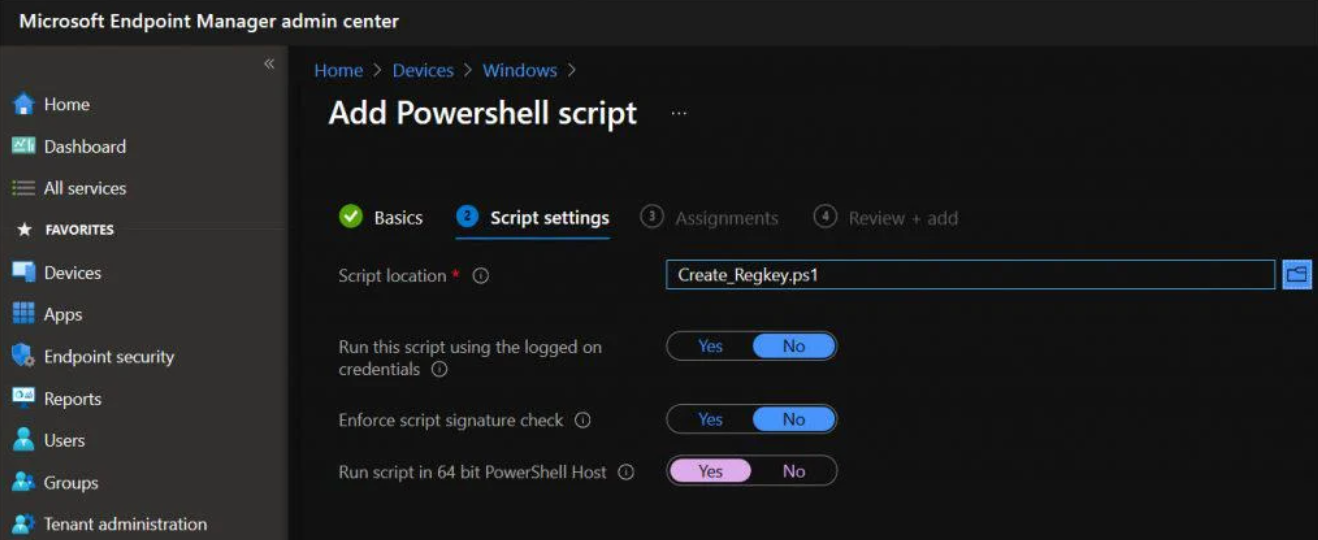
On the Script settings tab we will enter the actual configuration and PowerShell script. Just enter the following:
- Upload the PowerShell script on the Script location
- Run this script using the logged on credentials: Select Yes (default) to run the script with the user’s credentials on the device. Choose No to run the script in the system context. Many administrators choose Yes. If the script is required to run in the system context, choose No.
- Enforce script signature check: Select Yes (default) if the script must be signed by a trusted publisher. Select No if there isn’t a requirement for the script to be signed.
- Run script in 64-bit PowerShell host: Select Yes to run the script in a 64-bit PowerShell host on a 64-bit client architecture. Select No (default) runs the script in a 32-bit PowerShell host.When setting to Yes or No, use the following table for new and existing policy behavior:
On the Scope tab:
- Define your Scope if applicable and click on Next. If you need more information about Scopes you can find them here: Use role-based access control (RBAC) and scope tags for distributed IT
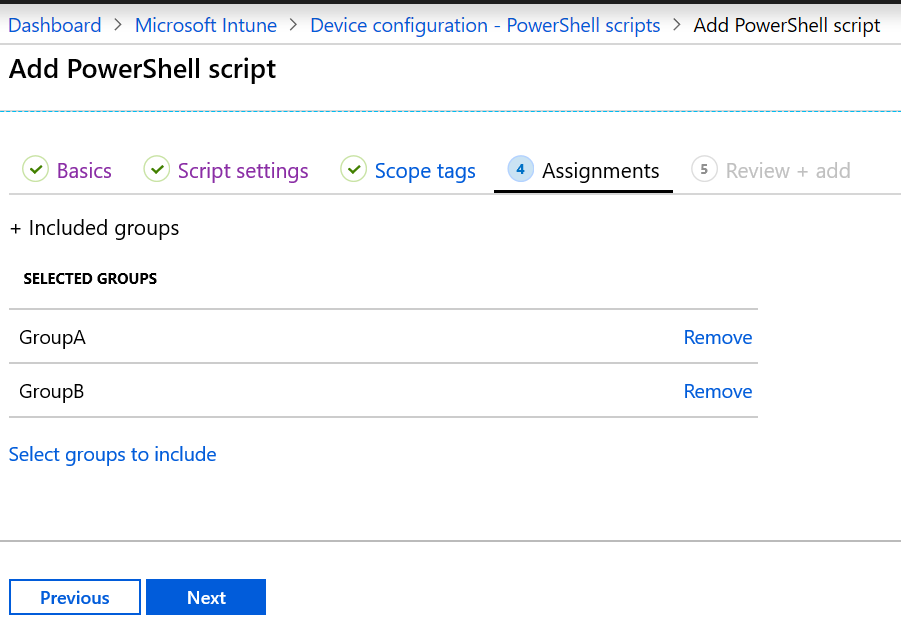
On the Assignment tab:
- On the Assignments tab assign the Policy to a Group or to All Users / All Devices and click on Next.
In Review + add click on Create.
Congratulation, you have successfully deployed a PowerShell script with Microsoft Intune. This will now deploy to all devices or users from the assignment. If a PowerShell script fails to run on a device, it will show it on the Portal after 30 minutes.
Conclusion
You learned How to deploy PowerShell script with Microsoft Intune. We created took a PowerShell script and deployed it with the Microsoft Intune Portal. We hope this guide has provided you with valuable insights to improve your device management strategy. Did you enjoy this article? Don’t forget to follow us and share this article. If you have any questions or need further assistance, feel free to reach out or leave a comment below.


