
Welcome to our blog post on leveraging Microsoft Intune to copy TeamViewer QuickSupport to your desktop. Discover how this integration can streamline your support process, making it easier and more efficient. Say goodbye to complex remote access procedures and embrace a seamless experience that enhances collaboration. Let’s dive in and unlock the full potential of Intune and TeamViewer QuickSupport!
Table of Contents
What are we going to set up?
In the first step, we will create a PowerShell script which will copy the Teamviewer QS file to Desktop. In the second step, we will create an IntuneWin application with the Teamviewer QS and the PowerShell file. Last but not least, we are going to upload this IntuneWin file to Intune and configure the parameters. This allows us to achieve a smooth installation on the clients.

Create PowerShell script
We first need to create a PowerShell script. Follow these instructions:
- Create a new PowerShell script. Name it CopyTeamviewerQS.ps1
- Copy the following Script and paste it in your PowerShell file.
$location = Get-Location
Copy-item "$location\TeamViewerQS.exe" -Destination "C:\Users\Public\Desktop\Support.exe"


We need this script in step 2.

Create Intunewin app
- Create a new folder on C:\DeployTeamviewerQS
- Create a new folder on C:\Output
- Download your TeamviewerQS Agent. (Your IT Department should have an own Teamviewer QS). Otherwise you can download it from the official Website.
- Make sure you name it TeamViewerQS.exe
- Copy the TeamViewerQS.exe in the DeployTeamviewerQS folder
- Copy the CopyTeamviewerQS.ps1 PowerShell script from step1 in the DeployTeamviewerQS folder

- Download the official Microsoft Intune Win App Tool
- Open the Intune Win App Tool.
Important: You need to open the Tool with Administrator right. Otherwise there will be an error.
- Please specify the source folder: C:\DeployTeamviewerQS
- Please specify the setup file: CopyTeamviewerQS.ps1
- Please specify the output folder: C:\Output
- Do you want to specify catalog folder: N

In your Output Folder, there should be a new file called CopyTeamviewerQS.intunewin
We need this file in Step 3

Deploy with Intune
- Go to endpoint.microsoft.com
- Click on Apps
- Click on Windows
- Click on Add
- Chose App type Windows app (win32)
- Click on Select

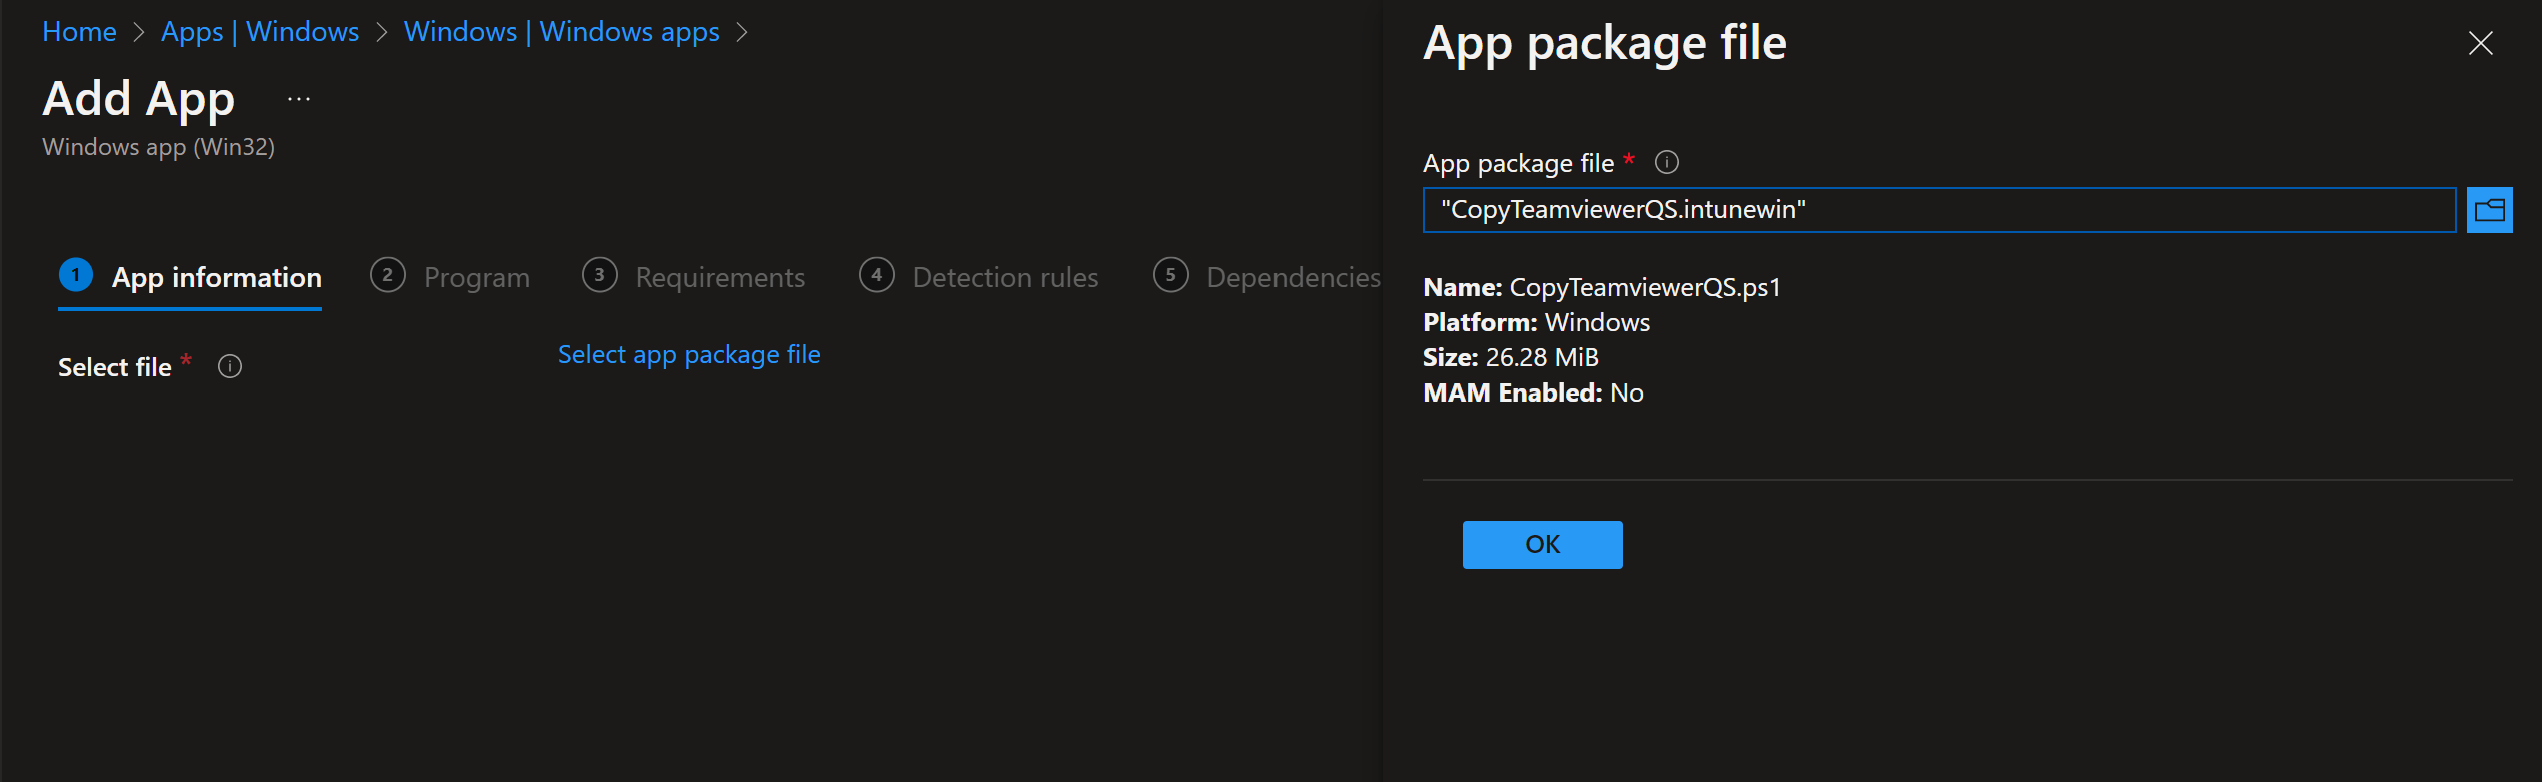
- Click on Select app package file
- Upload your IntuneWin file which is located in C:\output
- Click on OK
- Click on Next
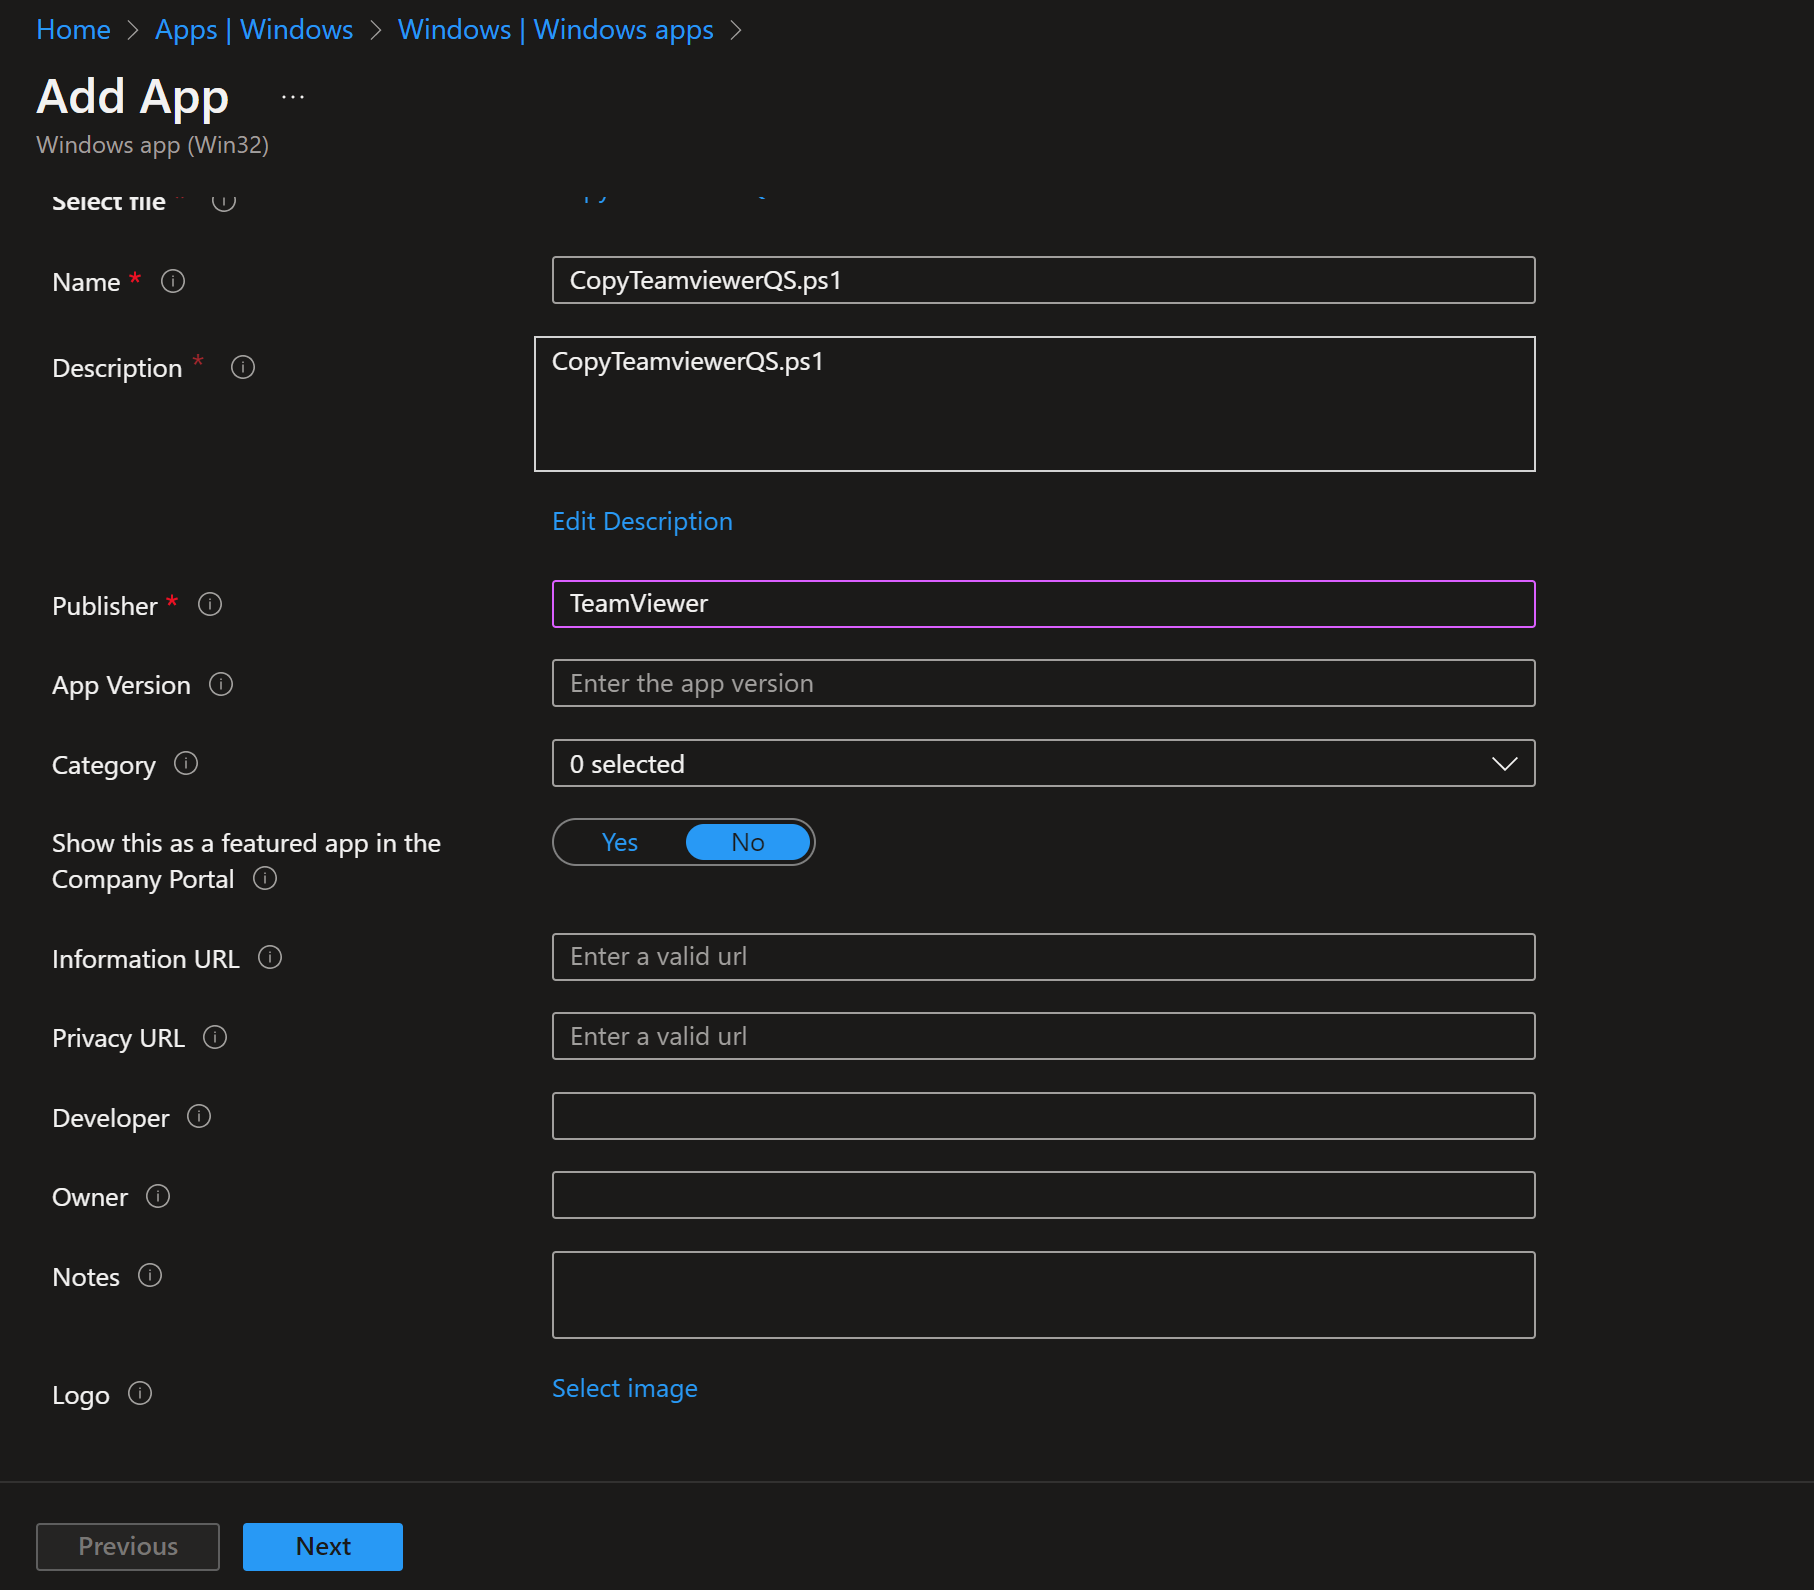
- Here you can change the Settings. I leave it as it is. Dont forget to enter a Publisher
- Click on Next
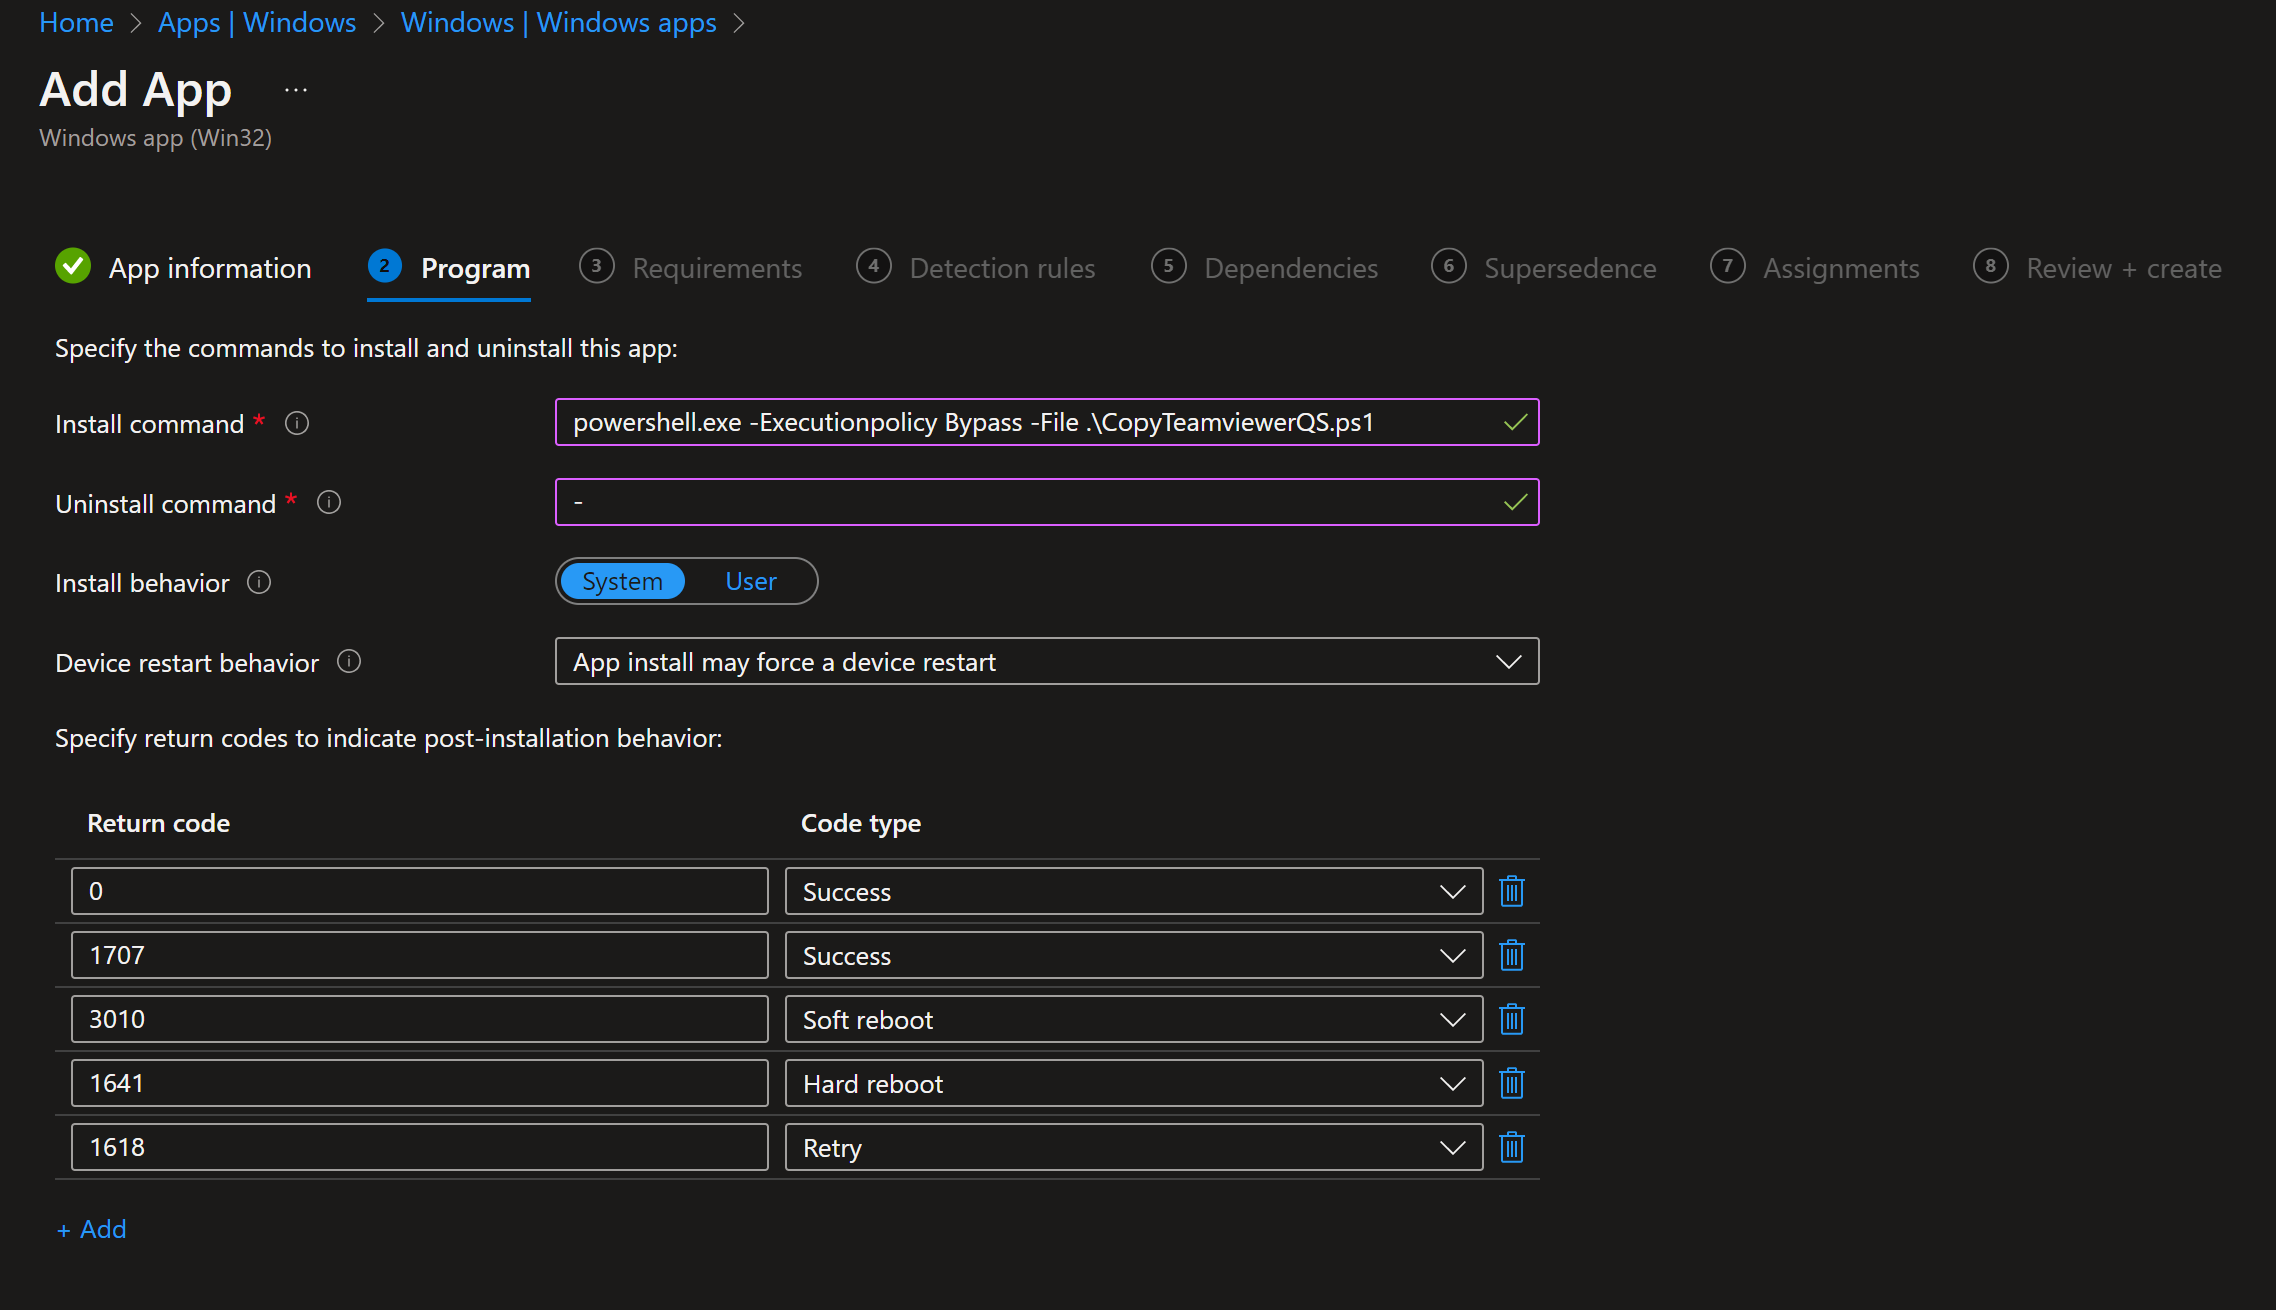
Enter the following Commands:
- Install Command: powershell.exe -Executionpolicy Bypass -File .\CopyTeamviewerQS.ps1
- Uninstall command: –
- Install behavior: System
- Device restart behavior: no specific Action
- Click on Next
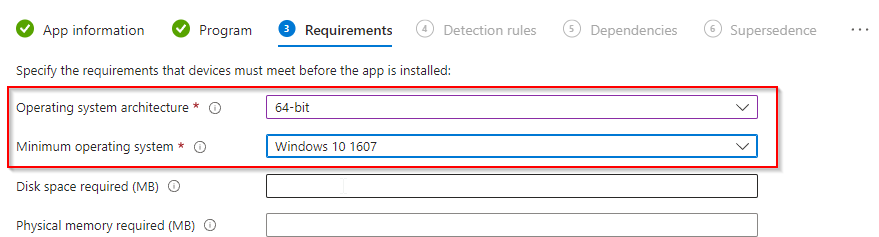
On the Requirements tab enter:
- Operating system architecture: 64-bit
- Minimum operating system: Windows 10 1607
- Click on Next
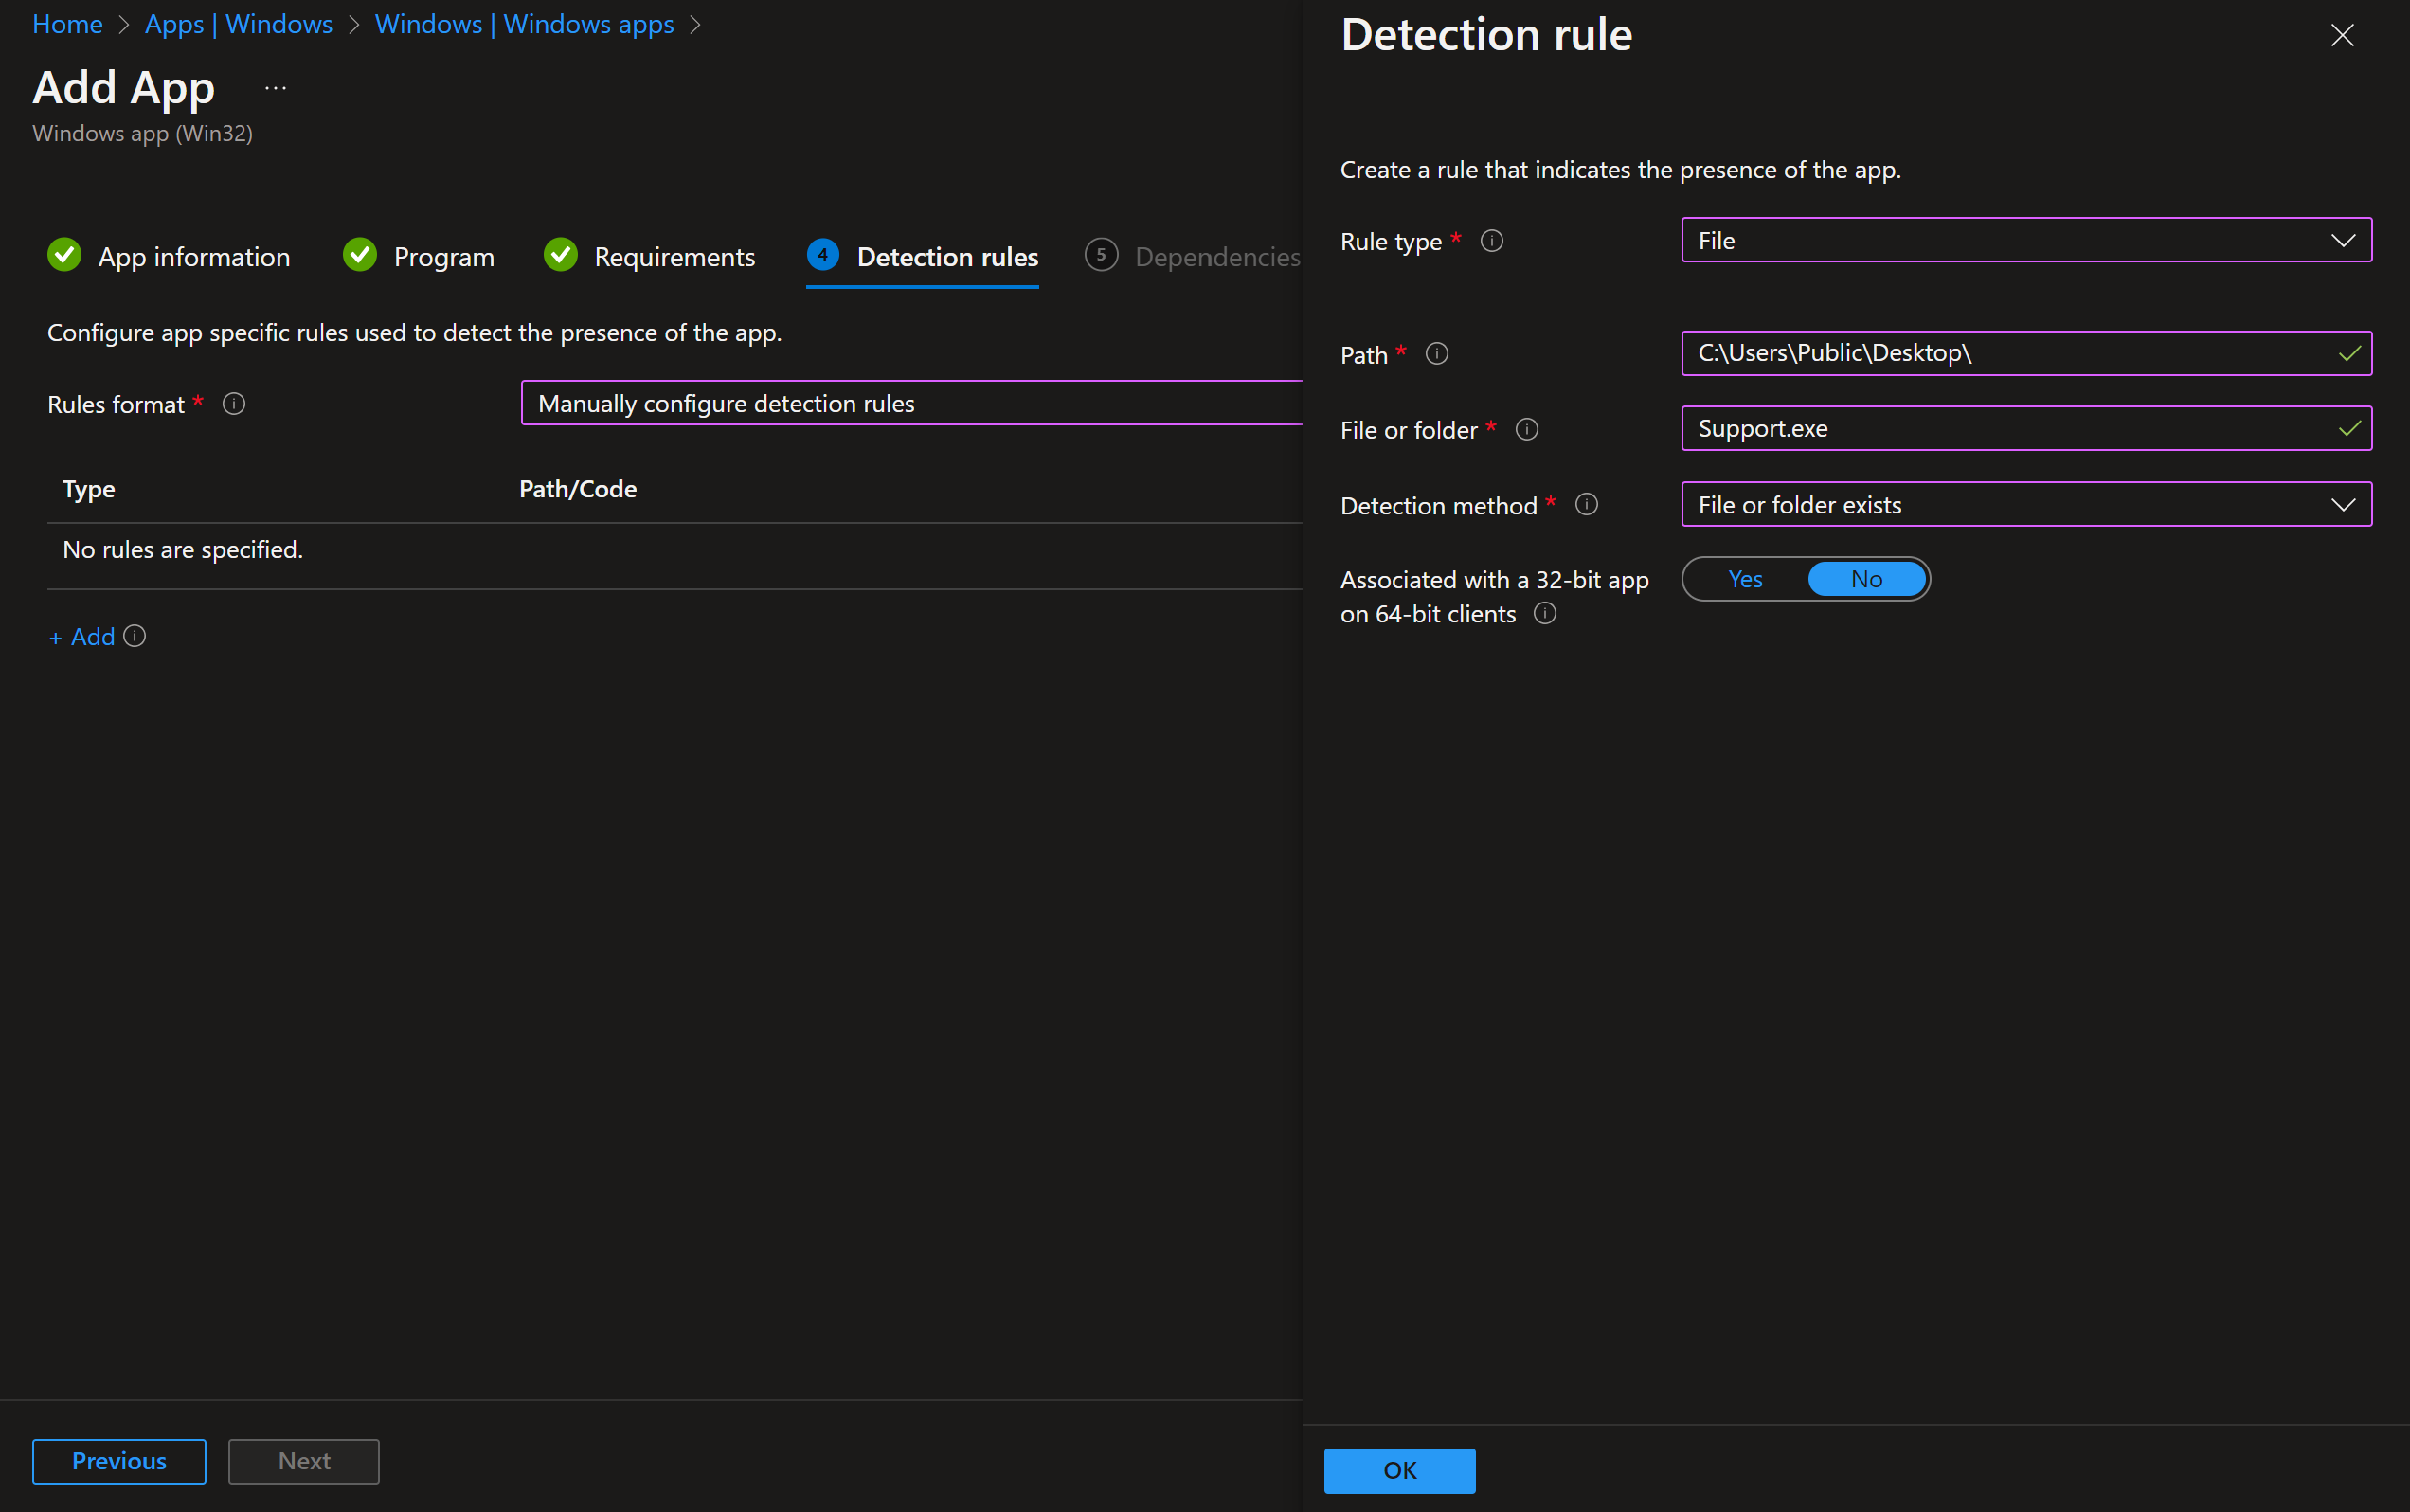
On the Detection rules tab:
- Rules format: Manually configure detection rules
- Click on Add
- Rule type: File
- Path: C:\Users\Public\Desktop\
- File or Folder: Support.exe
- Detection method: File or folder exists
- Associated with a 32-bit app on 64-bit clients: No
- Click on Ok and on Next
- You can skip the Dependencies
- You can skip the Supersedence
- On the Assignments tab assign the Policy to a Group or to All User
- Click on Next
- And Review + Create the Policy

Congratulations! You have successfully deployed the policy.


Hi dear WhackAssTech Team.
I think it would be nice to add a Uninstall Command too 🙂
powershell.exe -ExecutionPolicy Bypass -Command “Remove-Item ‘C:\Users\Public\Desktop\Support.exe’ -Force -ErrorAction SilentlyContinue”
Kind Regards^^
Hi Trim
Good Point :). Thanks for your comment. We will add this to our post.
Kind regards 🙂