
Microsoft Intune has become a popular solution for managing devices and applications in the modern workplace. One common application that many organizations use is Google Chrome. In this blog post, we’ll explore how to deploy Chrome using Intune, including the different deployment methods and steps to follow for a successful deployment. Whether you’re an IT admin or a user, this post will provide you with all the information you need.
Table of Contents
What are we going to set up?
In the first step, we will download the official Chrome MSI installation file. In the second step, we will upload this file to Intune and configure the parameters. This allows us to achieve a smooth installation on the clients.

Download Chrome MSI
To deploy Chrome for Windows, follow these instructions:
- Go to https://chromeenterprise.google/browser/download/#windows-tab
- Download the latest Package
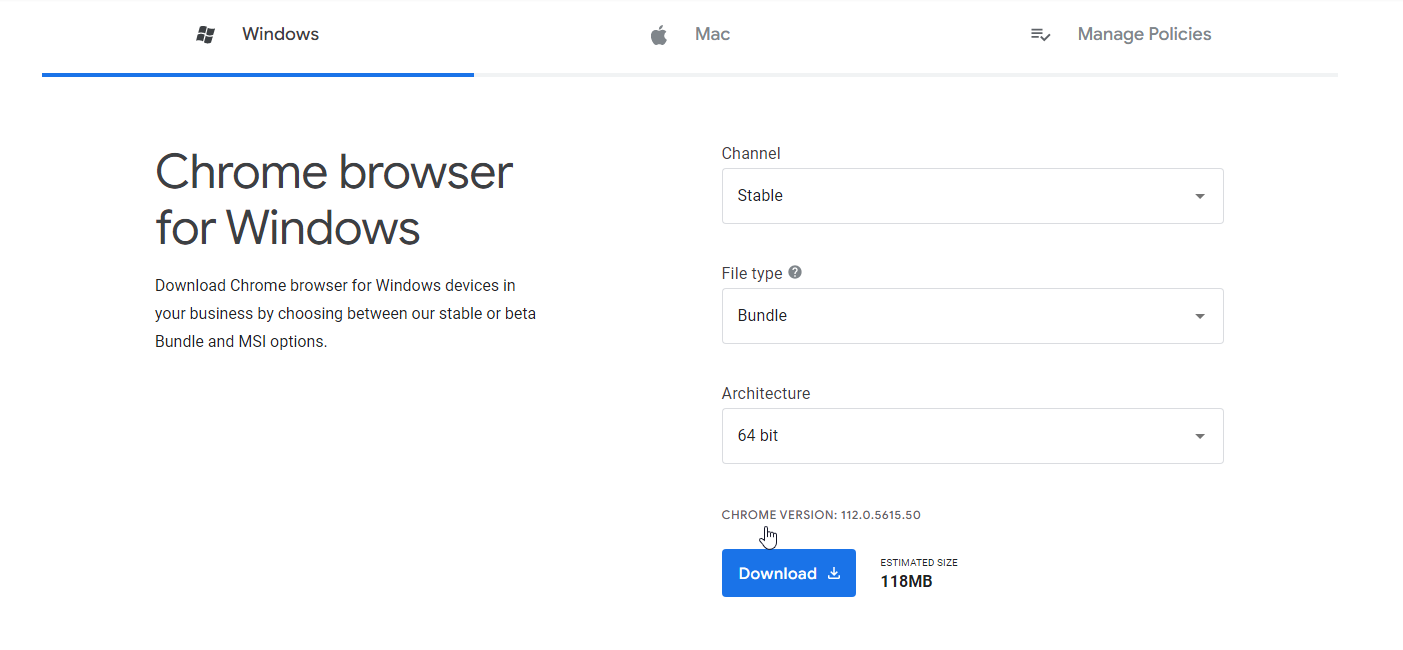
- You should get a GoogleChromeEnterpriseBundle64.zip file
- Extract the file
It should look like this:

You can now go to Step 2.

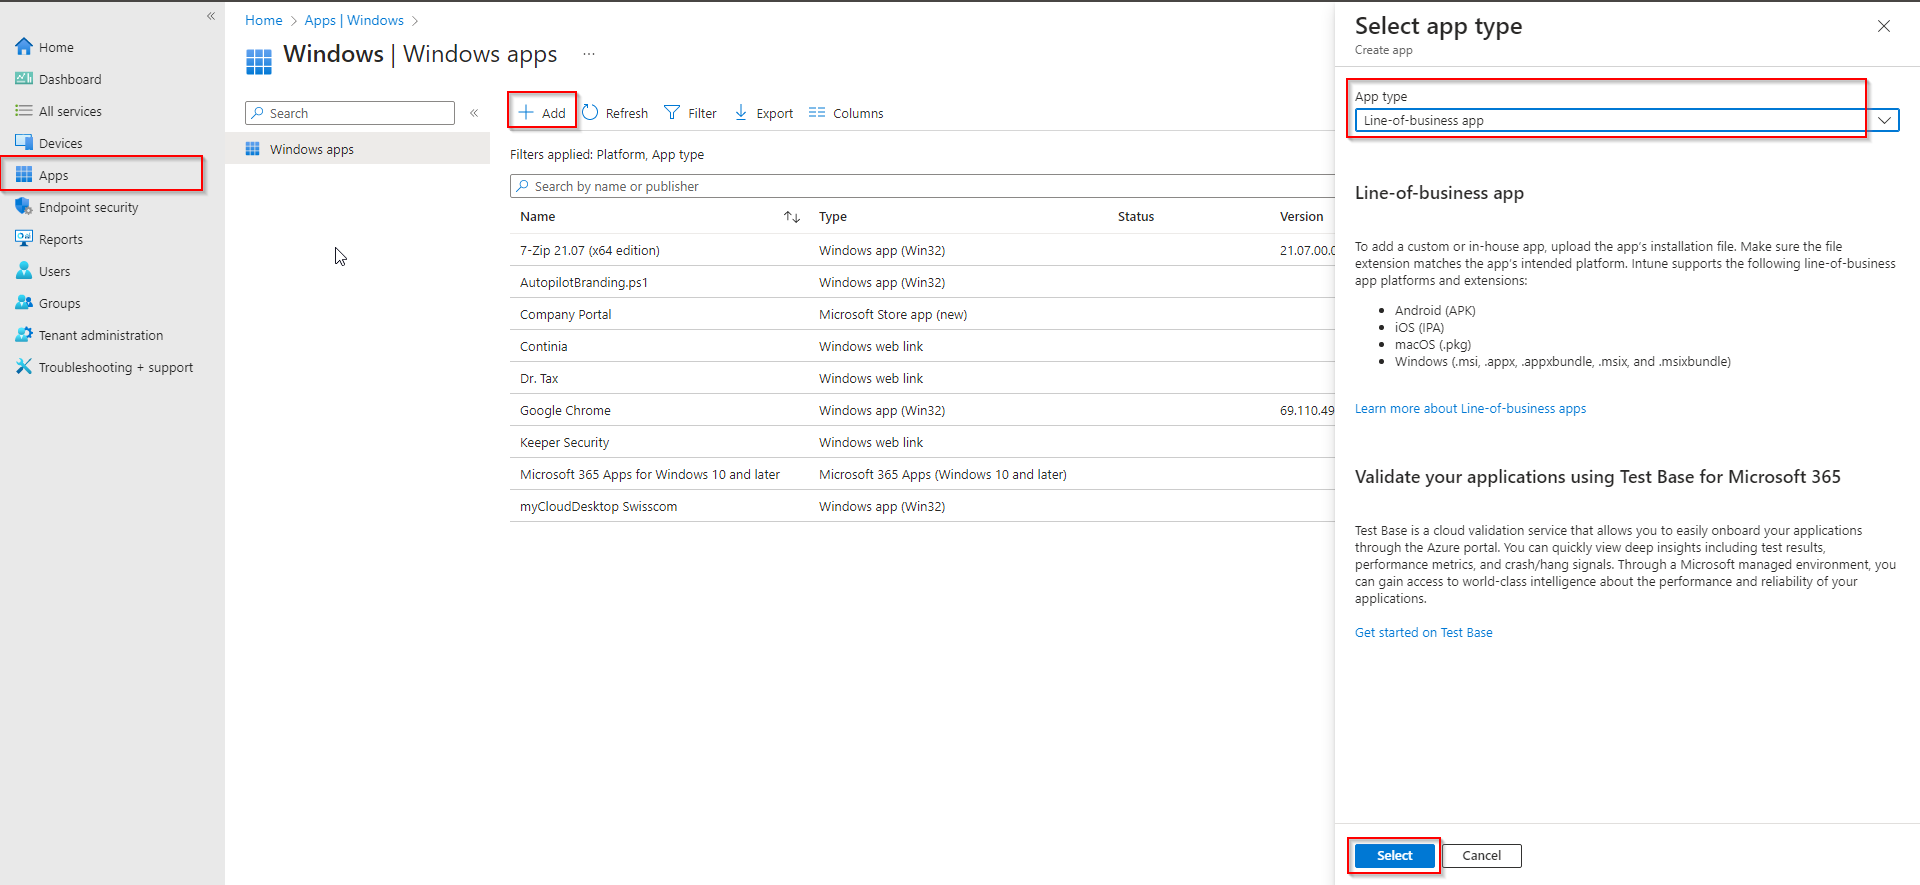
Import and deploy with Intune
- Go to endpoint.microsoft.com
- Click on Apps
- Click on Windows
- Click on Add
- Select Line-of-business app
- Click on Select
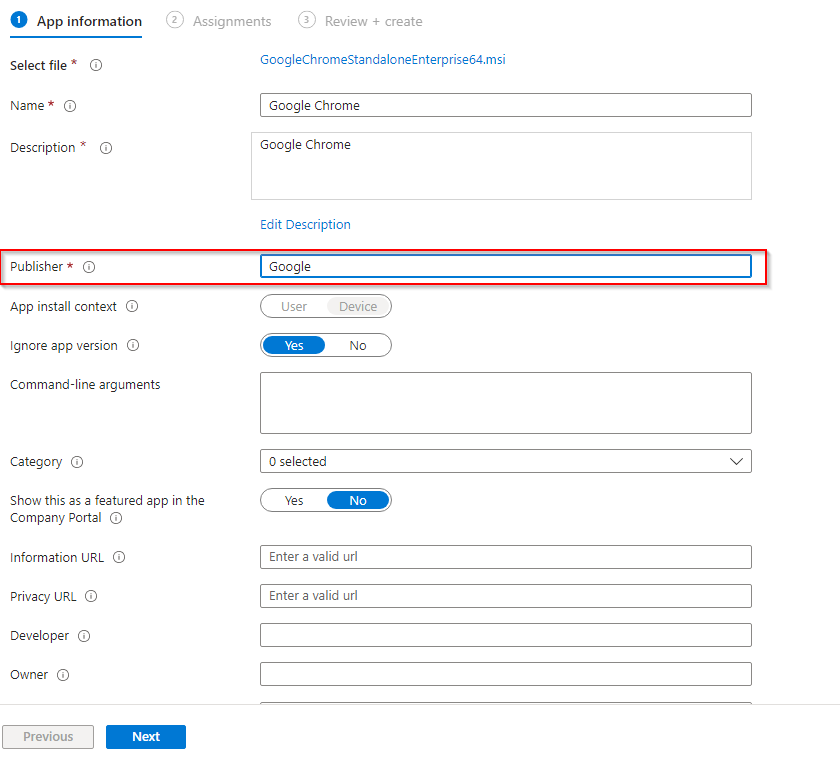
- Click on Select app
- Upload the GoogleChromeStandaloneEnterprise64.msi installer
This is located in the Extracted File (Step 1) -> GoogleChromeEnterpriseBundle64\Installers - Click on OK

- You can Edit the Name or Description
- Add a Publisher
- Click on Next
For the Assignments we have the following optiones:
- Required: Will deploy 7-Zip automatically
- Available for enrolled devices: Will be available in the Company Portal
- I will Deploy it automatically for all Users.
- Click on Next
- On the Review + create page, click on Create

Congratulations! You have successfully deployed the policy.


