How to configure Device Guard with Microsoft Intune? Step into a more secure digital realm by exploring the power of Device Guard configured with Microsoft Intune. In this guide, we will show you, how to configure and deploy Device Guard with Microsoft Intune.
Table of Contents
What is Device Guard?
Device Guard is a crucial security feature that fortifies your system against malware and unauthorized code. By configuring it with Microsoft Intune, you establish a formidable defense, ensuring only trusted applications run, safeguarding your devices from potential threats. Embrace Device Guard to elevate your security posture and foster a safer digital environment.
What are we going to set up?
In this blog post we will show you, How to configure Device Guard with Microsoft Intune. We are going to create a configuration profile in Intune and configure the Device Guard settings.

Create Configuration Profile
In this step we are going to create a configuration profile in Microsoft Intune and deploy the policy to the users or devices. Just follow these steps:
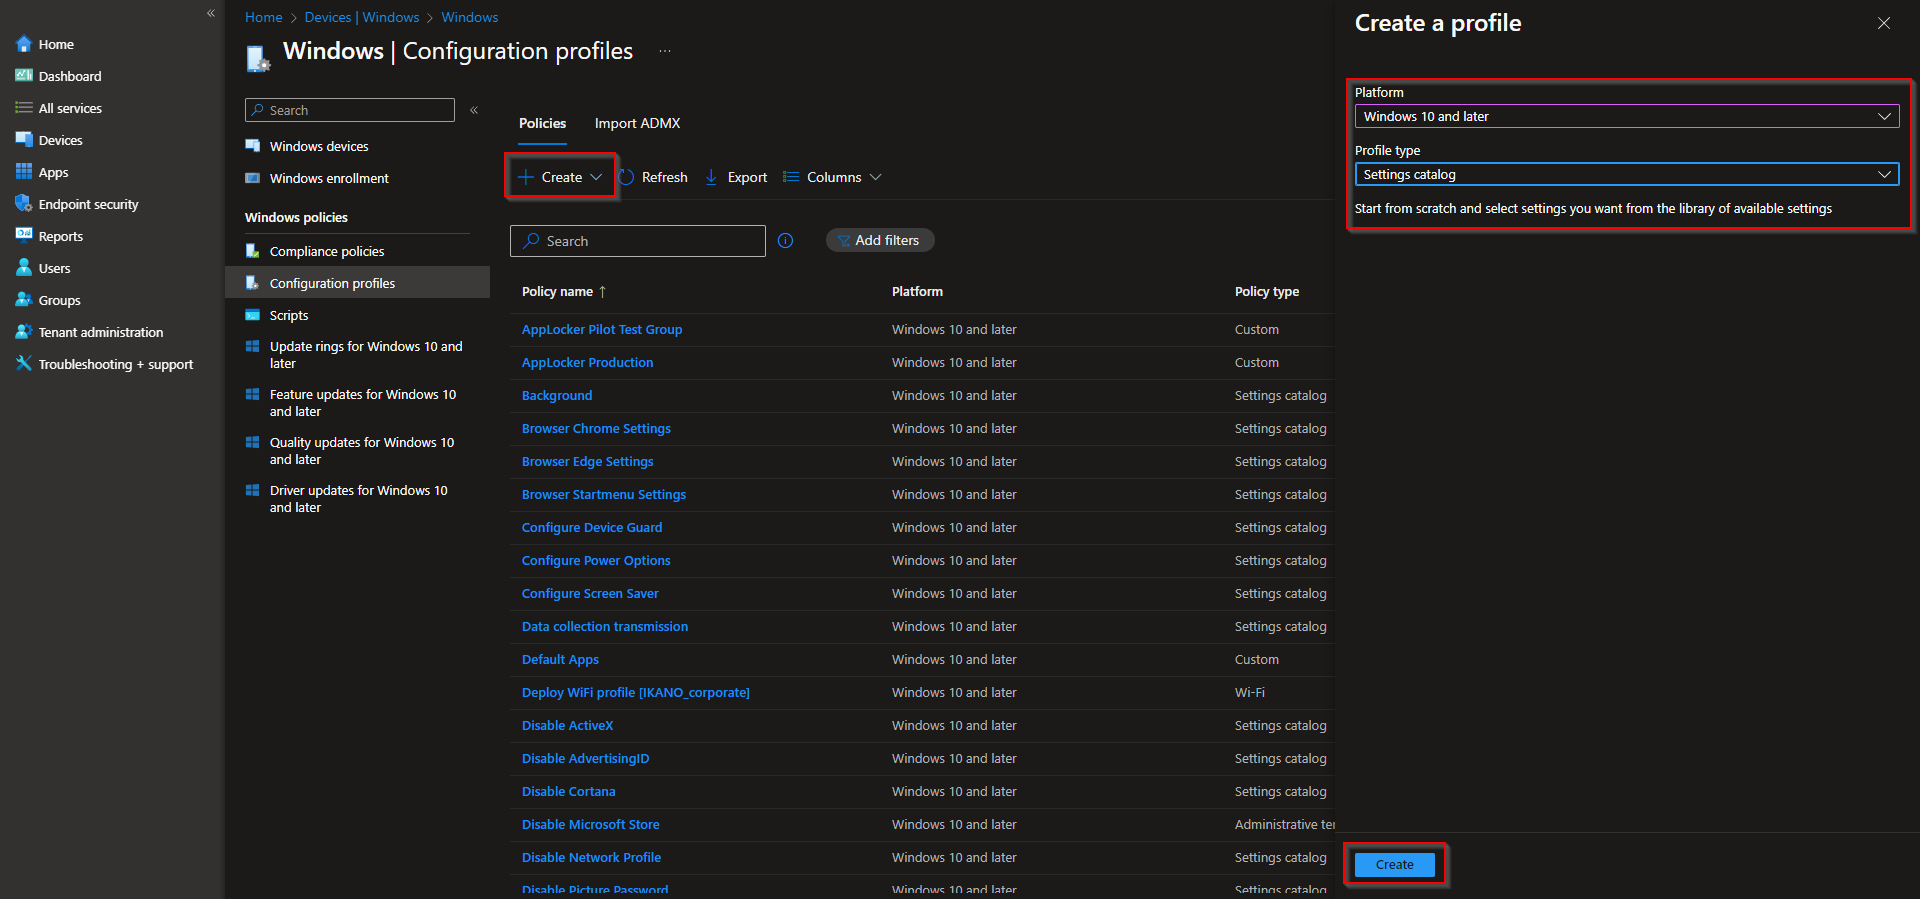
- Go to intune.microsoft.com
- Click on Devices
- Click on Windows
- Click on Configuration profiles
- Click on Create and New Policy
- Select the Platform Windows 10 and later
- Select the Profile type Settings catalog
- Click on Create
- Give a Name and Description (optional) to the profile.
- Click on Next

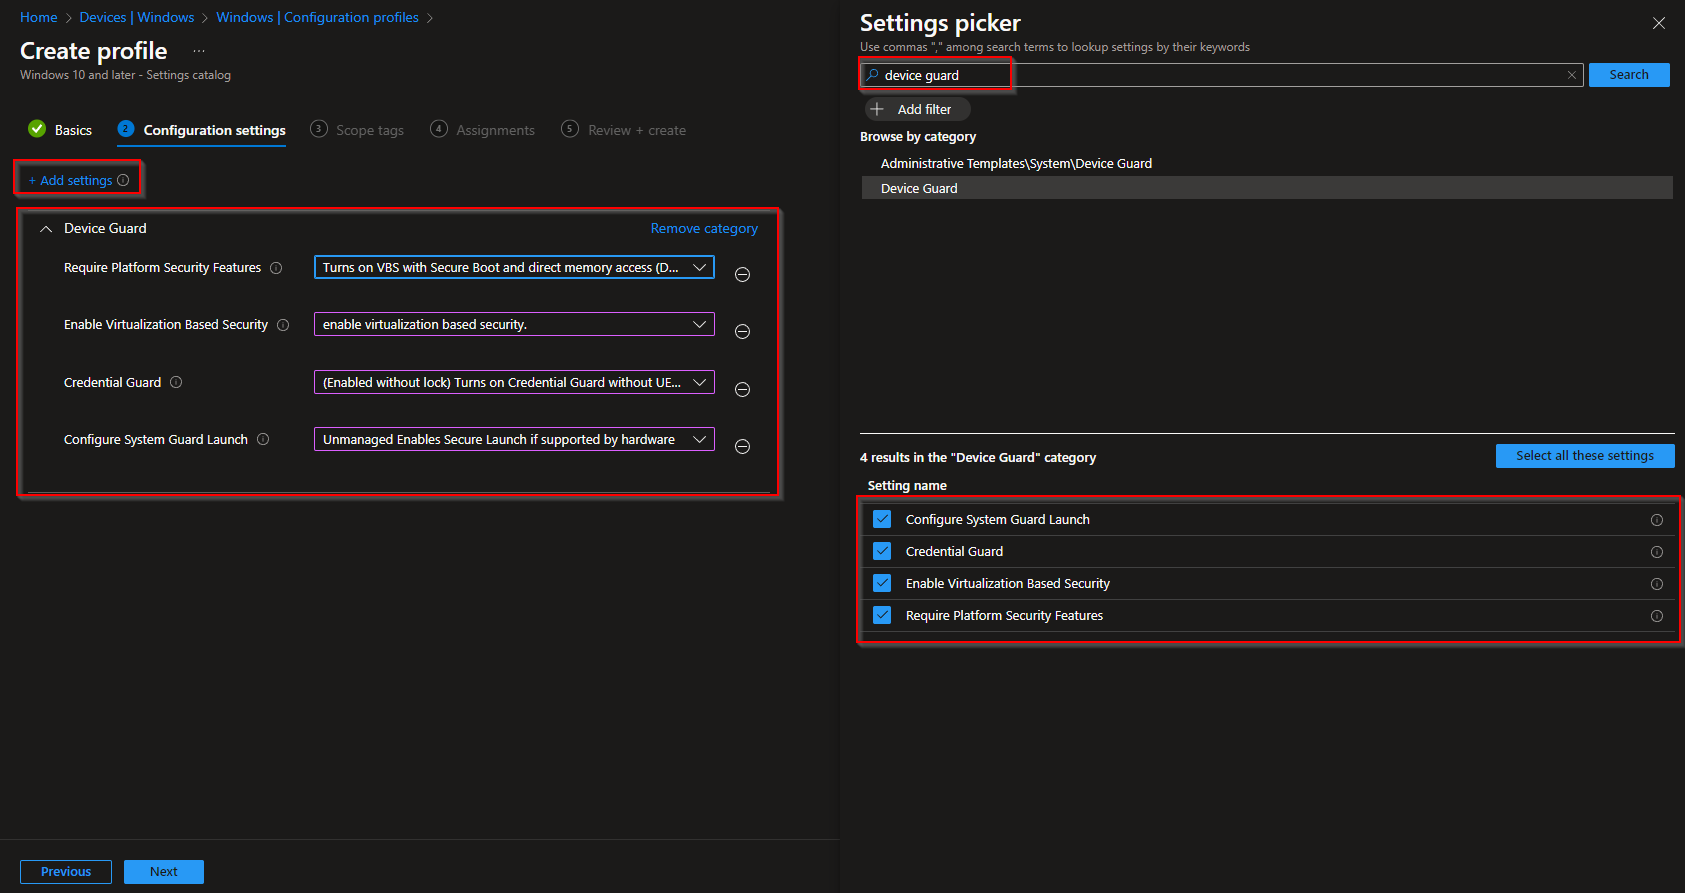
- Click on Add settings
- Search for Device Guard
- Click on Device Guard
- Check all 4 options shown.
Now you can configure your Device Guard settings. In my case I will configure it on whats the best practice.
- Require Platform Security Features: Turn on VPS with Secure Boot and direct memory access (DMA). DMA requires hardware support.
- Enable Virtualization Based Security: Enable virtualization based security
- Credential Guard: (Enabled without lock) Turns on Credential Guard without UEFI Lock
- Configure System Guard Launch: Unmanaged Enables Secure Launch if supported by hardware
- Click on Next
- In the Scope tags tab, enter the scope when applicable. Click on Next.
- On the Assignments tab, add the groups or all users/devices. Click on Next.
- On the Review + create tab click on Create
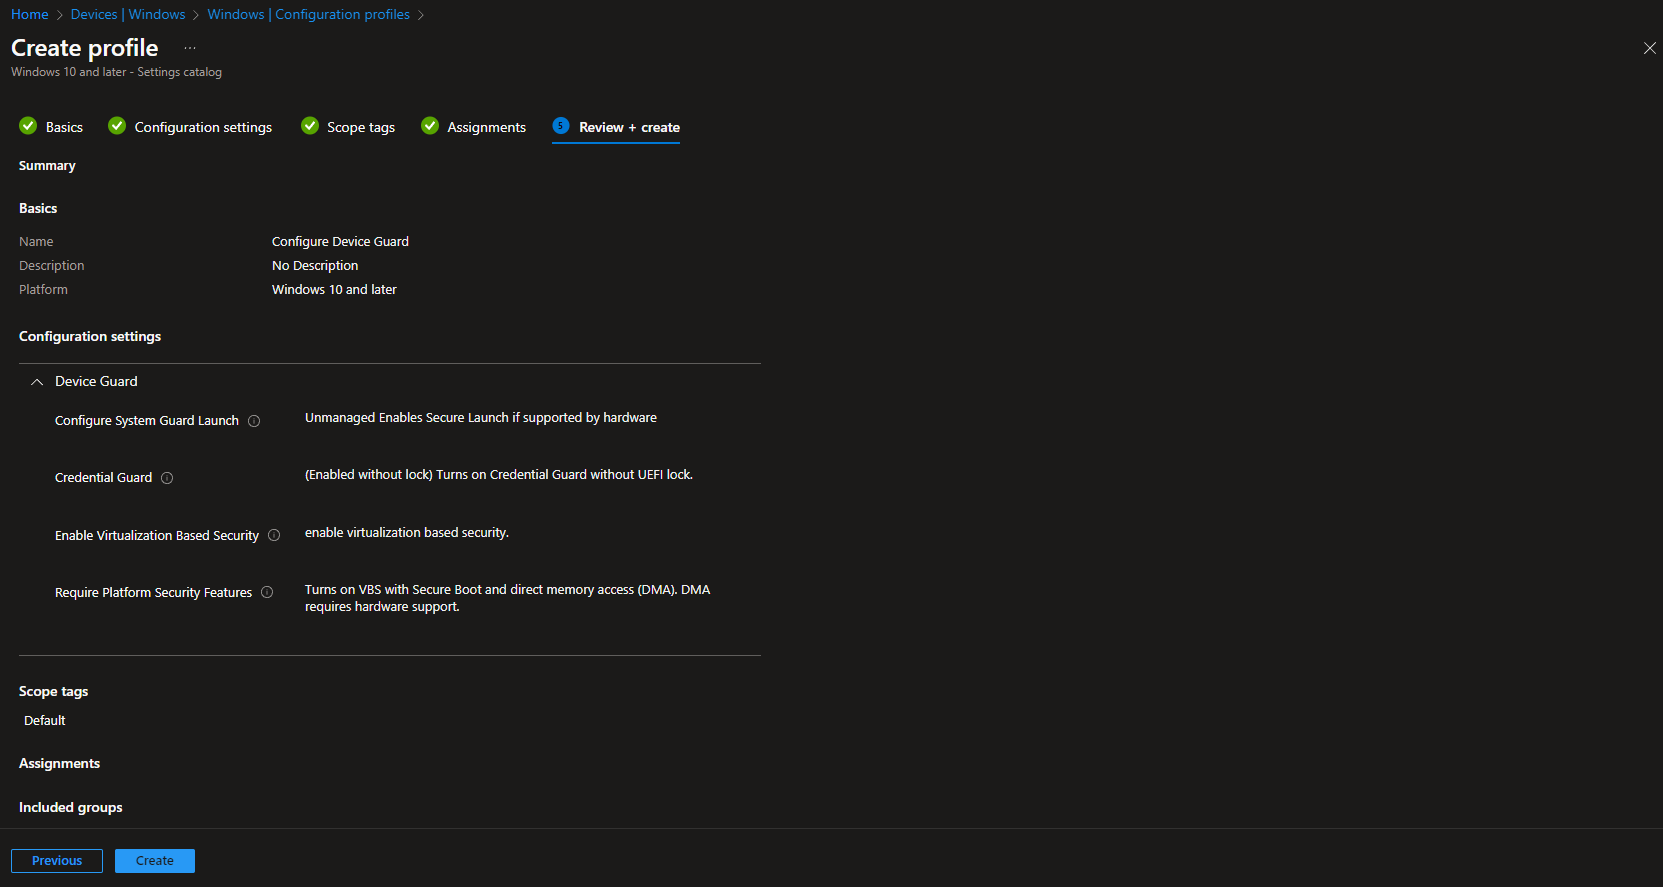
Congratulations! You have successfully deployed the policy.


