Welcome to our new blog post about How to deploy Adobe Acrobat Pro with Microsoft Intune. Managing software deployments in an enterprise environment can be complex, especially when dealing with essential productivity tools like Adobe Acrobat Pro. Fortunately, Microsoft Intune simplifies this process, allowing IT administrators to efficiently deploy, configure, and manage Acrobat Pro across their organization’s devices. Whether you’re rolling out the application to a small team or a large workforce, Intune ensures a streamlined and secure deployment experience. In this guide, we’ll walk you through the entire process, from preparing the installation package to successfully pushing it out to your users.
Table of Contents
Deploy Adobe Reader DC
If you’re looking for a way to deploy Adobe Reader DC with Microsoft Intune, I’ve already covered that in a previous blog post. Adobe Reader DC is a widely used PDF viewer that many organizations need to distribute across their managed devices. In that post, I walked through the process of preparing the installer, configuring Intune for deployment, and ensuring a smooth installation across your endpoints.
How to deploy Adobe Acrobat Pro with Microsoft Intune
Step 1: Download the Adobe Acrobat Pro application
In this section we will first need to download the Adobe Acrobat Pro application from the admin console of adobe. You will need the admin login for the Admin Console. Just follow the steps below.
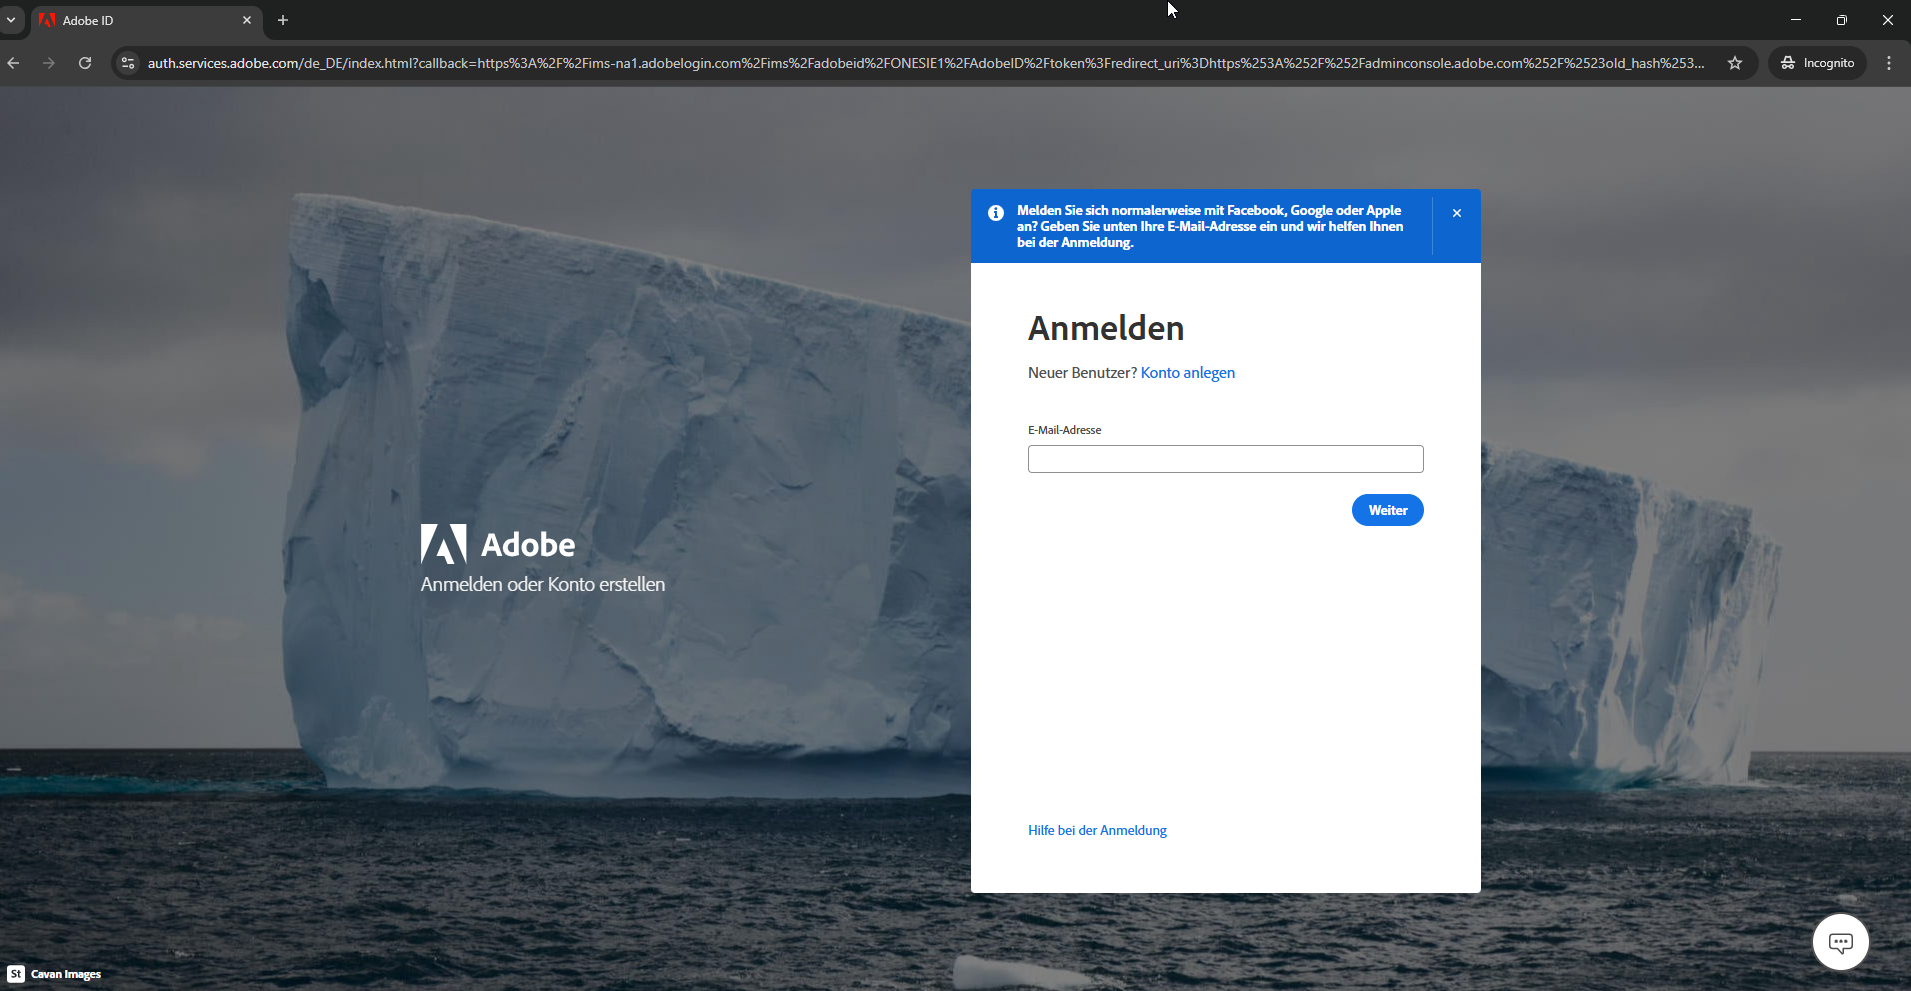
- Go to https://adminconsole.adobe.com/
- Login with your Adobe Admin
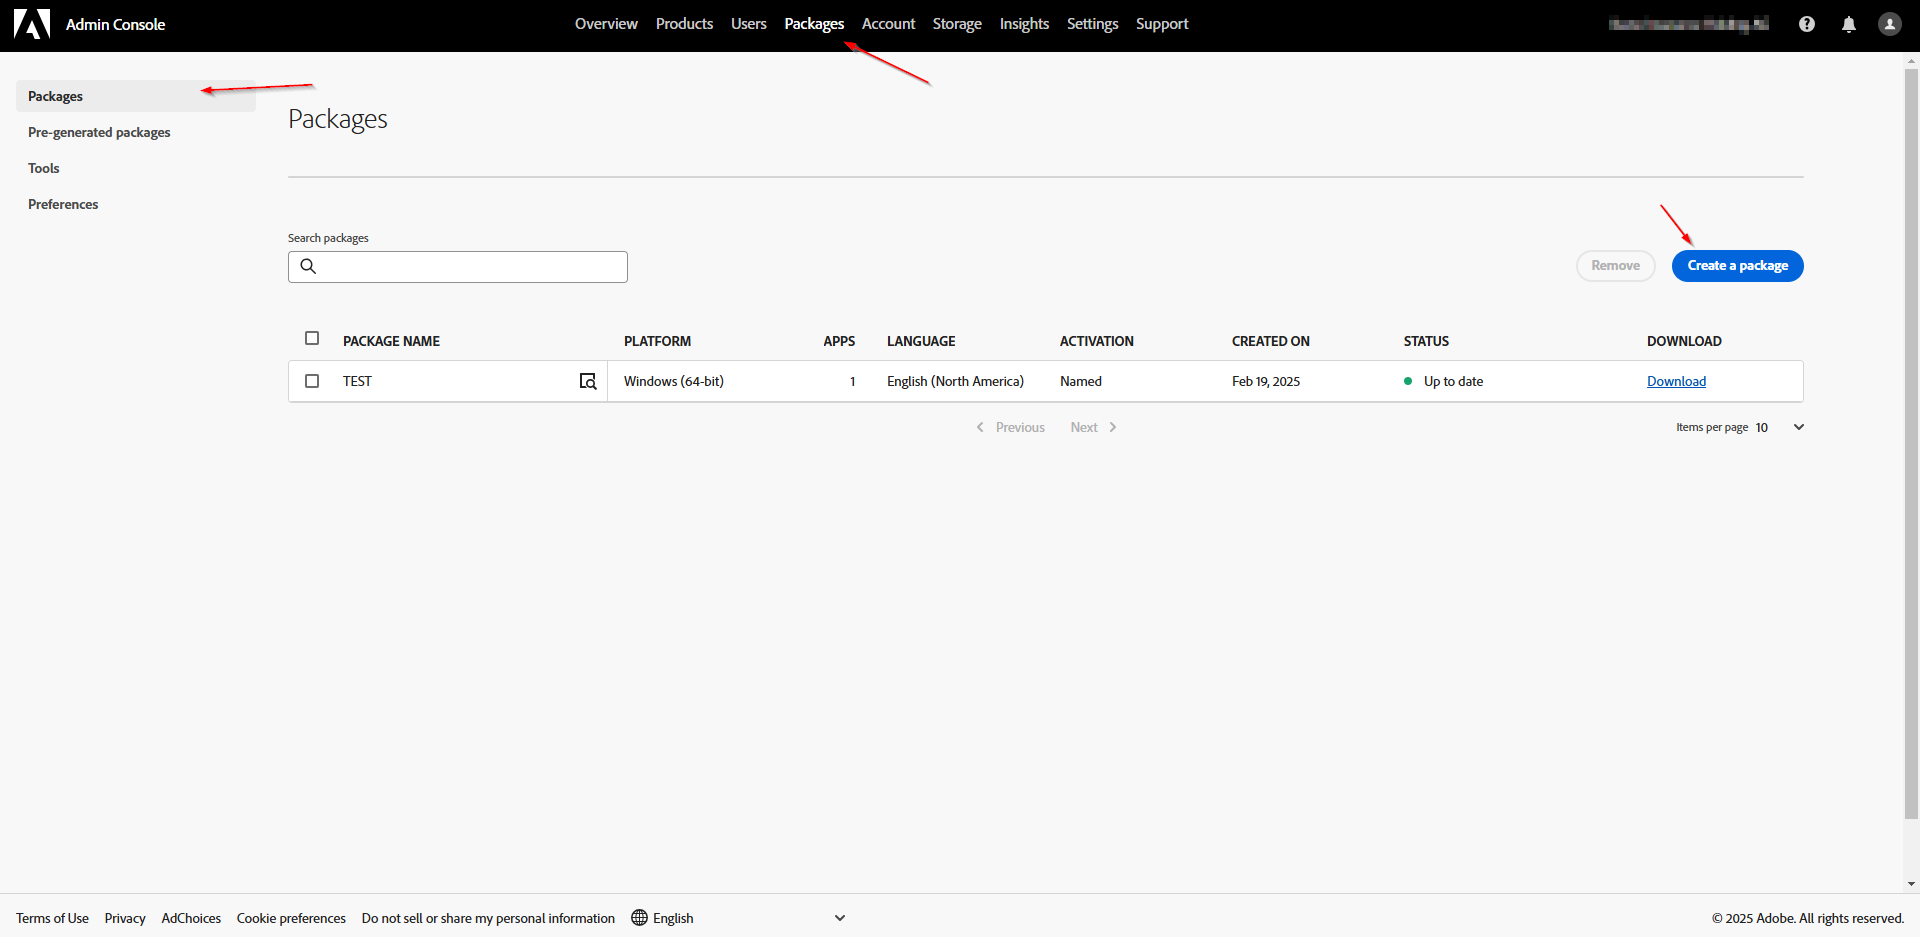
On the Admin Console Dashboard:
- Click on Packages > Packages
- Click on Create a package
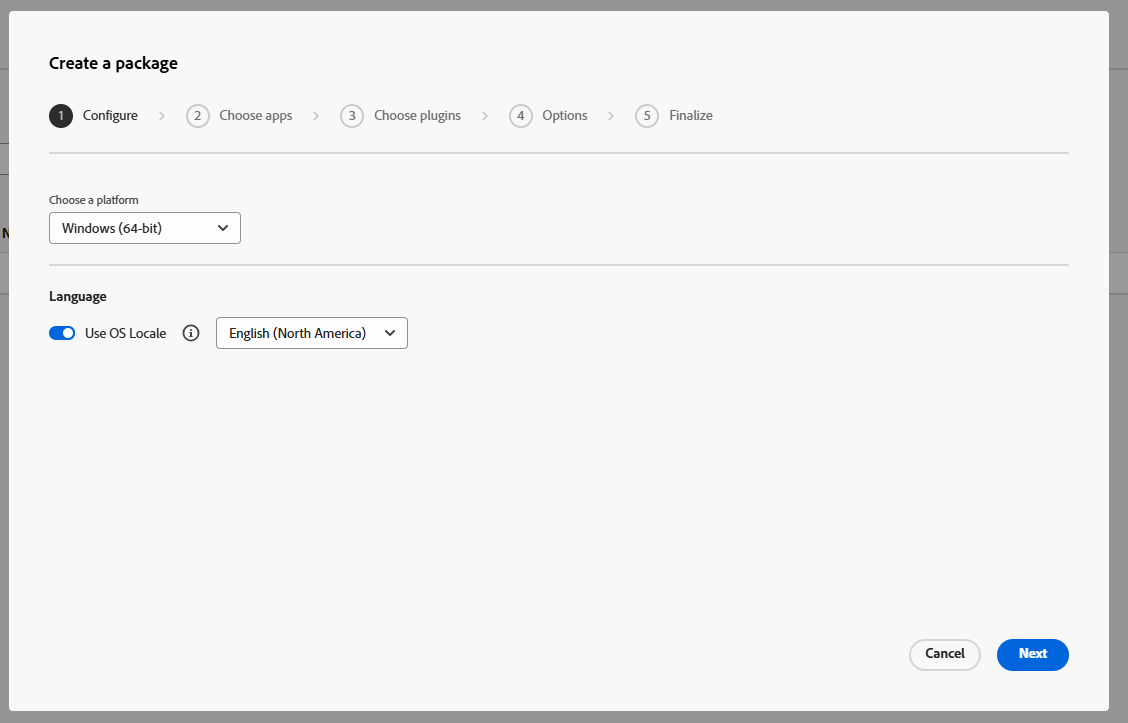
On the Configure tab:
- Choose a platform: Windows (64-bit)
- Choose the prefered language
- Click on Next
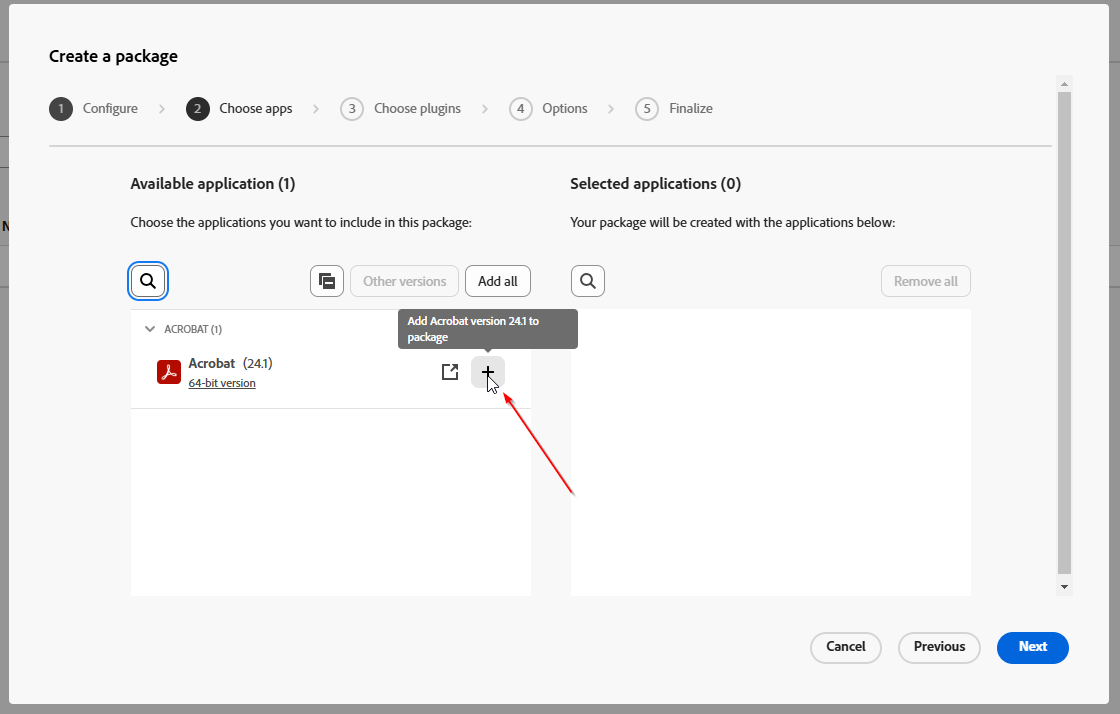
On the Choose apps tab ad the Acrobat Application.
- Click on + on the Acrobat Application.
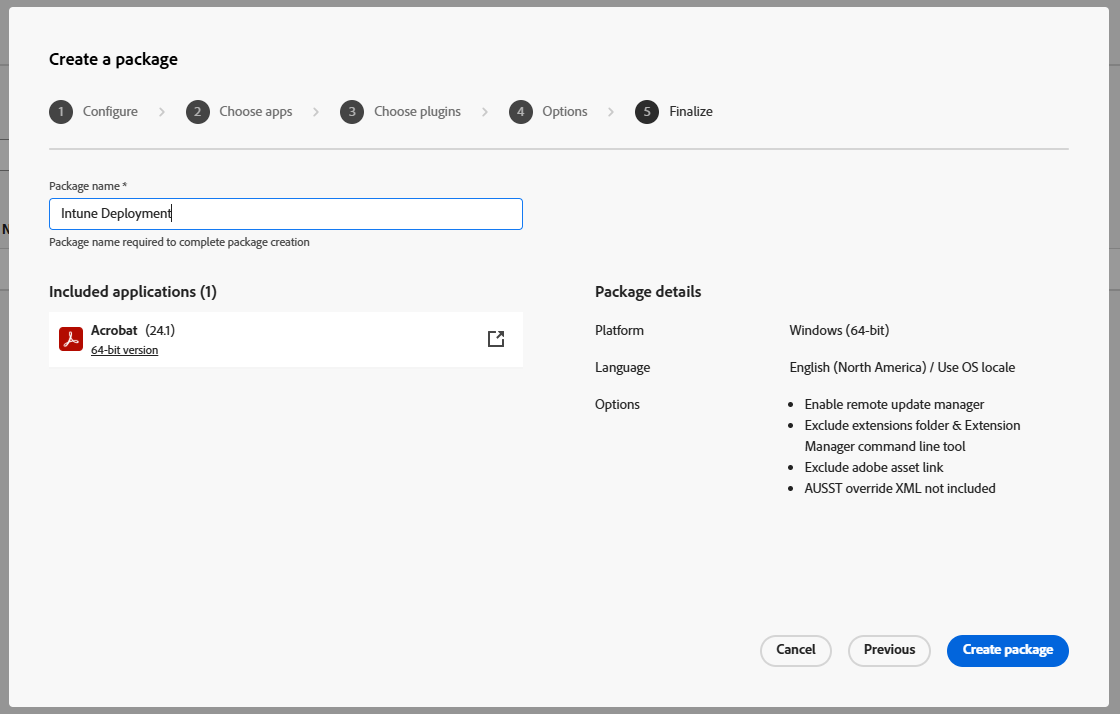
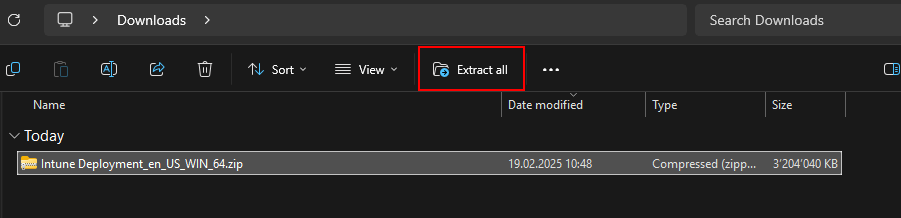
After some time, the Package is ready to be downloaded. If you are seeing the Download button, click on it. The application will be installed. You should now have a new zip file in your downloads folder. Last, Extract the folder.

Step 2: Create Intune Win32 App
After you have downloaded the Adobe Acrobat Pro application the next step is to create an Intune Win App. Just follow the steps below:
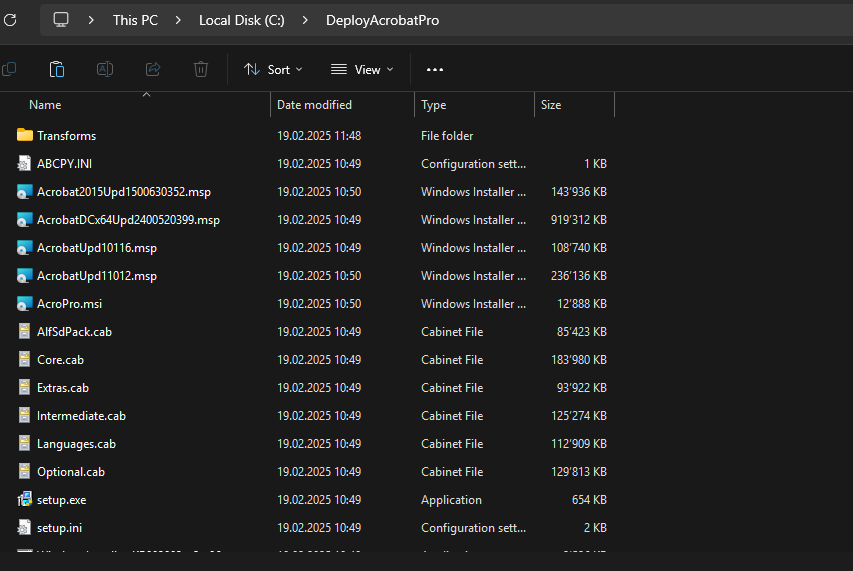
- Create a new folder DeployAcrobatPro on C:.
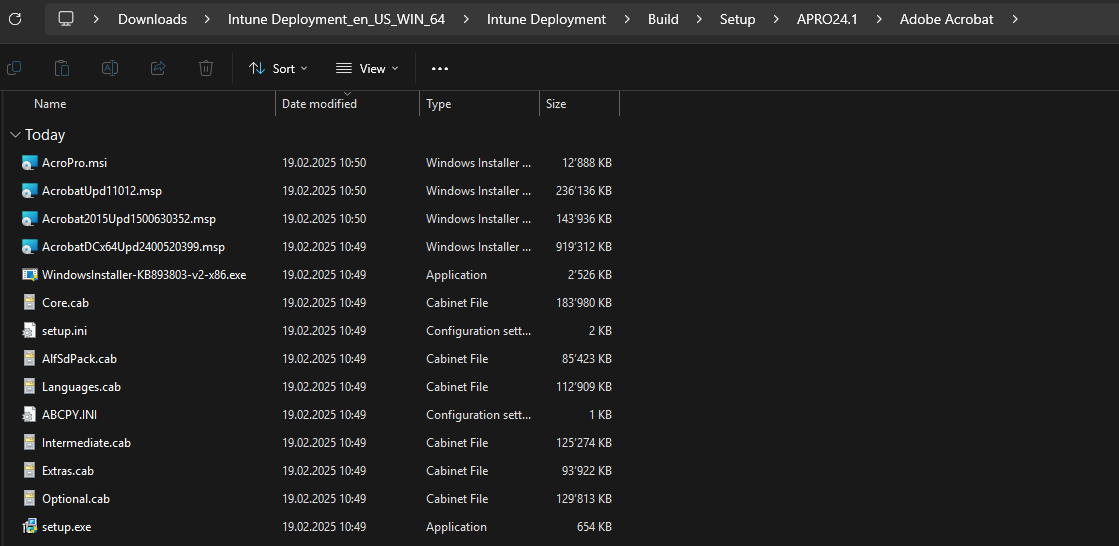
- Go to the downloaded Package and navigate to Intune Deployment_en_US_WIN_62 > Intune Deployment > Build > Setup > APRO24.1 > Adobe Acrobat (Folder Names can be different)
- Copy the complete Adobe Acrobat folder and paste it into the DeployAcrobatPro folder
- Create a new folder Output on C:
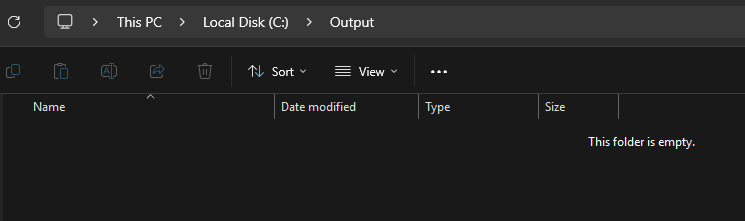
Now we are going to create an Intune Win file with the official application. First of all download the official Microsoft Intune Win App Tool.
- Download the official Microsoft Intune Win App Tool
- After installation open the Intune Win App Tool.
In the application specify the following things:
- Please specify the source folder: C:\DeployAcrobatPro
- Please specify the setup file: AcroPro.msi
- Please specify the output folder: C:\Output
- Do you want to specify catalog folder: N

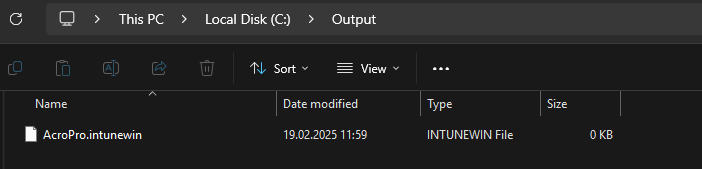
In your Output Folder, there should be a new .intunewin file. We need this file in the next step.
Step 3: Import and deploy with Microsoft Intune
After we have created the intunewin file of the executable, we can now upload the application to Microsoft Intune and deploy it to our environment. Just follow these steps.
- Go to intune.microsoft.com
- Click on Apps
- Click on Windows
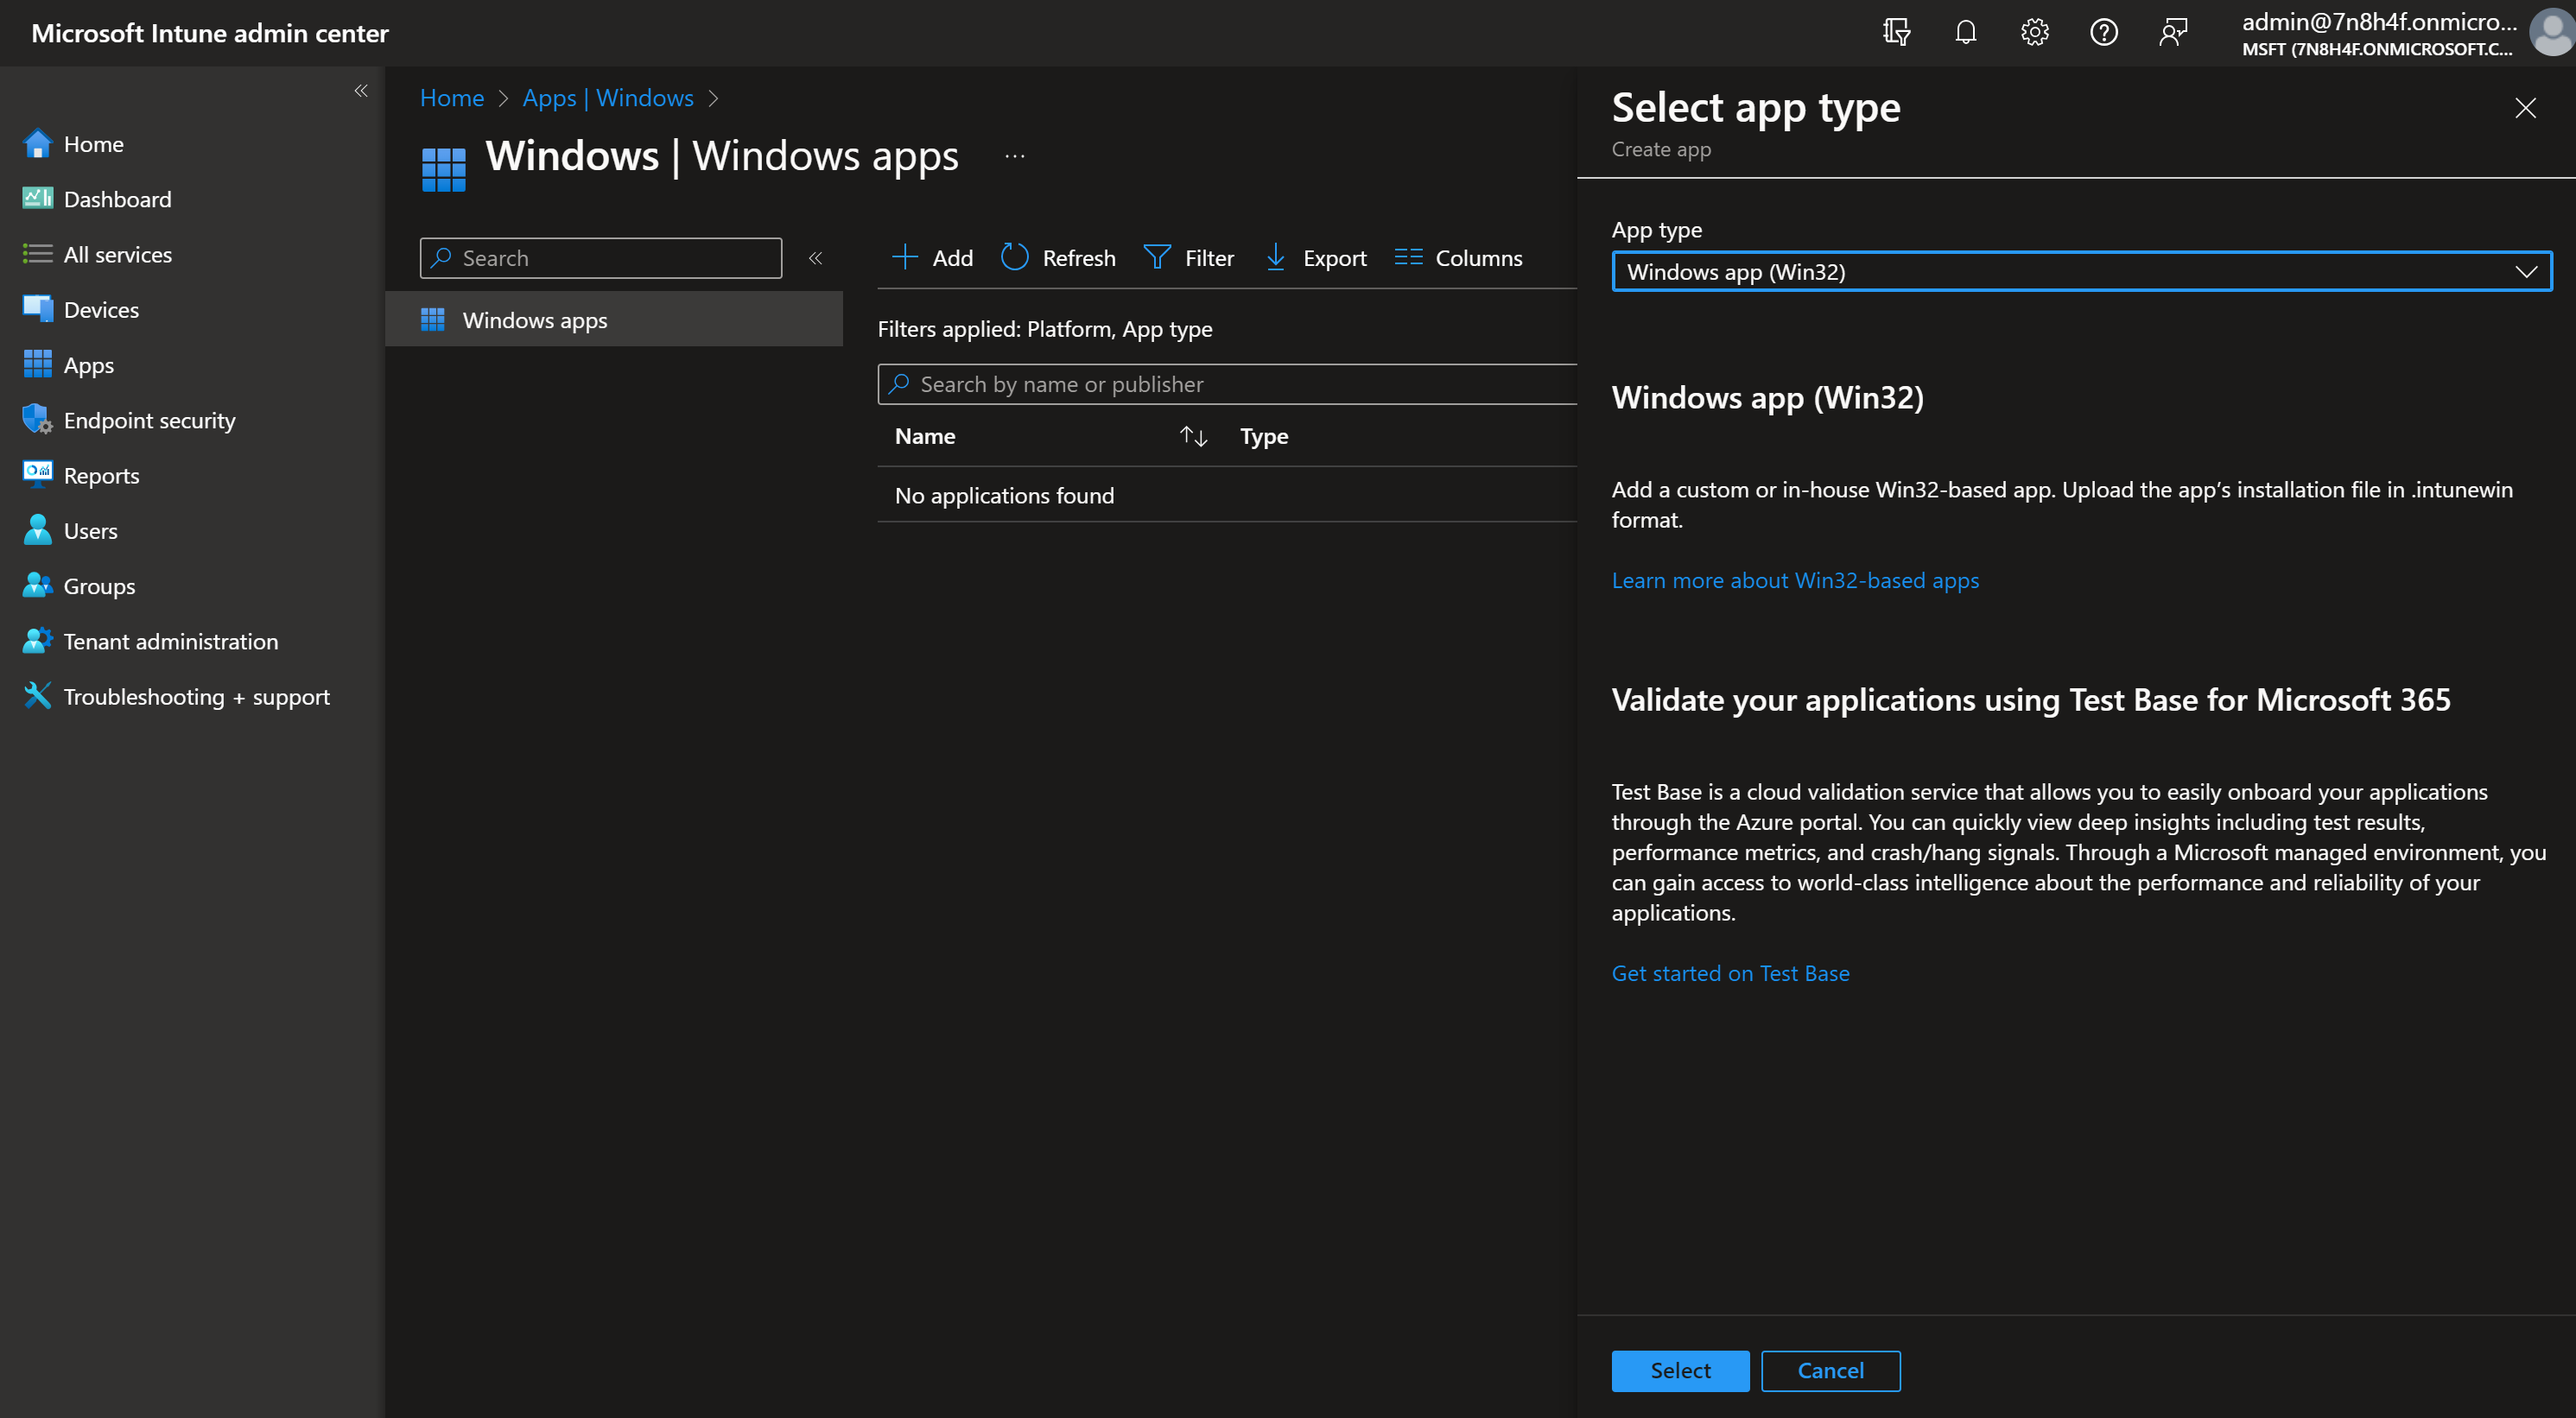
- Click on Add
- Chose App type Windows app (win32)
- Click on Select
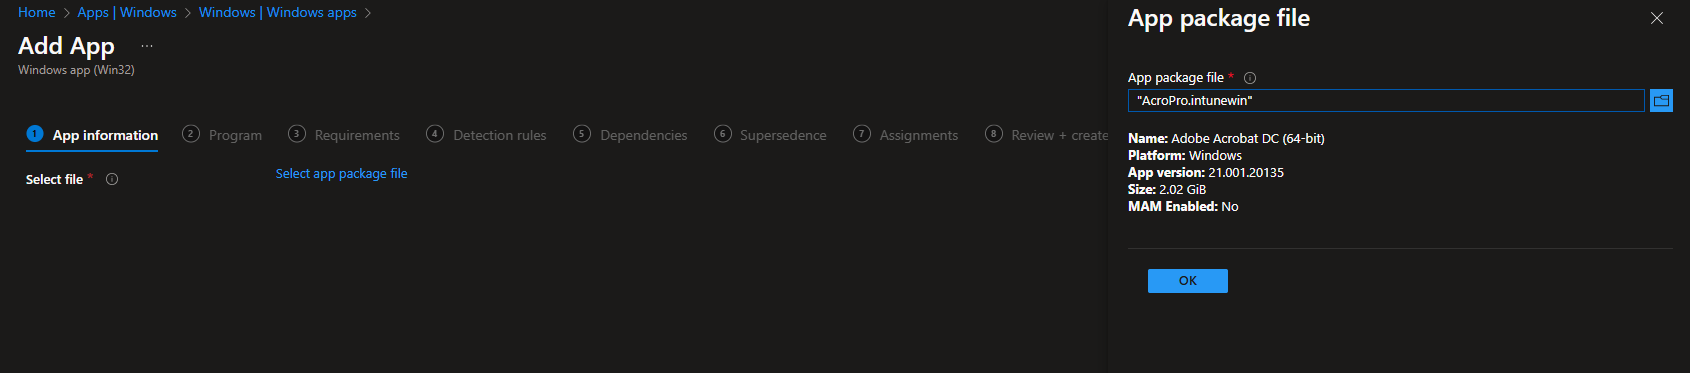
- Click on Select app package file
- Upload your IntuneWin file which is located in C:\Output
- Click on OK
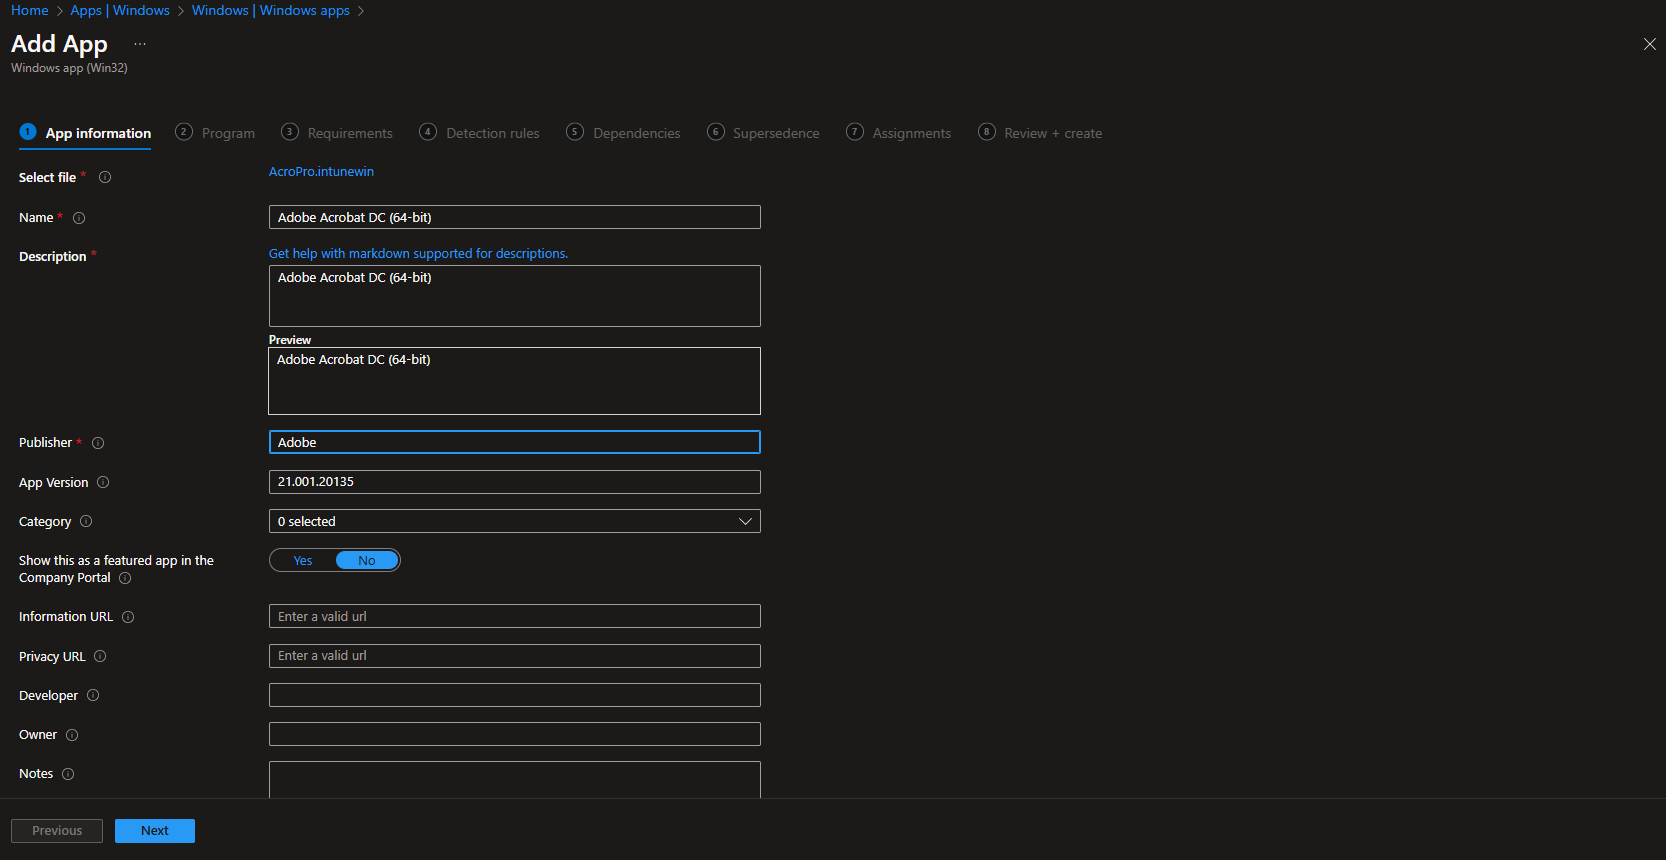
- Click on Next
- Here you can change the Settings. I leave it as it is. Dont forget to enter a Publisher
- Click on Next
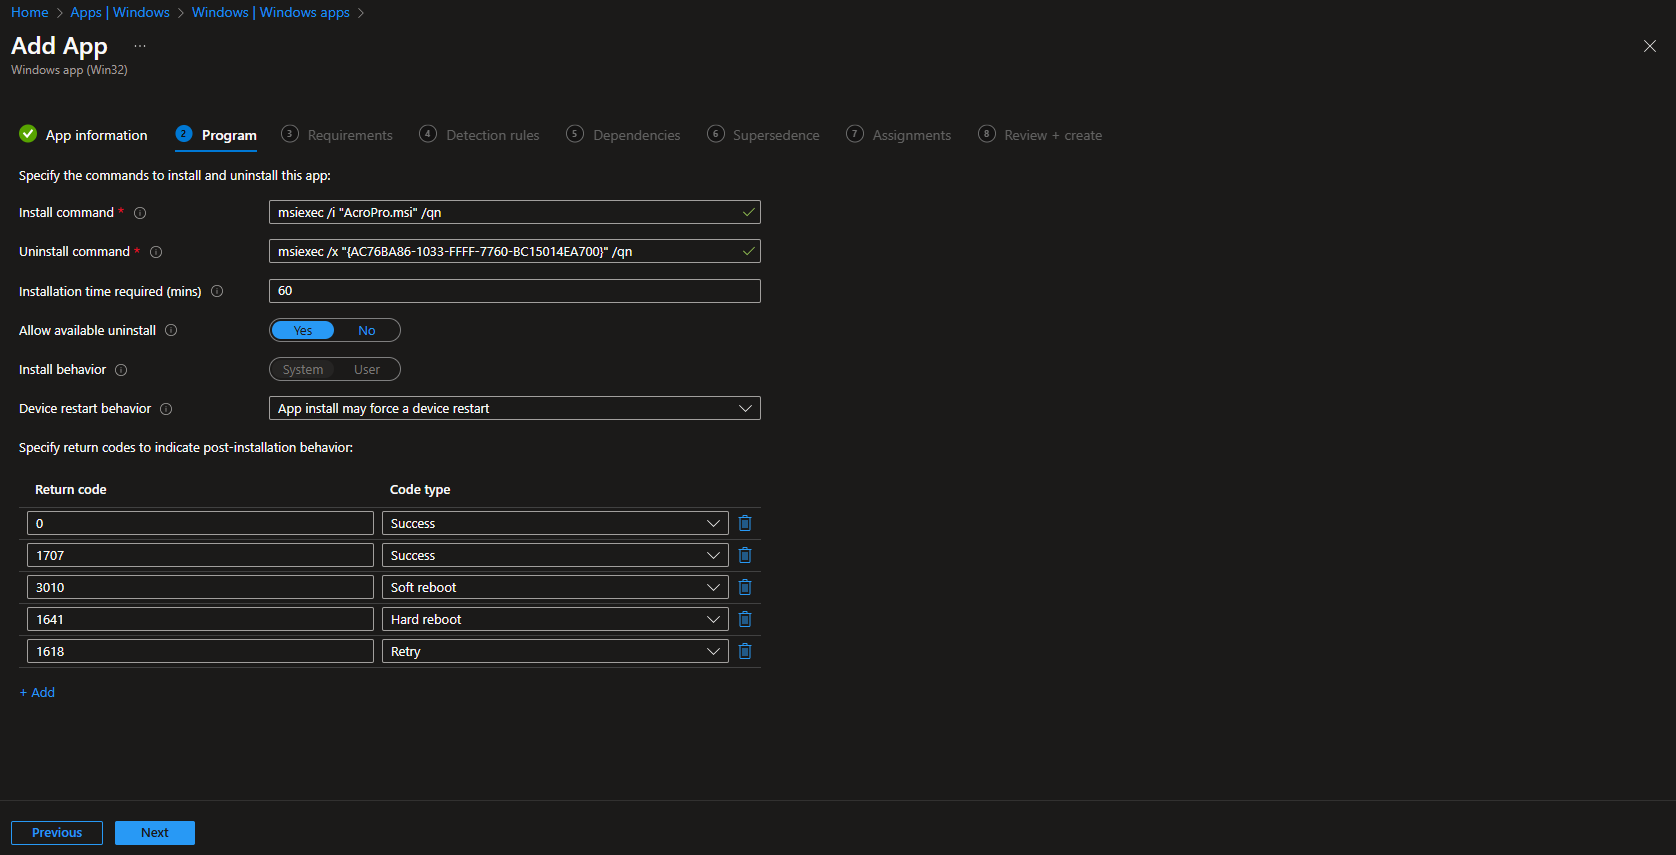
On the Program tab enter the following Commands:
- Install Command: Will be automatically filled out
- Uninstall command: Will be automatically filled out
- Allow available uninstall: Yes
- Install behavior: System
- Click on Next
On the Requirements tab enter:
- Operating system architecture: 64-bit
- Minimum operating system: Windows 10 1607
- Click on Next
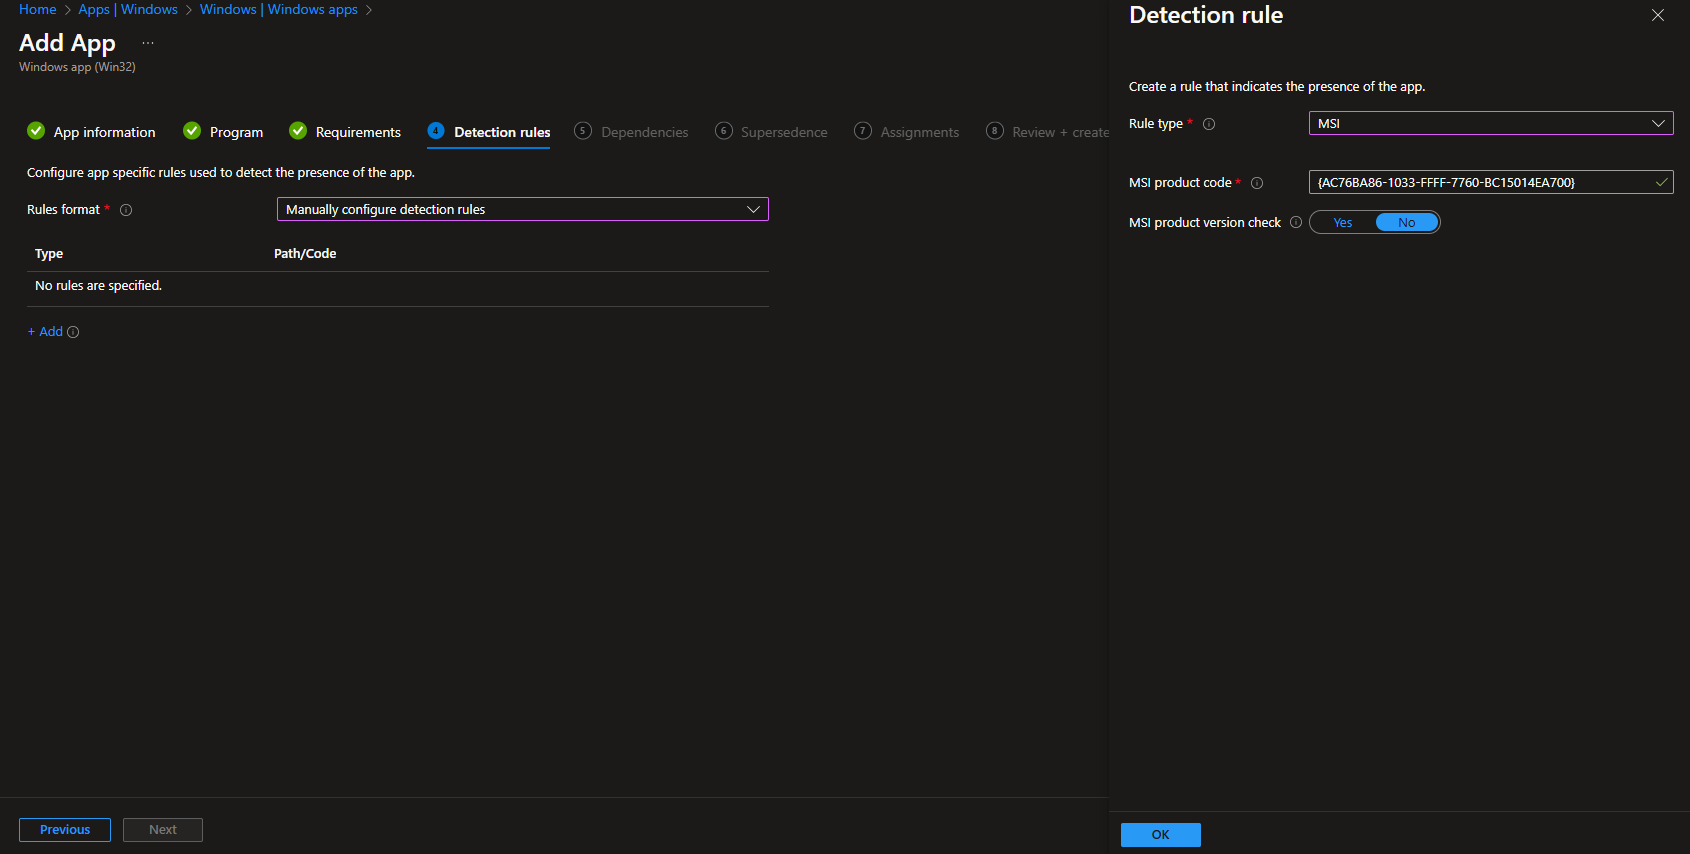
On the Detection rules tab enter the following:
- Rules format: Manually configure detection rules
- Click on Add
- Rule type: MSI
- MSI product code: Will be automatically filled out
- MSI product version check: No
- Define your Dependencies if applicable and click on Next
- Define your Supersedence if applicable and click on Next
- On the Assignments tab assign the Policy to a Group or to All User / All Devices
- Click on Next
- And Review + Create the Policy
Congratulations! You have successfully deployed the application.
Conclusion
In this blog post we Learn about How to deploy Adobe Acrobat Pro with Microsoft Intune. In the first step, we created a new Package on the Adobe Admin Console. Next, we downloaded and extracted the zip folder. With the Intune Win App Util we created a new Win32 Intune Win App. Last we created a new Application on the Microsoft Intune Portal and deployed it to our users. We hope this guide has provided you with valuable insights to improve your device management strategy. Did you enjoy this article? Dont forget to follow us and share this article. If you have any questions or need further assistance, feel free to reach out or leave a comment below.


hello could you share the msi.