Welcome to our latest blog post on How to deploy BGInfo with Microsoft Intune. In this article, we’ll explore the best practices for deploying BGInfo, helping you to get the most out of Microsoft Intune. Whether you’re new to Intune or looking to enhance your existing setup, these tips will guide you toward a more secure and efficient management experience.
Table of Contents
What are we going to set up?
In this Blog post we will show you, How to deploy BGInfo with Microsoft Intune. We will perform the following steps to deploy BGInfo:
- Step 1: Download BGInfo application
- Step 2: Create BGInfo Configuration file
- Step 3: Create Install and Uninstall Scripts
- Step 4: Create Intune Win32 application
- Step 5: Import and deploy with Microsoft Intune
How to deploy BGInfo with Microsoft Intune
Step 1: Download BGInfo application
The first step is to download the BGInfo application from the official Microsoft documentation website. Once you have downloaded the application, you can proceed to the next step.
- Go to https://learn.microsoft.com/en-us/sysinternals/downloads/bginfo
- Click on Download BGInfo
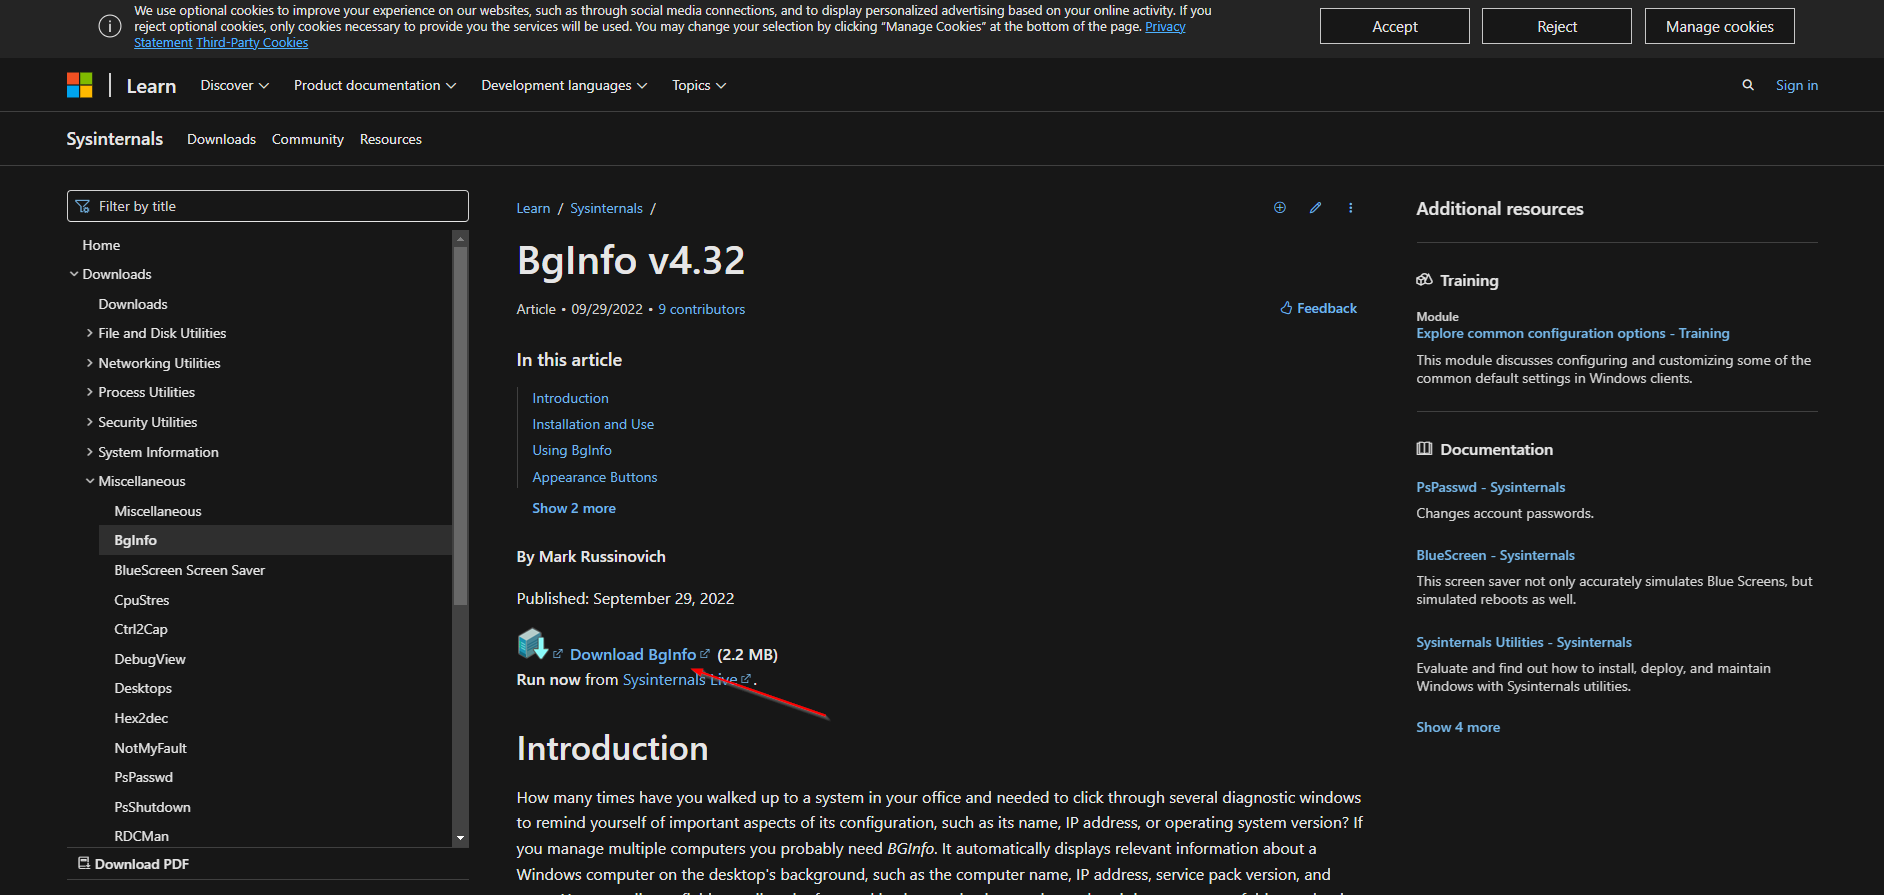
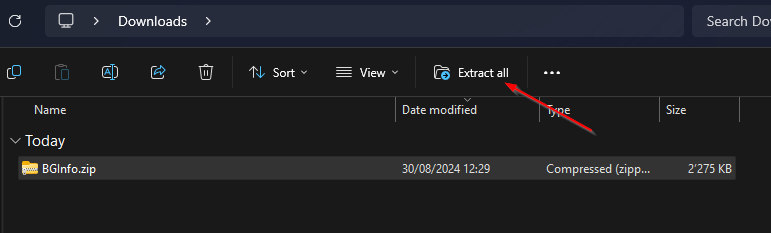
Now you should have the BGInfo application in your Downloads folder.
- Now unzip the file.
Step 2: Create BGInfo Configuration file
In the previous step we downloaded the official application. In this step we will have to create the BGInfo Configuration. I wont explane every detail and every configuraiton of the BGInfo application. If you need some guidences go to the official documentation https://learn.microsoft.com/en-us/sysinternals/downloads/bginfo. I will just do some basic configurations, just follow the steps.
- Open the application Bginfo.exe / Bginfo64.exe.
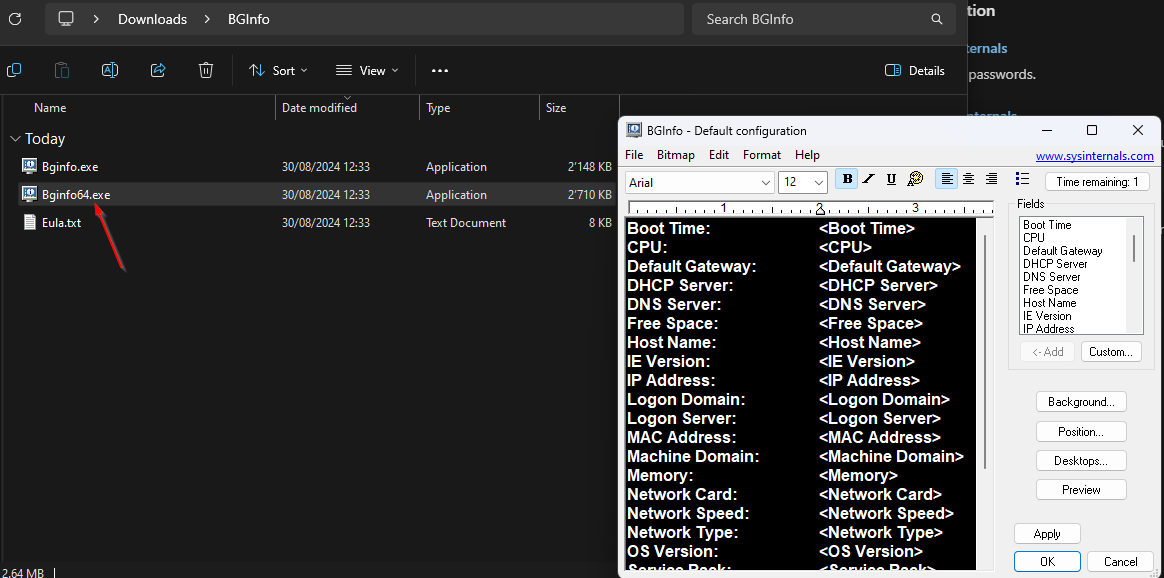
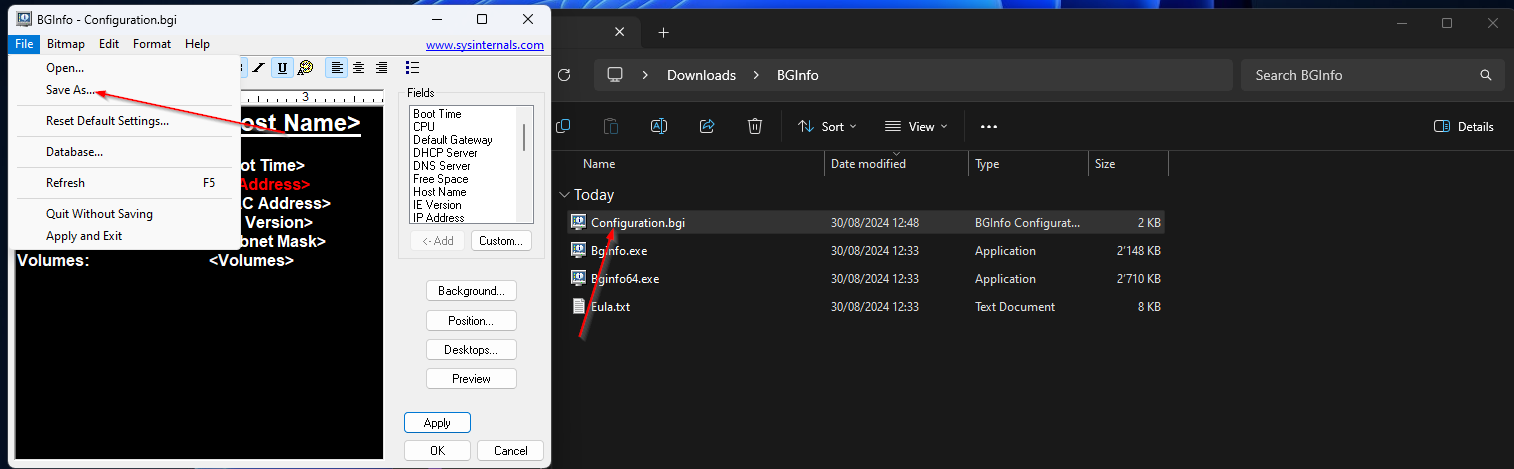
Here you can adjust the parameters you want to display. I’m just going to delete a few simple fields here and adjust the size. If you want, you can also make complex adjustments. This is customizable for everyone as much as you want. The adjustments are also displayed directly on your PC. In the end you have something like this, for example.
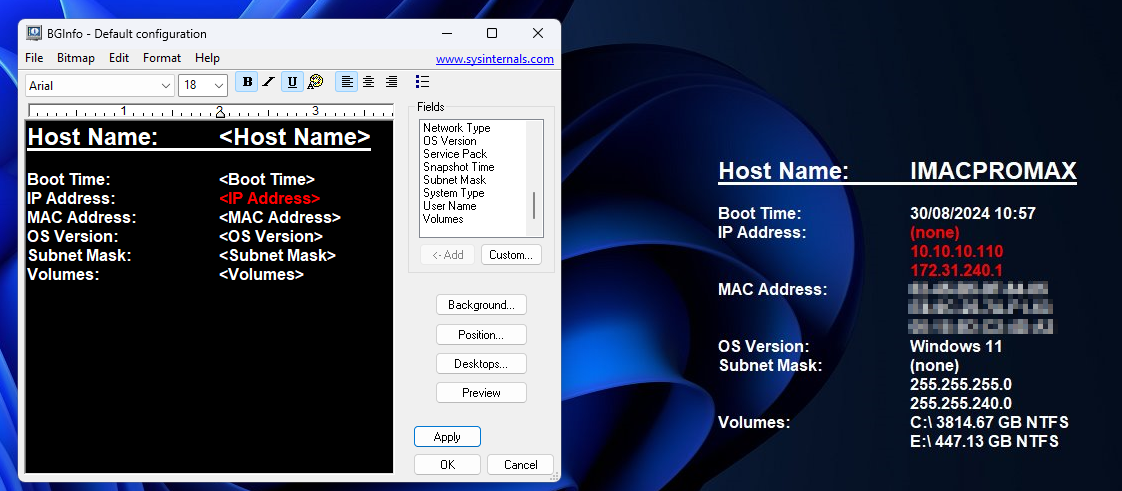
When you have completed the configuration as you want it, we will export the configuration. Simply follow the following steps.
- In the BGInfo application click on File > Save as
- Save the Configuration in the Same folder where the application is.
Step 3: Create Install and Uninstall Scripts
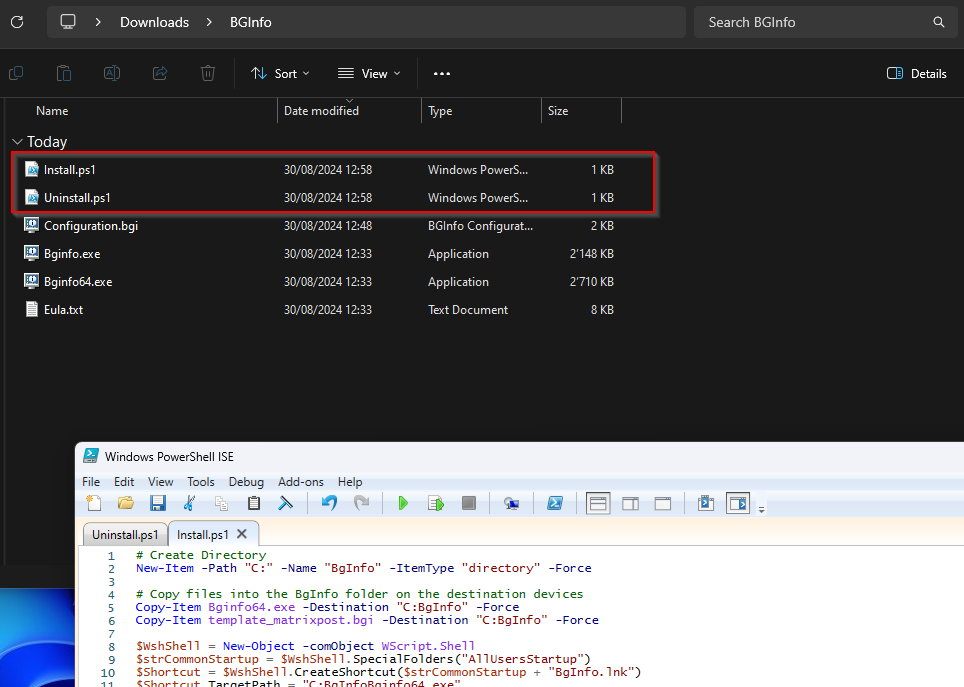
In addition to the application and configuration, we also have to create two PowerShell scripts (Install and Uninstall). Just follow the steps here.
- Create a new PowerShell Script with the following script below.
- Name it Install.ps1
- Save it in the same folder as the application and configuration from step 2.
# Create Directory
New-Item -Path "C:" -Name "BgInfo" -ItemType "directory" -Force

# Copy files into the BgInfo folder on the destination devices
Copy-Item Bginfo64.exe -Destination "C:BgInfo" -Force
Copy-Item template_matrixpost.bgi -Destination "C:BgInfo" -Force

$WshShell = New-Object -comObject WScript.Shell
$strCommonStartup = $WshShell.SpecialFolders("AllUsersStartup")
$Shortcut = $WshShell.CreateShortcut($strCommonStartup + "BgInfo.lnk")
$Shortcut.TargetPath = "C:BgInfoBginfo64.exe"
$Shortcut.Arguments = "C:BgInfotemplate_matrixpost.bgi /SILENT /TIMER:0 /NOLICPROMPT"
$Shortcut.Save()

# Return optional a status code if installation was successfully
# Determine if BgInfo is successfully installed
$BgInfoIsInstalled = Test-Path -Path "C:BgInfoBginfo64.exe"

if($BgInfoIsInstalled)
 {
    write-output "BgInfo successfully installed"
    exit 0
 }
   else
 {
    write-output "Some issues occured when installing BgInfo"
    exit 1
 }
Now the second script.
- Create a new PowerShell Script with the following script below.
- Name it Uninstall.ps1
- Save it in the same folder as the application and configuration from step 2.
# Remove Directory along with Files
Remove-Item -LiteralPath "C:BgInfo" -Force -Recurse

# Determine Shortcut (symbolic link) path using Windows Script Host (WSH)
$WshShell = New-Object -comObject WScript.Shell
$strCommonStartup = $WshShell.SpecialFolders("AllUsersStartup")
$strShortcut = $strCommonStartup + "BgInfo.lnk"

# Remove Shortcut using PowerShell's Remove-Item cmdlet
Remove-Item -Path $strShortcut -Force


# Return optional a status code if uninstalling was successfully
# Determine if BgInfo is still installed
$BgInfoIsInstalled = Test-Path -Path "C:BgInfoBginfo64.exe"

if($BgInfoIsInstalled)
 {
    write-output "BgInfo not successfully uninstalled"
    exit 1
 }
   else
 {
    write-output "BgInfo successfully uninstalled"
    exit 0
 }
It should look something like this.
Step 4: Create Intune Win32 application
In this step we will prepare the application to roll out with Intune. Before this step, check that you have all files together in one folder. Then you can follow the steps below.
- Download the official Microsoft Intune Win App Tool
- After installation open the Intune Win App Tool.
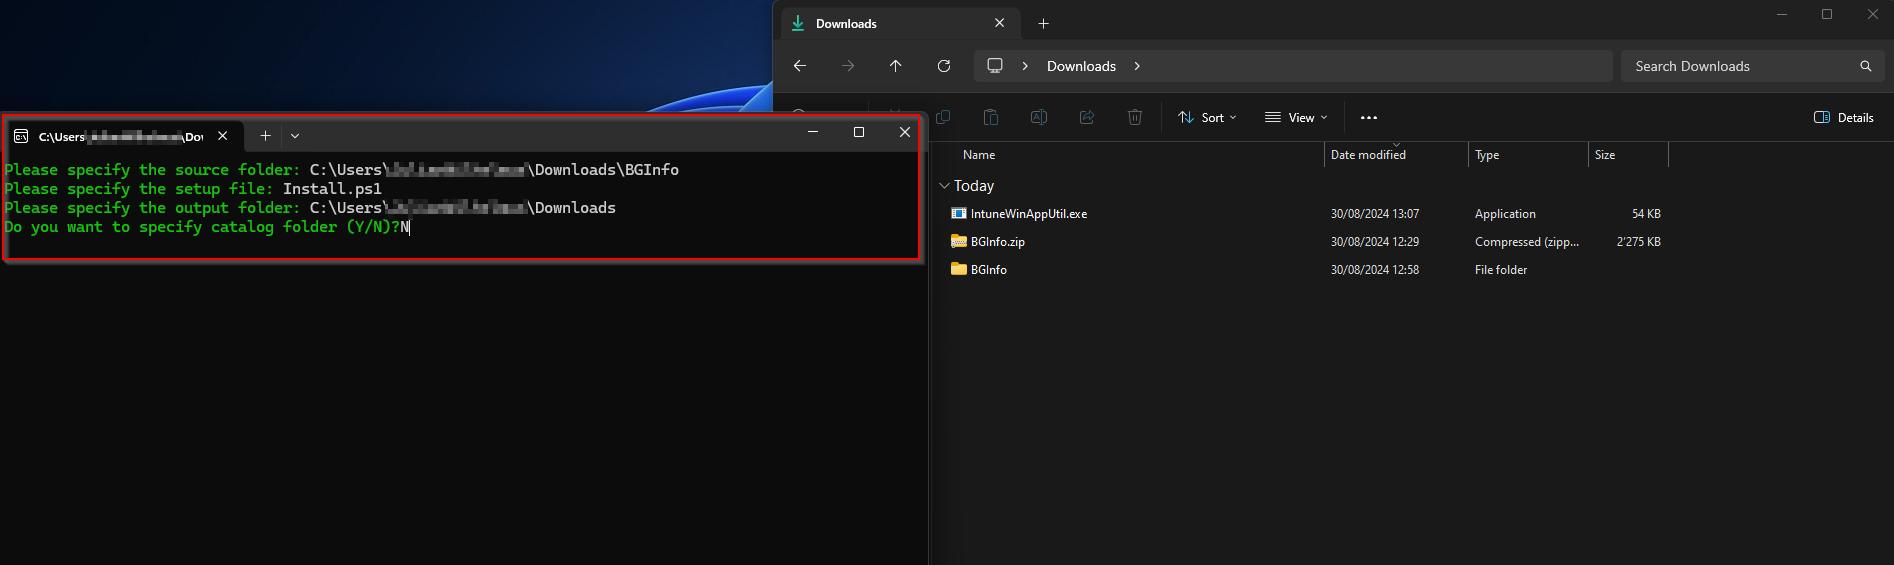
In the application specify the following things:
- Please specify the source folder: C:\Users\User1\Downloads\BGInfo [This is the folder where all the files are stored]
- Please specify the setup file: Install.ps1
- Please specify the output folder: C:\Users\User1\Downloads\ [Just specify the Downloads folder here]
- Do you want to specify catalog folder: N
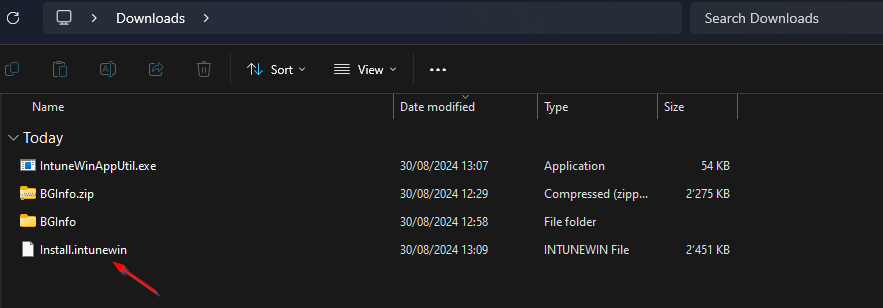
Now you have a new Intunewin file in the Downloads order. We will upload these in the next step.
Step 5: Import and deploy with Microsoft Intune
After we have created the intunewin file of the executable, we can now upload the application to Microsoft Intune and deploy it to our environment. Just follow these steps.
- Go to intune.microsoft.com
- Click on Apps
- Click on Windows
- Click on Add
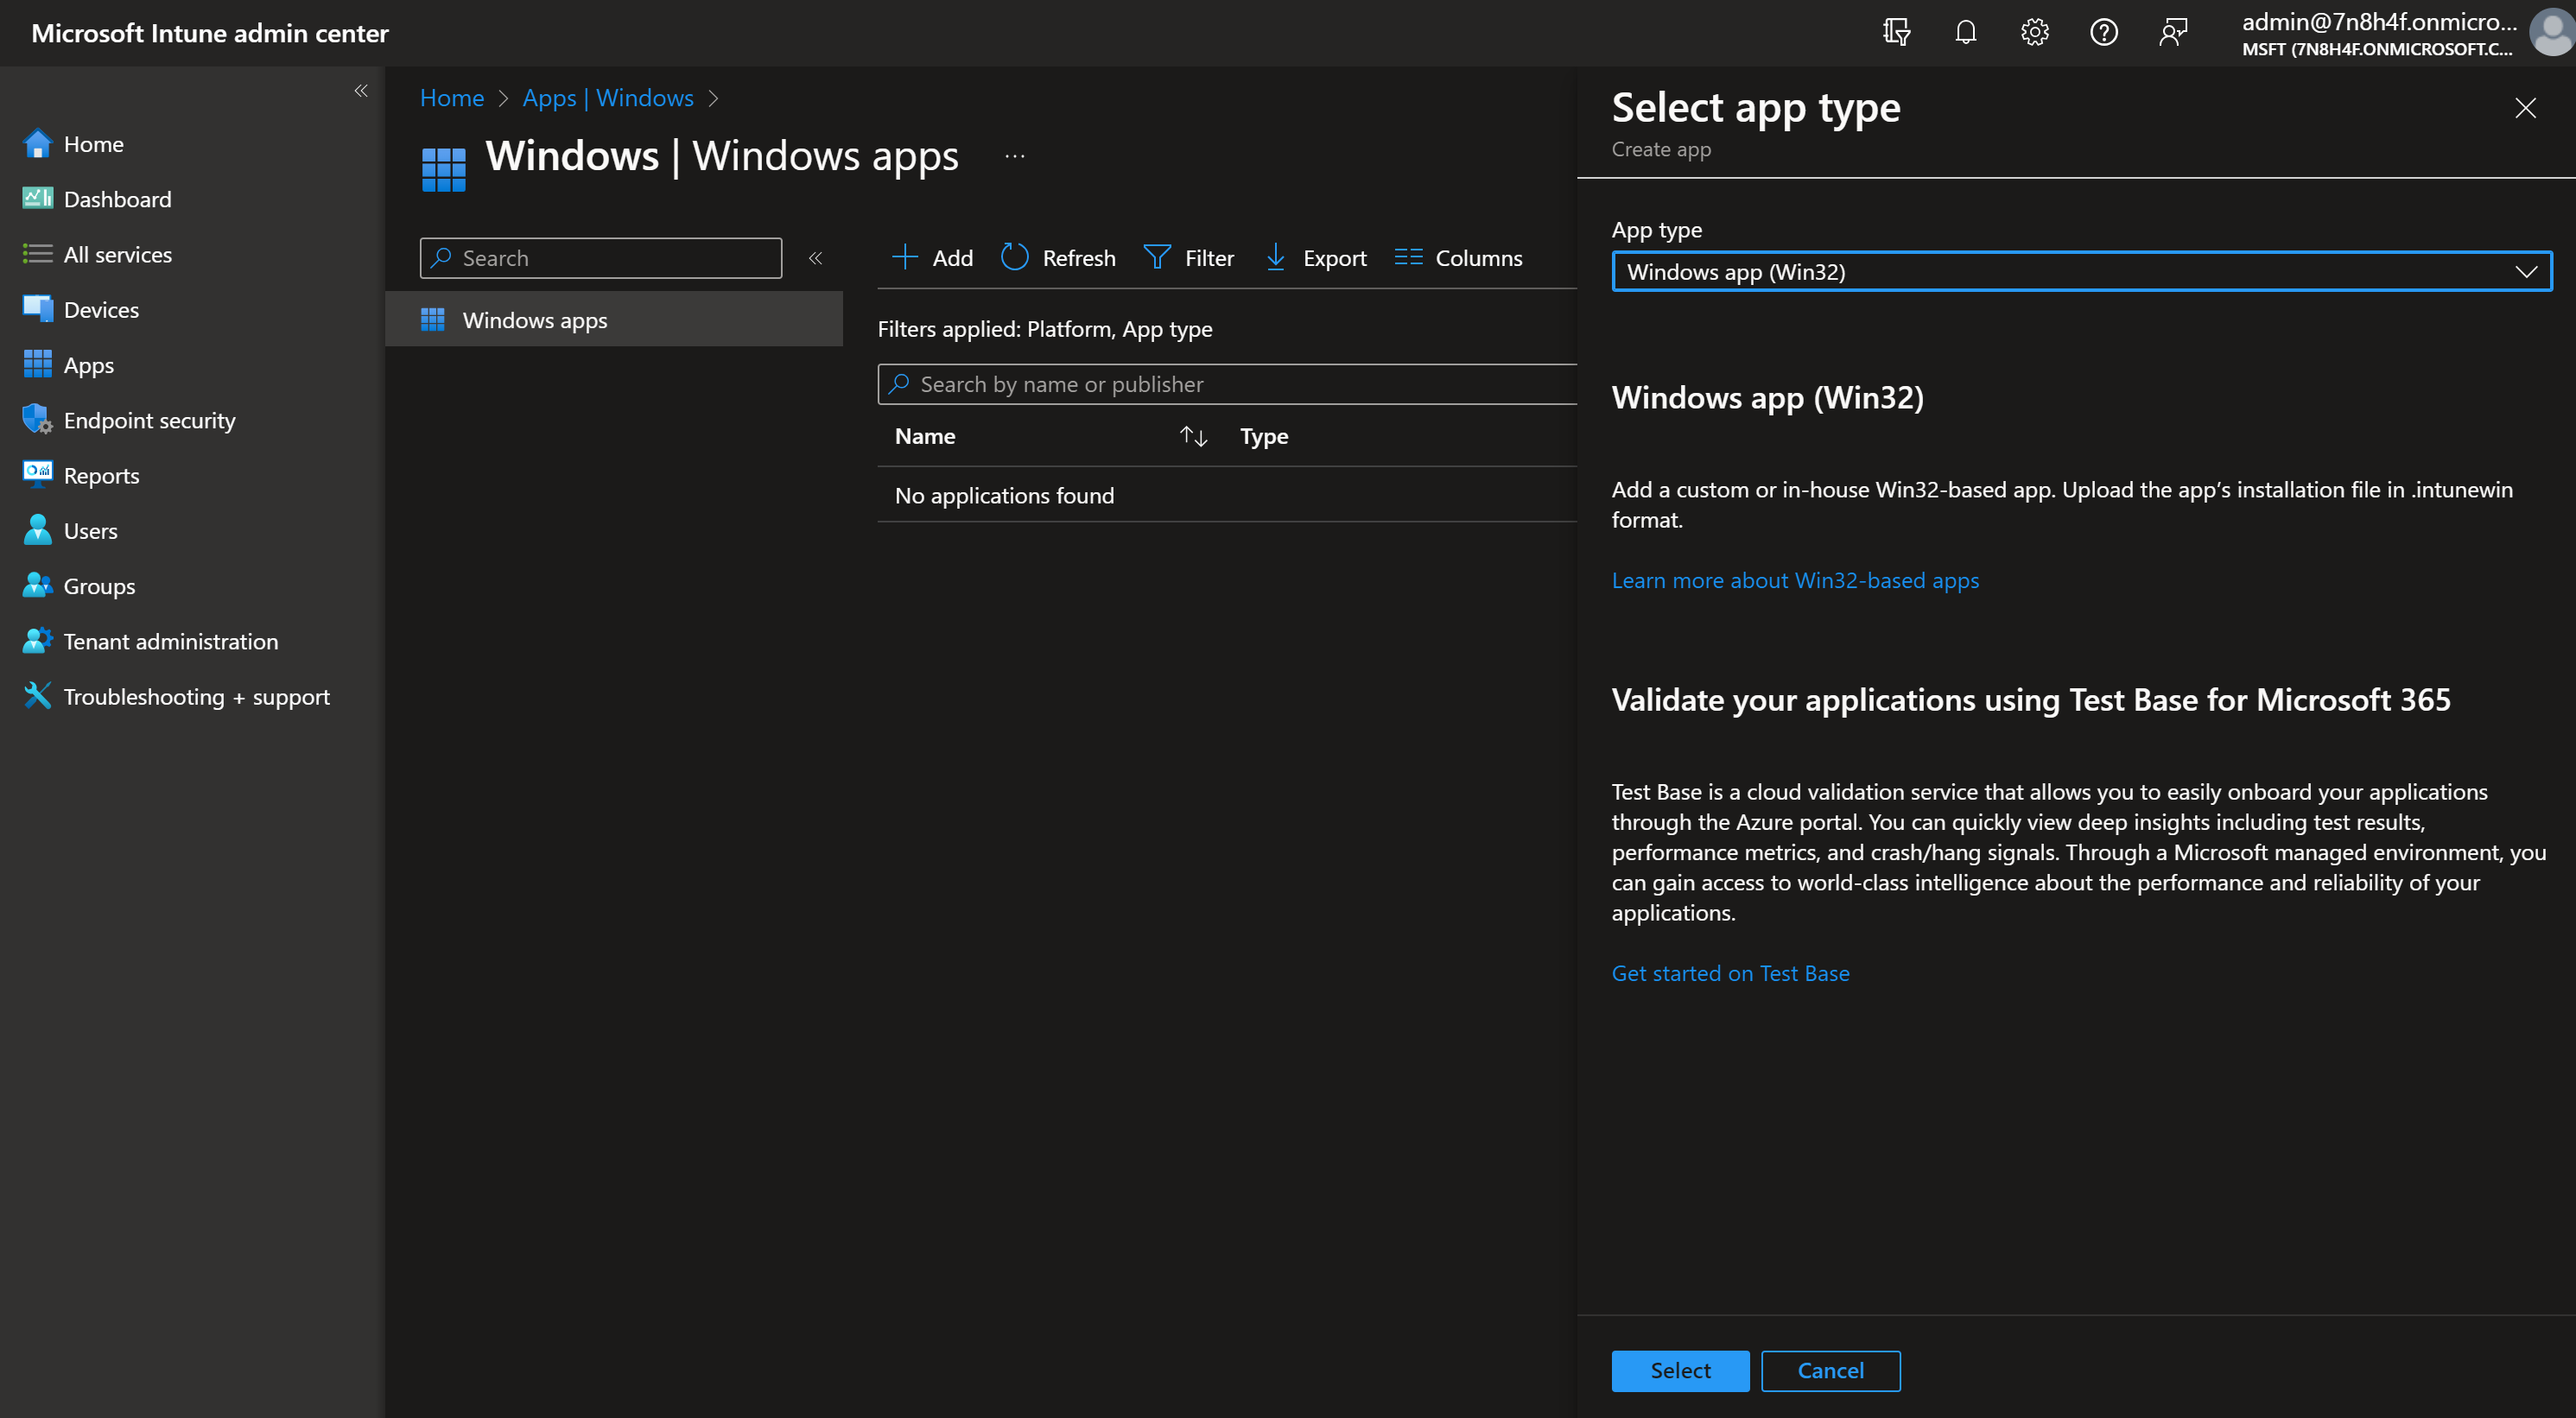
- Chose App type Windows app (win32)
- Click on Select
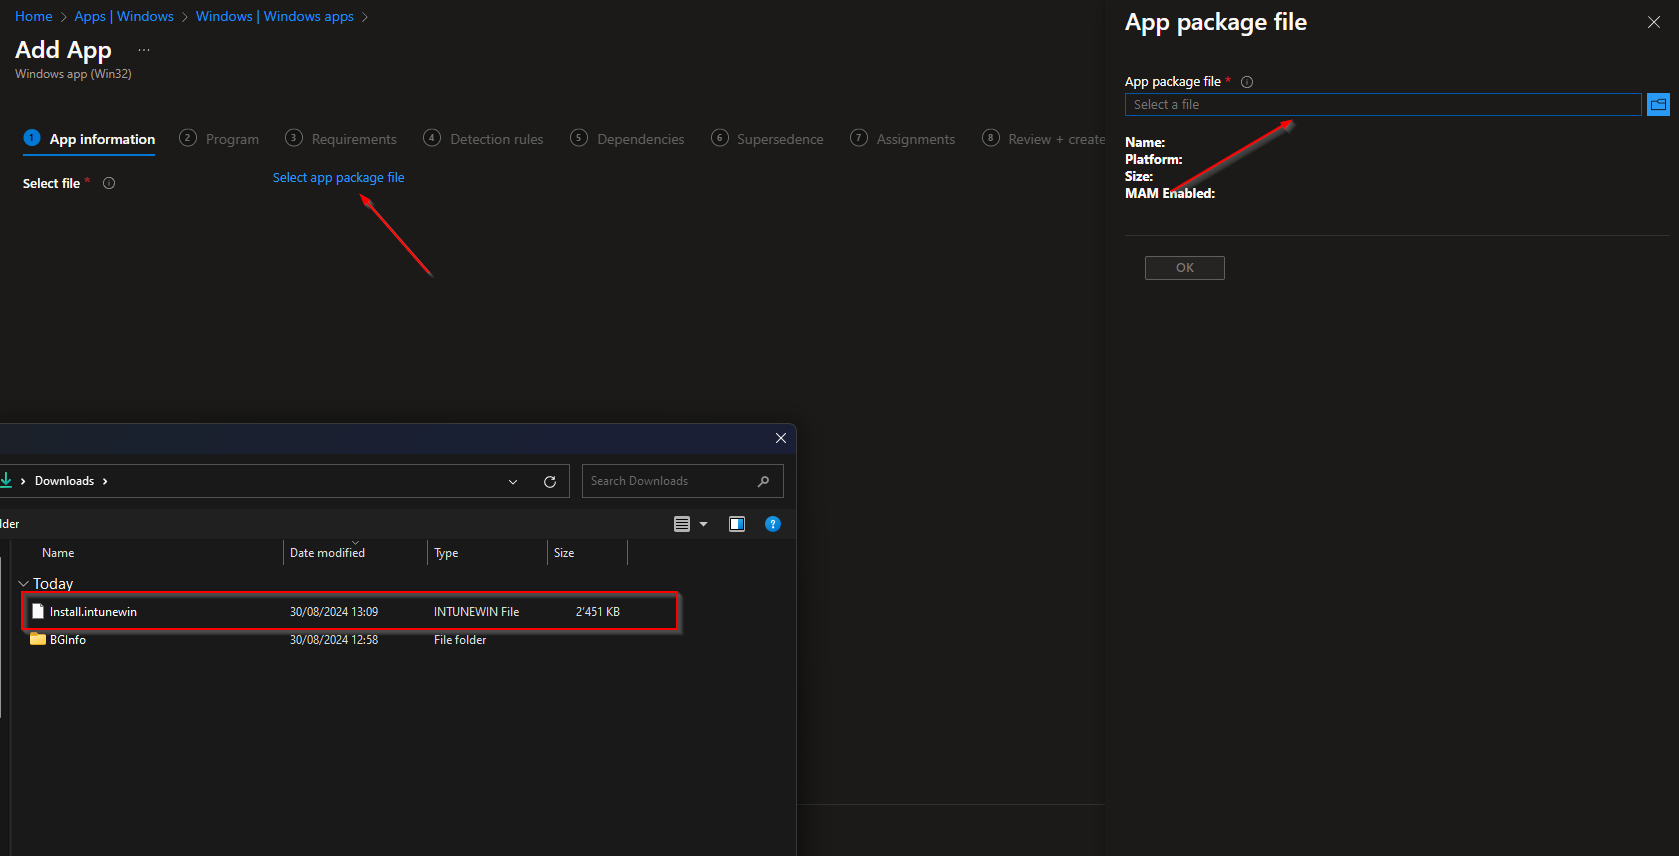
- Click on Select app package file
- Upload your IntuneWin file which is located in your Downloads folder
- Click on OK
- Click on Next
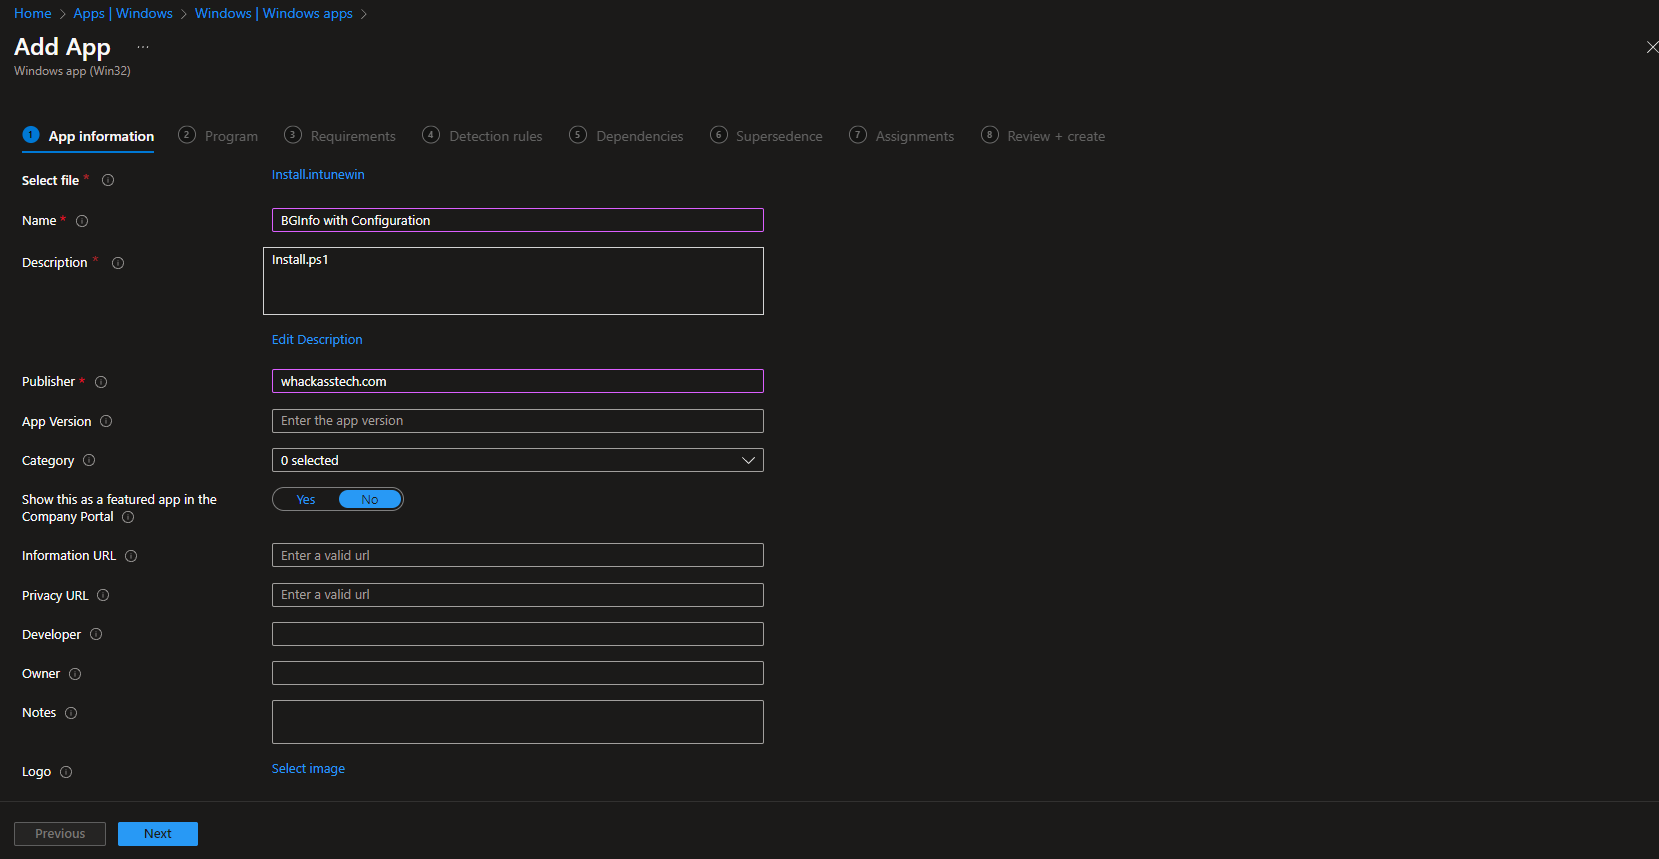
- Here you can change the Settings. I leave it as it is. Dont forget to enter a Publisher
- Click on Next
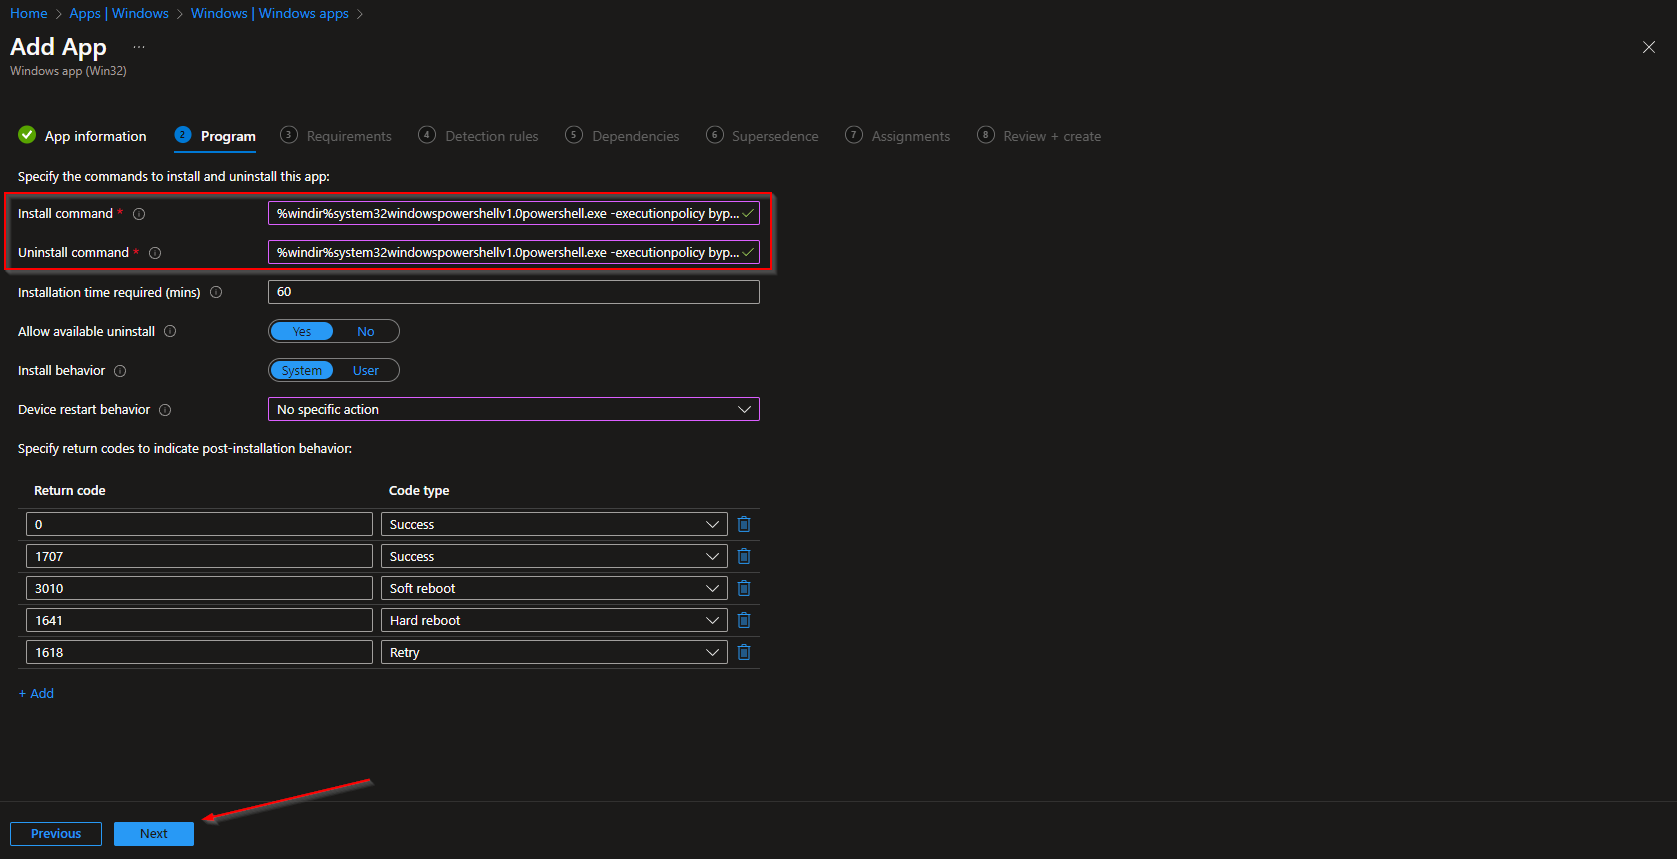
On the Program tab enter the following Commands:
- Install Command: %windir%system32windowspowershellv1.0powershell.exe -executionpolicy bypass -file “Install.ps1”
- Uninstall command: %windir%system32windowspowershellv1.0powershell.exe -executionpolicy bypass -file “Uninstall.ps1”
- Allow available uninstall: Yes
- Install behavior: System
- Click on Next
On the Requirements tab enter:
- Operating system architecture: 32-bit / 64-bit
- Minimum operating system: Windows 10 1607
- Click on Next
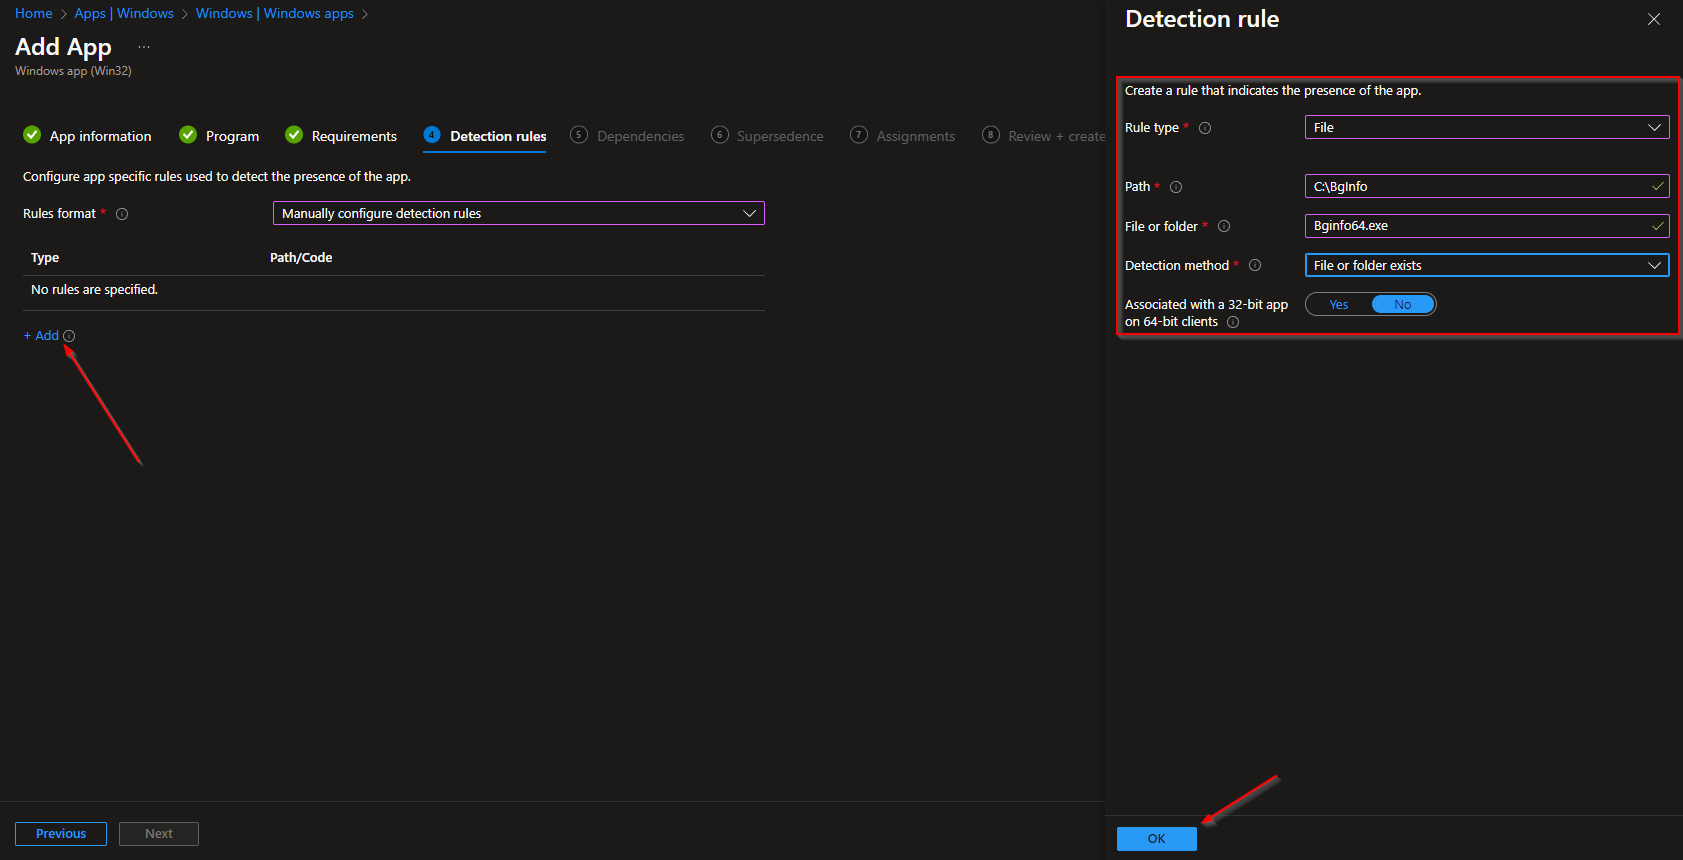
On the Detection rules tab enter the following:
- Rules format: Manually configure detection rules
- Click on Add
- Rule type: File
- Path: C:\BgInfo
- File or Folder: Bginfo64.exe
- Detection method: File or folder exists
- Associated with a 32-bit app on 64-bit clients: No
- Click on Ok and on Next
- Define your Dependencies if applicable and click on Next
- Define your Supersedence if applicable and click on Next
- On the Assignments tab assign the Policy to a Group or to All User
- Click on Next
- And Review + Create the Policy
Congratulations! You have successfully deployed the application.
Conclusion
You learned How to deploy BGInfo with Microsoft Intune. We first downloaded the BGInfo application and created a personal configuration. After, we created two powershell scripts and created a new Intune Win32 application. In the last step we uploaded the Intunewin application to Microsoft Intune.
We hope this guide has provided you with valuable insights to improve your device management strategy. Did you enjoy this article? Dont forget to follow us and share this article. If you have any questions or need further assistance, feel free to reach out or leave a comment below.


Hi Max,
Thank you for all Intune guides
but in this guide the install.ps1 & uninstall.ps1 in same content
Thanks for your notice. I changed the script for the install.ps1.
Hi,
i became a error in intune, when i the script is running on the client: File not found.
I must also edit the install and uninstall path, because your path is not working.
Can you check this article and steps, that is working at this time?
Regards
how to install it on shared pc ?
Tried this and it doesnt work
Tried this and it doesnt work