
How to deploy Universal Print printer with Microsoft Intune. Many organizations are moving their printer infrastructure to the cloud. Universal Print is a cloud-based printing solution in Microsoft 365. It uses built-in cloud printers, built-in legacy printers, and runs entirely in Microsoft Azure.
Using the settings catalog in Intune, you can create a printer policy, and deploy the policy to your managed users and devices. Then, on their devices, the printer will automatically be installed.
Table of Contents
What are we going to set up?
In this blog post we will show you, How to deploy Universal Print printer with Microsoft Intune. We are going to create a configuration profile in Intune and configure the Universal Print printer. Please make sure that you have already shared the Printers in the Universal Print dashboard to the affected users.

Create Configuration Profile
In this step we are going to create a configuration profile in Microsoft Intune and deploy the policy to the users or devices. Just follow these steps:
- Go to intune.microsoft.com
- Click on Devices
- Click on Windows
- Click on Configuration profiles
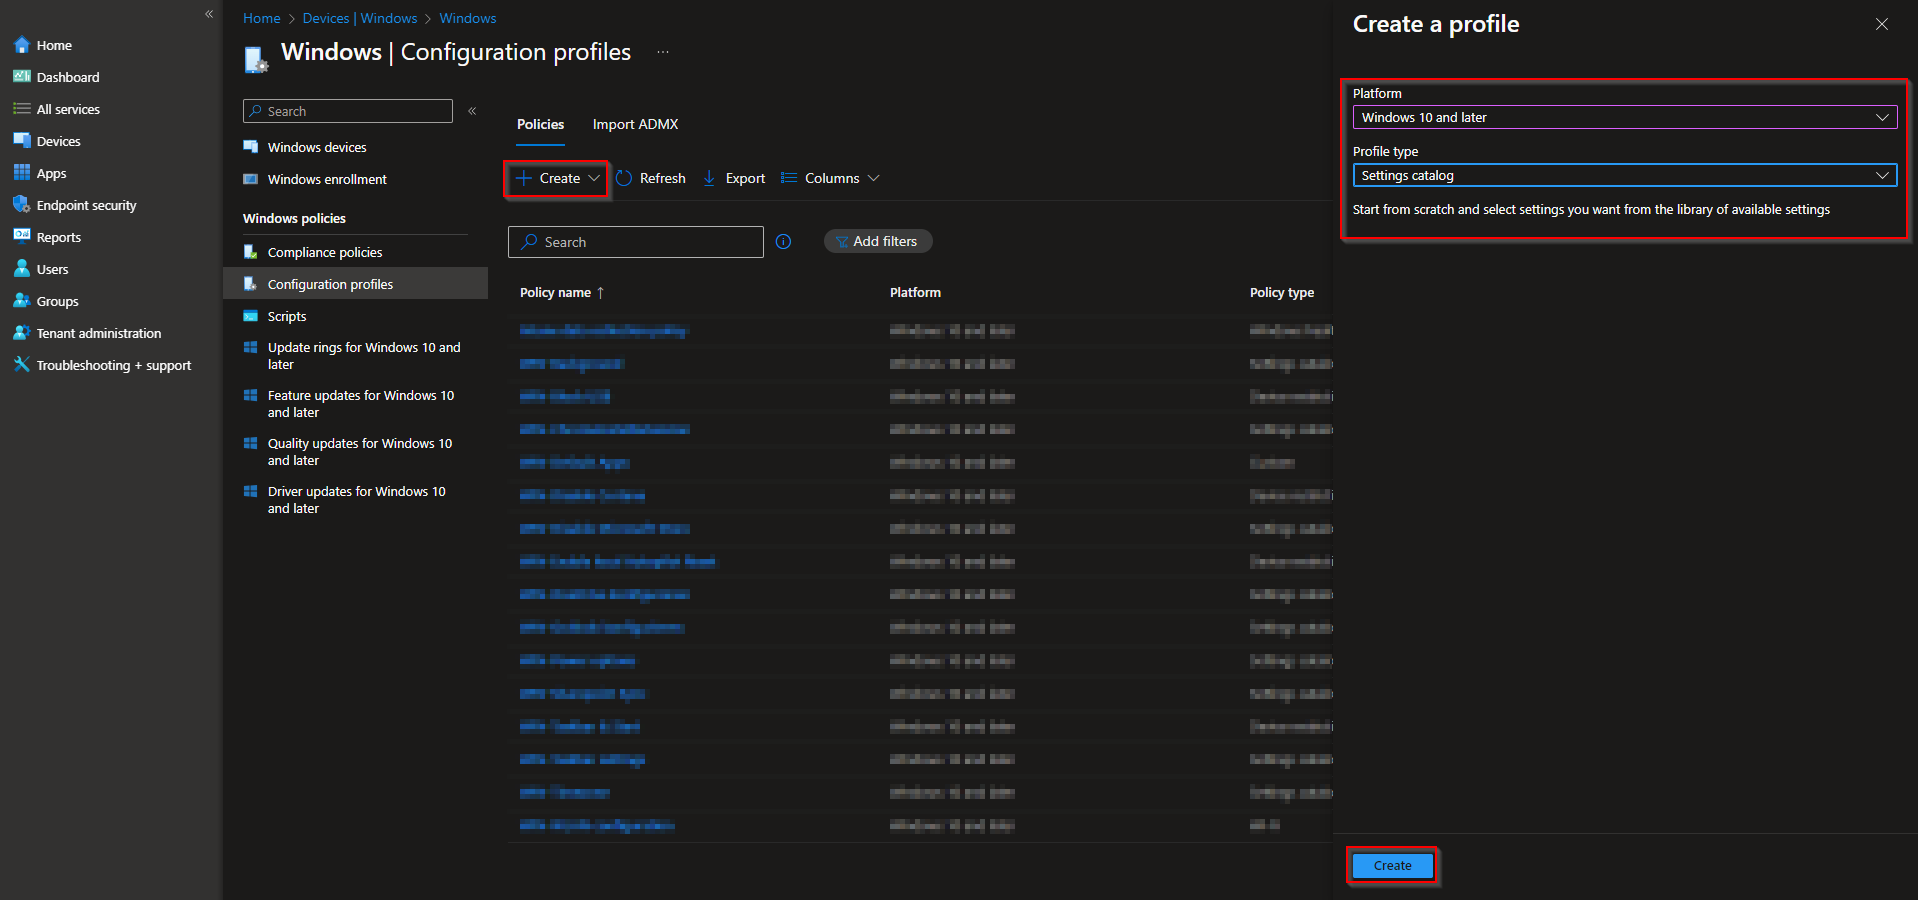
- Click on Create and New Policy
- Select the Platform Windows 10 and later
- Select the Profile type Settings catalog
- Click on Create
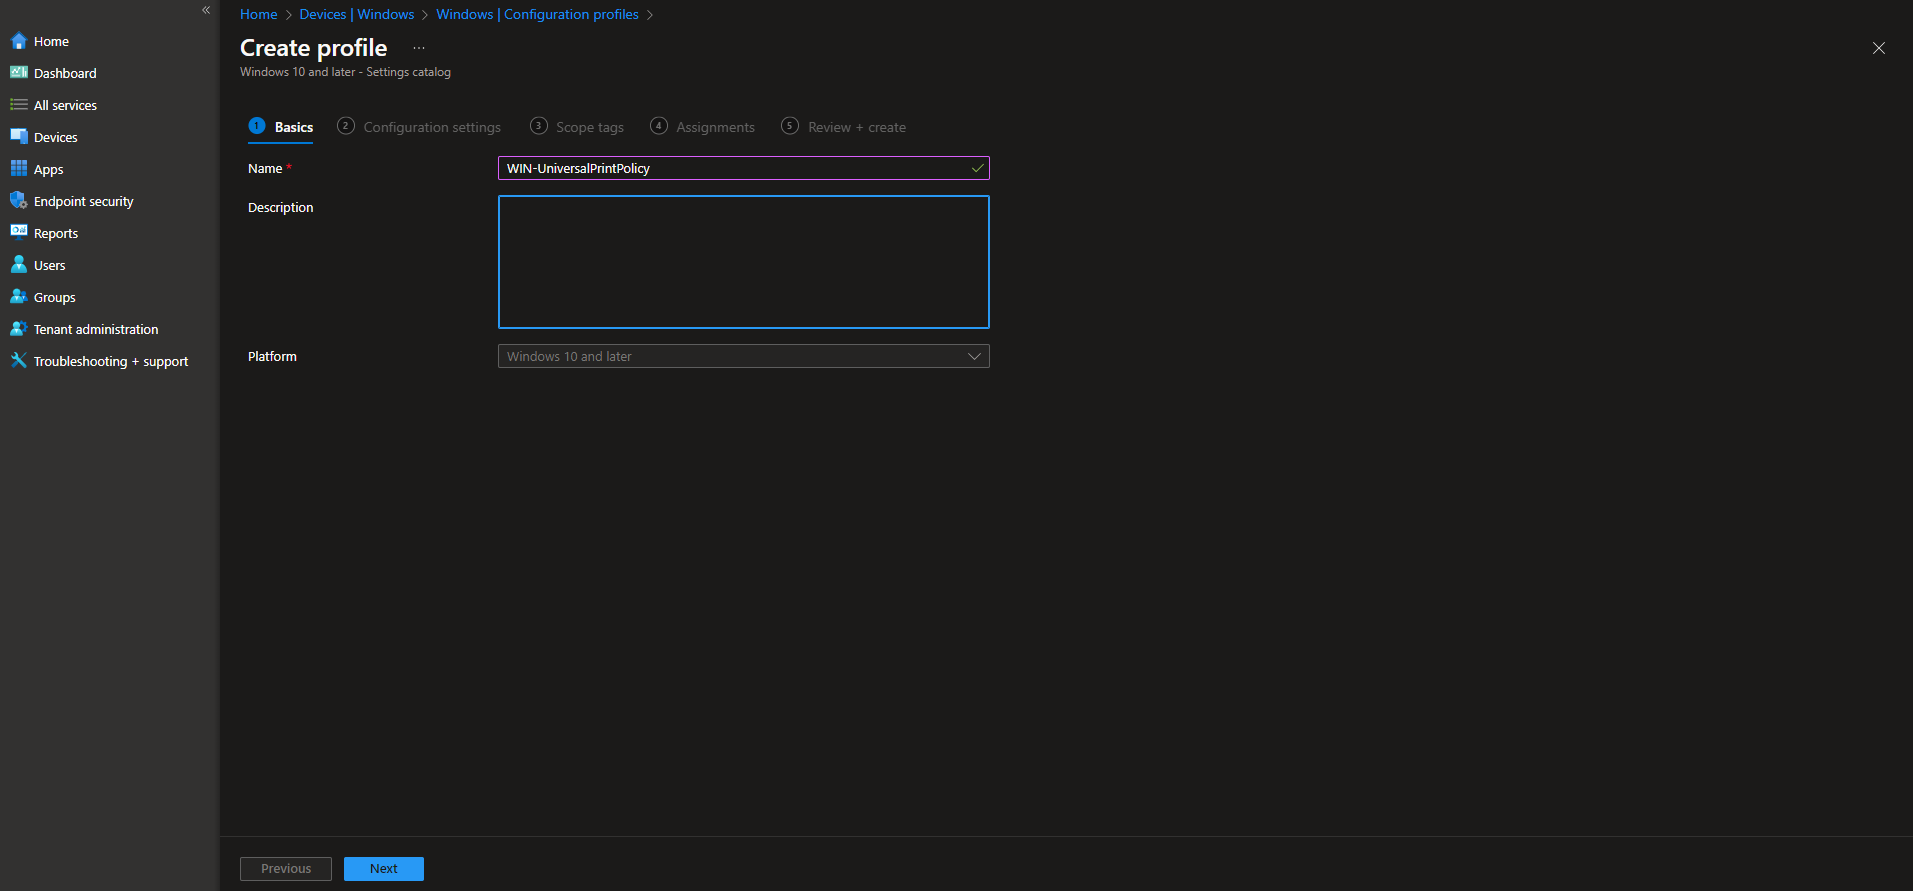
- Give a Name and Description (optional) to the profile.
- Click on Next
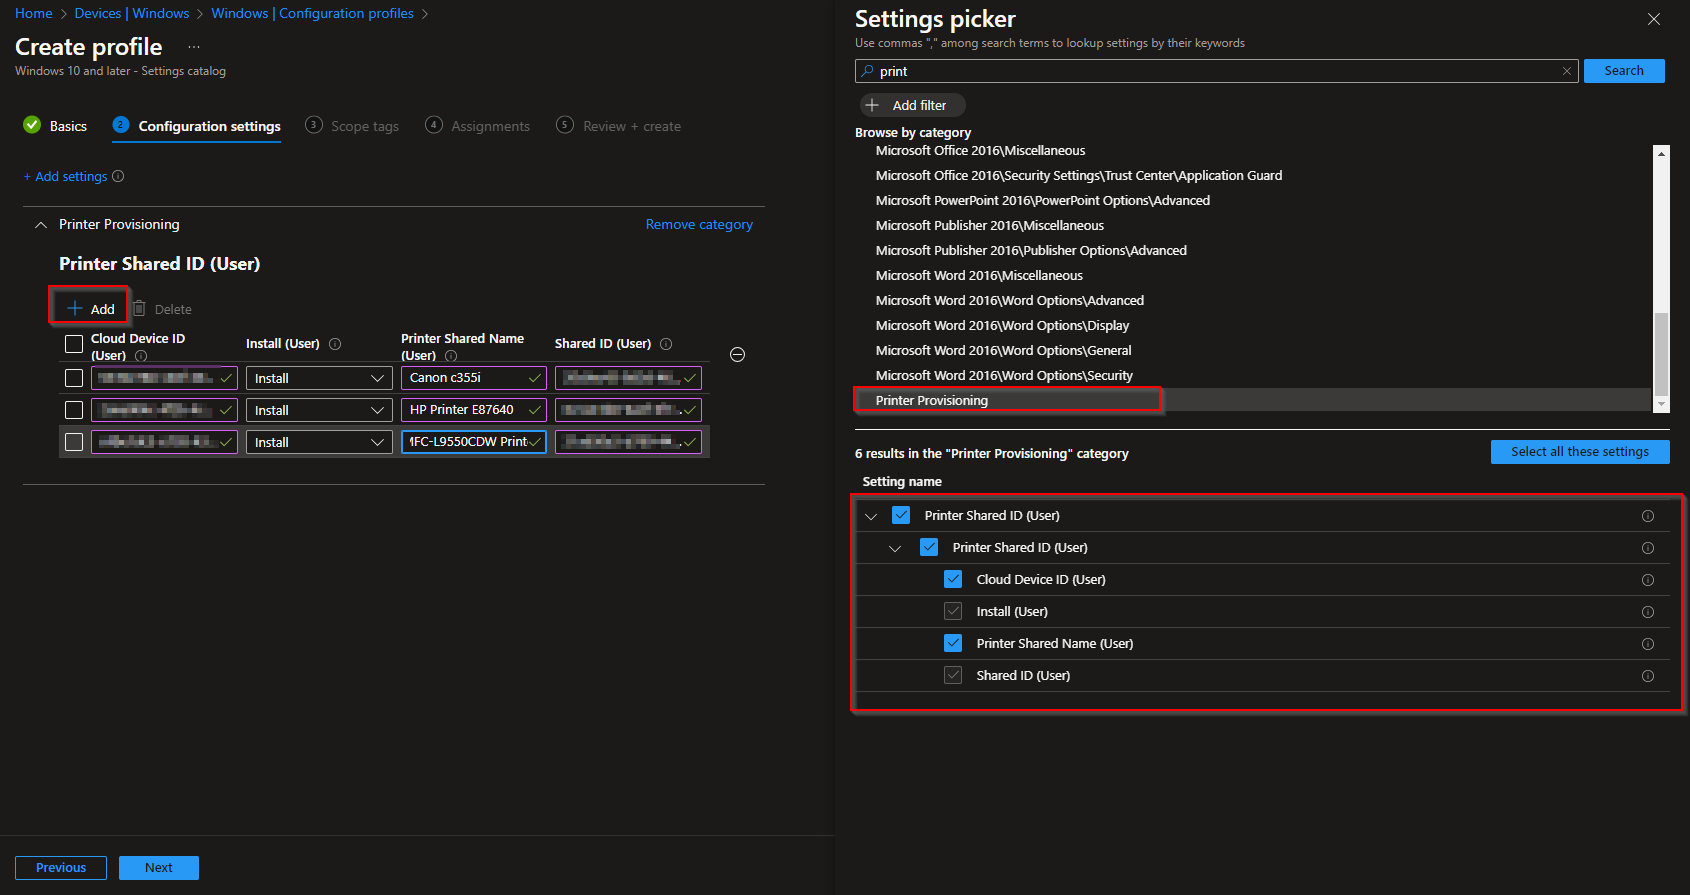
- Click on Add settings
- Search for print
- Click on Printer Provisioning
- Tick all Options you want to configure
- On the left site click on Add
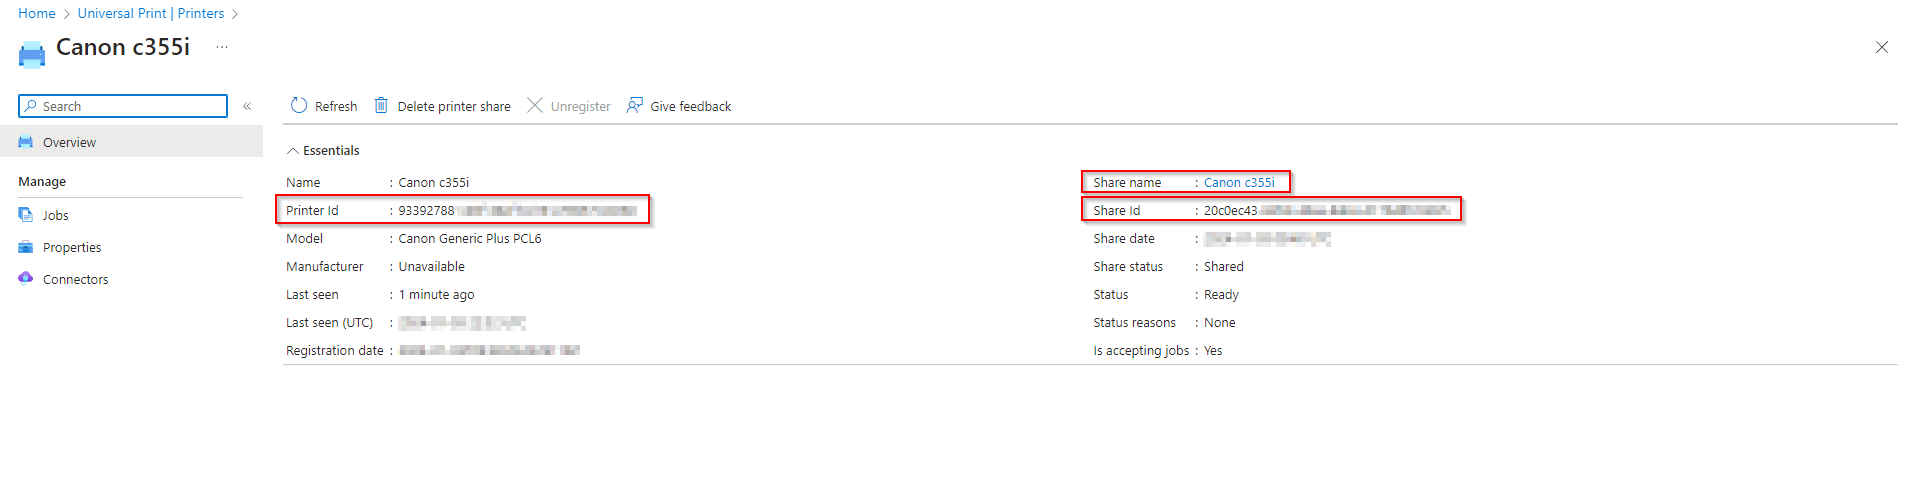
Now you need to get some informations from the Universal Print printer dashboard.
- Action: Select Install to install a printer. When users receive the policy, the printer will automatically install. Select Uninstall to uninstall a printer.
- Cloud Device ID: Enter the printer ID. This ID is created when the printer is registered in Microsoft Entra ID using the Universal Print service. To get the ID, use the Universal Print portal.
- Printer Shared ID: Enter the Shared ID of the printer. To get the ID, use the Universal Print portal.
- Printer Shared Name: Enter the Shared Name of the printer. To get the name, use the Universal Print portal.
- In the Scope tags tab, enter the scope when applicable. Click on Next.
- On the Assignments tab, add the groups or all users/devices. Click on Next.
- On the Review + create tab click on Create
Congratulations! You have successfully deployed the policy.
Conclusion
You learned how to deploy a Universal Print printer with Microsoft Intune. We created a configuration profile and added the Universal Print printer.
Did you enjoy this article? Dont forget to follow us and share this article.


