
Microsoft Intune offers a powerful solution for managing devices and applications, making remote desktop setup easier than ever. In this guide, discover the simplicity of installing Remote Desktop with Microsoft Intune, empowering you to work and collaborate efficiently from anywhere. Let’s get started!
Table of Contents
What are we going to set up?
In the first step, we will create an IntuneWin file using the Remote Desktop client and two PowerShell scripts. In the second step, we will upload this file to Intune and configure the parameters. This allows us to achieve a smooth installation on the clients.

Create IntuneWin file
To install the Remote Desktop with Microsoft Intune we first need to create the IntuneWin file. Follow these steps:
- Create a new folder called DeployRemoteDesktop on C:
- Create a new folder called Output on C:
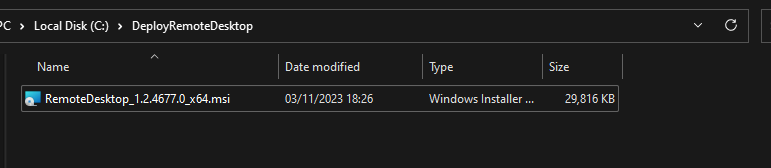
- Download the latest Remote Desktop client MSI file
- Copy the downloaded MSI file to the DeployRemoteDesktop folder
Attention: The Remote Desktop MSI filename can be different.
- We need to create two Powershell scripts
- Copy the bellow and name it Install.ps1
- Save the PowerShell script in the DeployRemoteDesktop folder
On the <RemoteDesktop> enter the MSI filename you just downloaded.
msiexec /i <RemoteDesktop>.msi /qn ALLUSERS=2 MSIINSTALLPERUSER=1

- Copy the bellow and name it Uninstall.ps1
- Save the PowerShell script in the DeployRemoteDesktop folder
$productCode = (Get-WmiObject -Class Win32_Product | Where-Object {$_.Name -eq 'Remote Desktop' -and $_.Vendor -eq 'Microsoft Corporation'}).IdentifyingNumber
msiexec /x $productCode /qn


- Download the official Microsoft Intune Win App Tool
- Open the Intune Win App Tool.
Important: You need to open the Tool with Administrator right. Otherwise there will be an error.
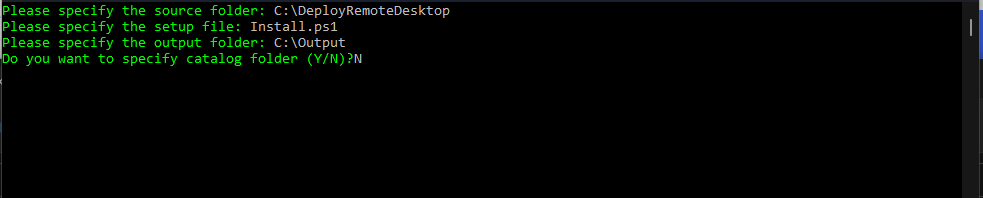
- Please specify the source folder: C:\DeployRemoteDesktop
- Please specify the setup file: Install.ps1
- Please specify the output folder: C:\Output
- Do you want to specify catalog folder: N
In your Output Folder, there should be a new file called Install.intunewin
We need this file in Step 2


Import and deploy with Intune
- Go to intune.microsoft.com
- Click on Apps
- Click on Windows
- Click on Add
- Chose App type Windows app (win32)
- Click on Select

- Click on Select app package file
- Upload your IntuneWin file which is located in C:\Output
- Click on OK
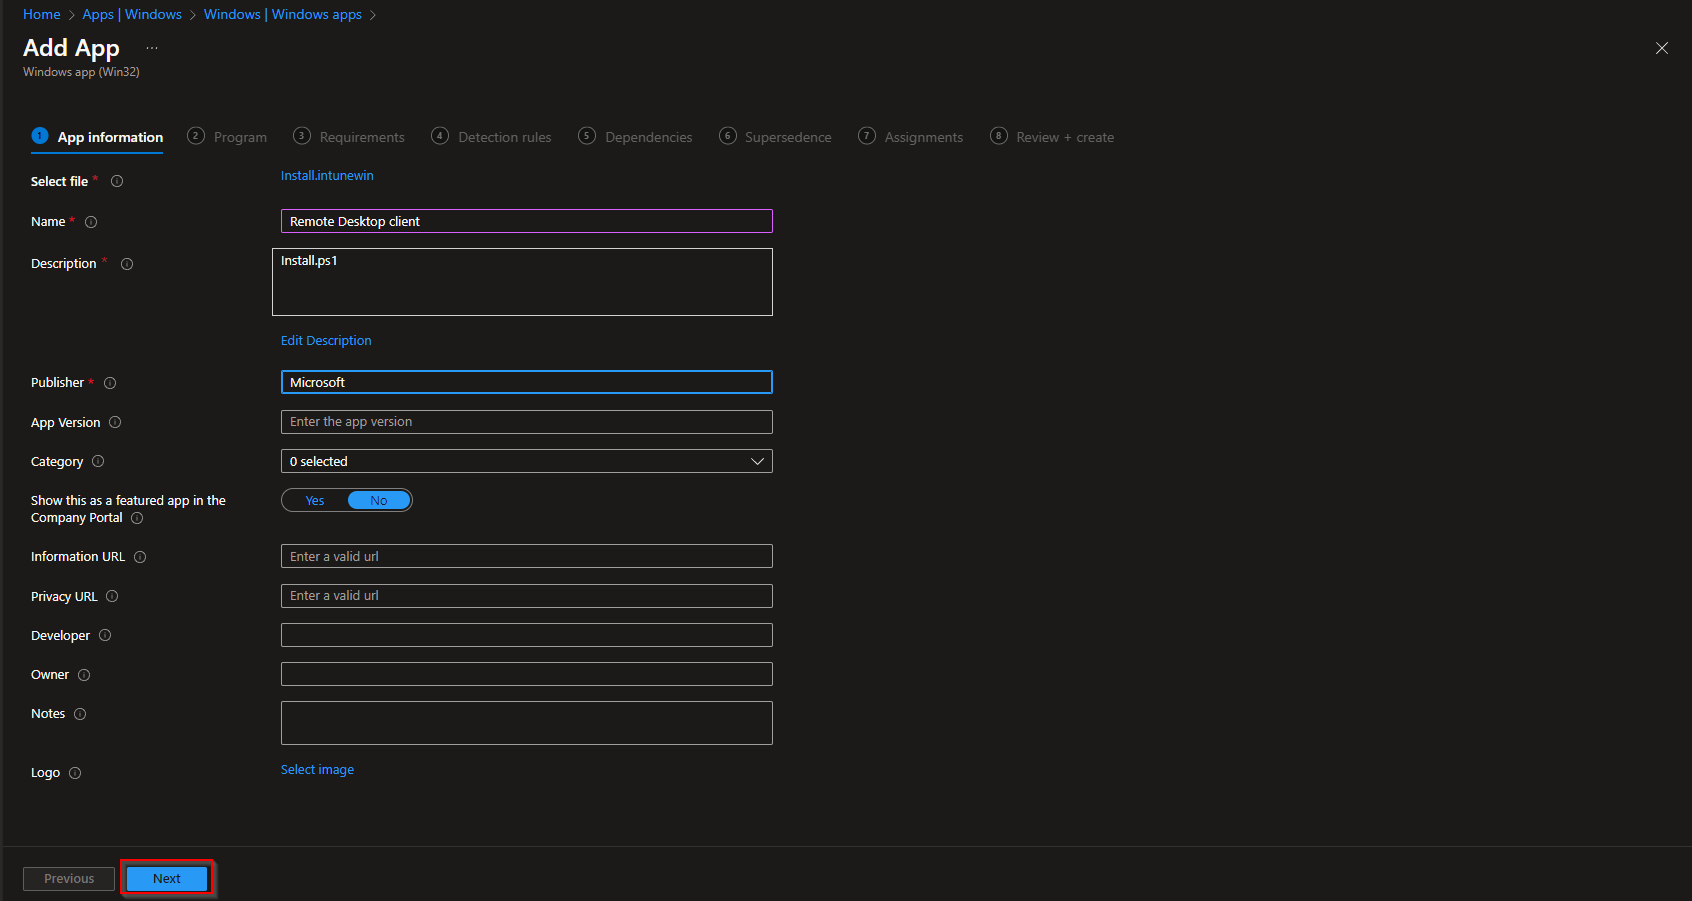
- Click on Next

- Here you can change the Settings. I leave it as it is. Dont forget to enter a Publisher
- Click on Next
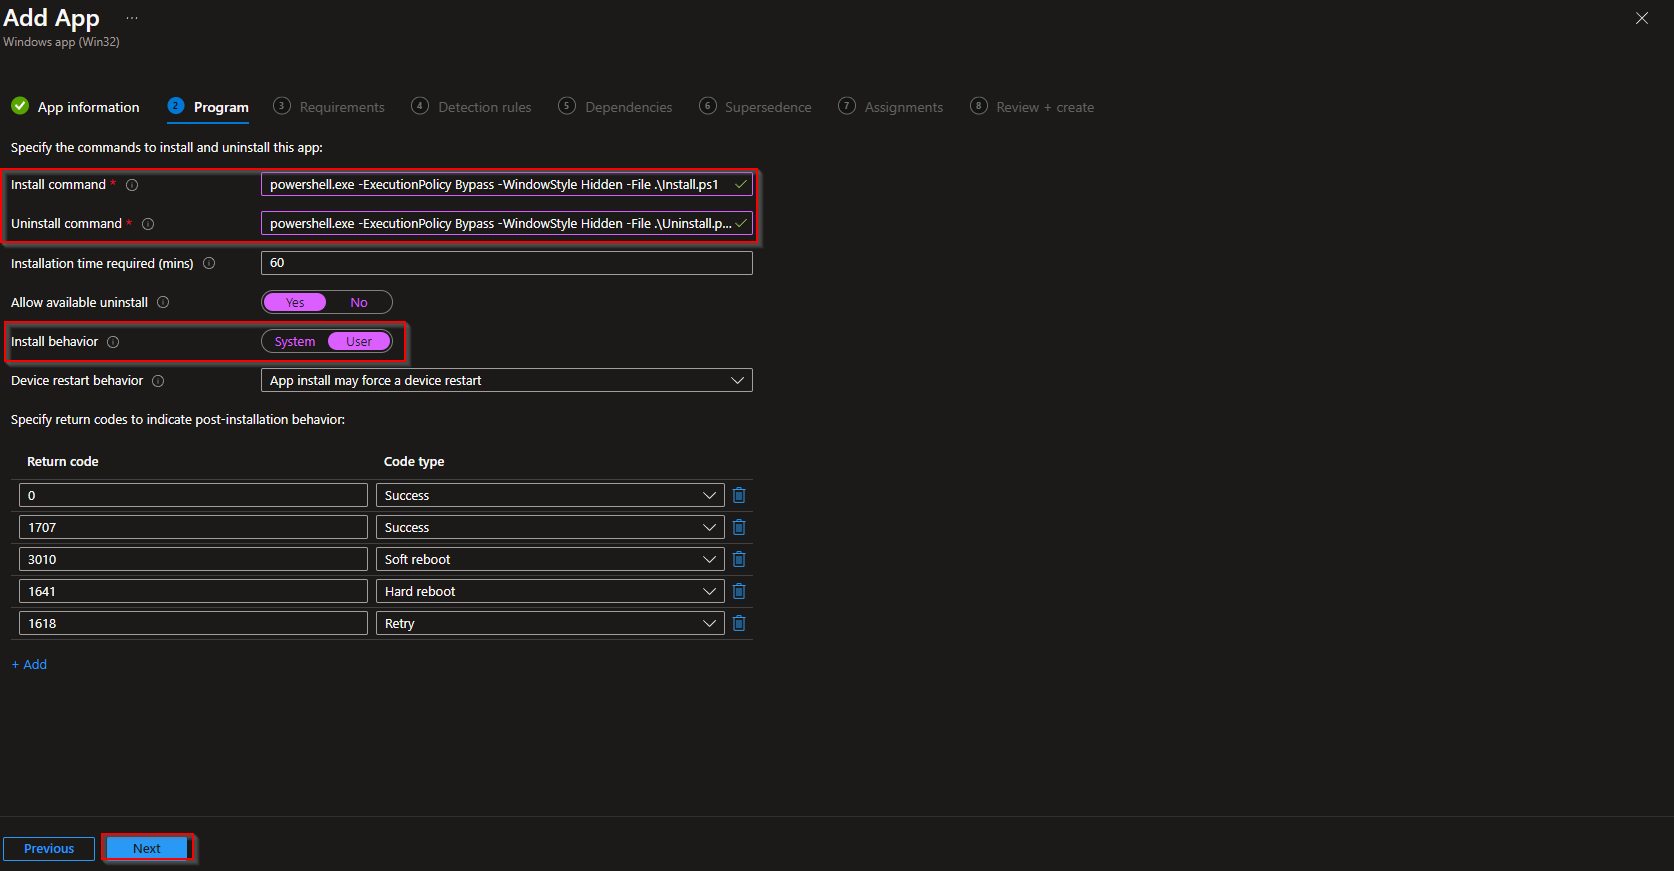
Enter the following Commands:
- Install Command: powershell.exe -ExecutionPolicy Bypass -WindowStyle Hidden -File .\Install.ps1
- Uninstall command: powershell.exe -ExecutionPolicy Bypass -WindowStyle Hidden -File .\Uninstall.ps1
- Install behavior: User
- Click on Next
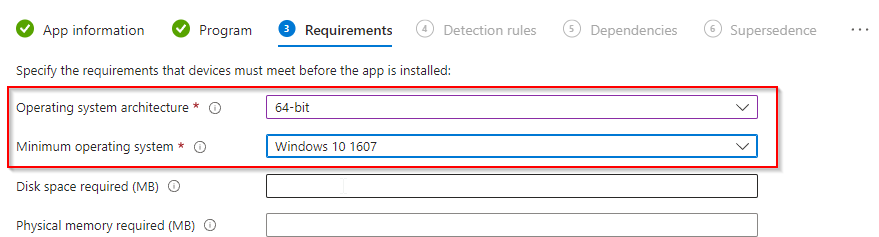
On the Requirements tab enter:
- Operating system architecture: 64-bit
- Minimum operating system: Windows 10 1607
- Click on Next
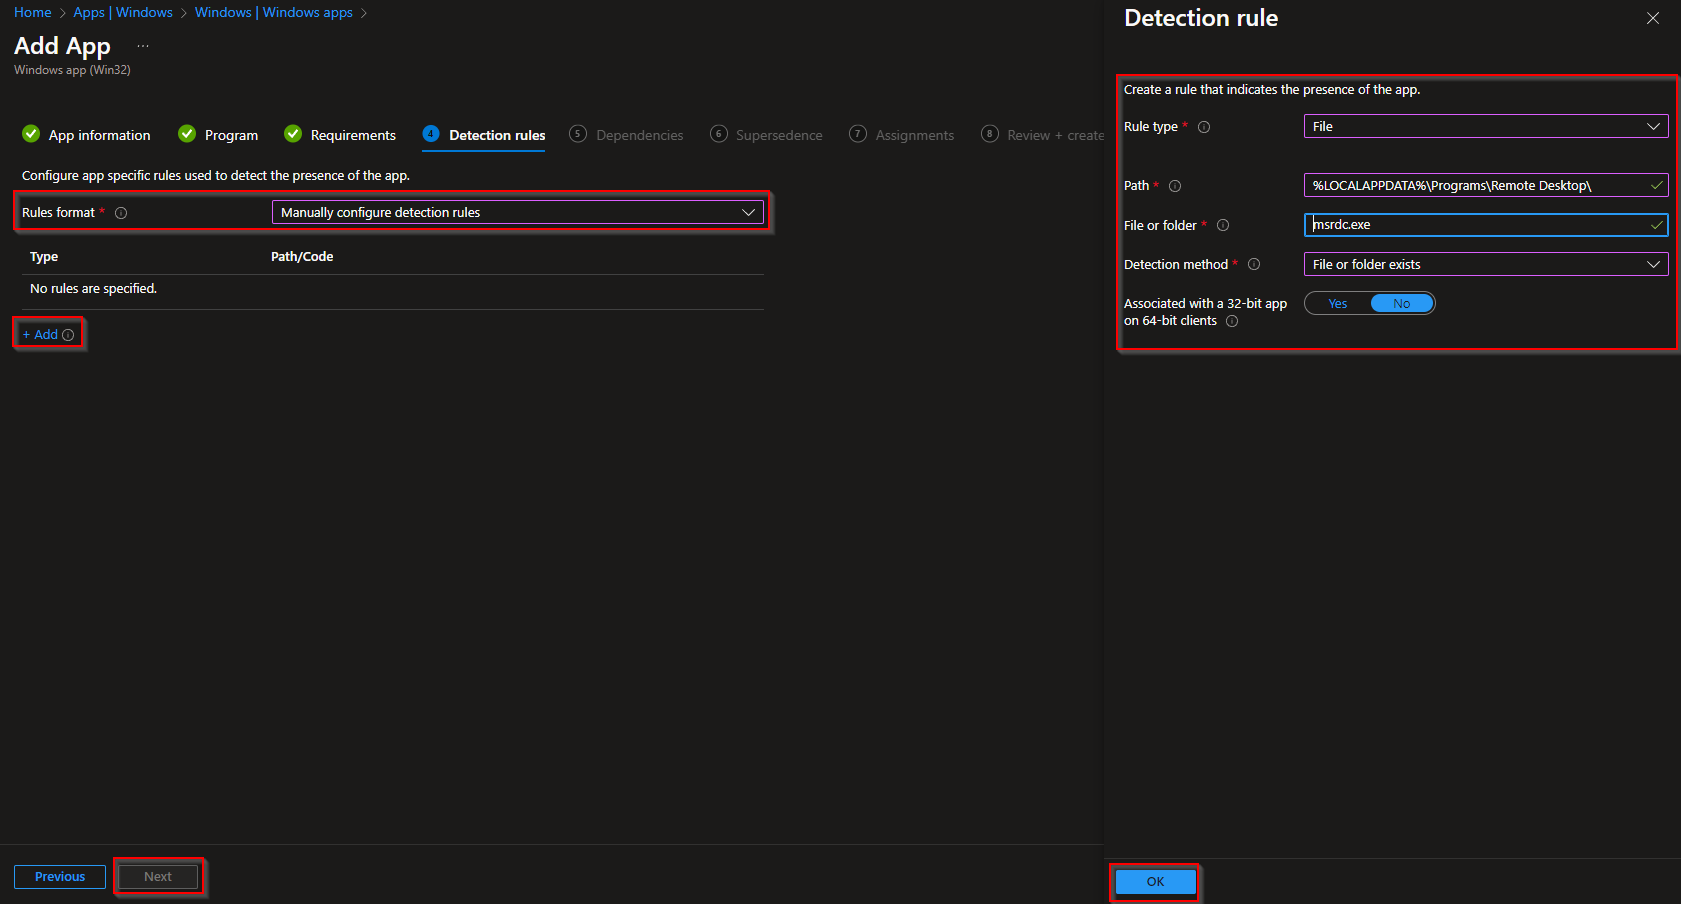
On the Detection rules tab:
- Rules format: Manually configure detection rules
- Click on Add
- Rule type: File
- Path: %LOCALAPPDATA%\Programs\Remote Desktop\
- File or Folder: msrdc.exe
- Detection method: File or folder exists
- Associated with a 32-bit app on 64-bit clients: No
- Click on Ok and on Next
- Define your Dependencies if applicable and click on Next
- Define your Supersedence if applicable and click on Next
- On the Assignments tab assign the Policy to a Group or to All User
- Click on Next
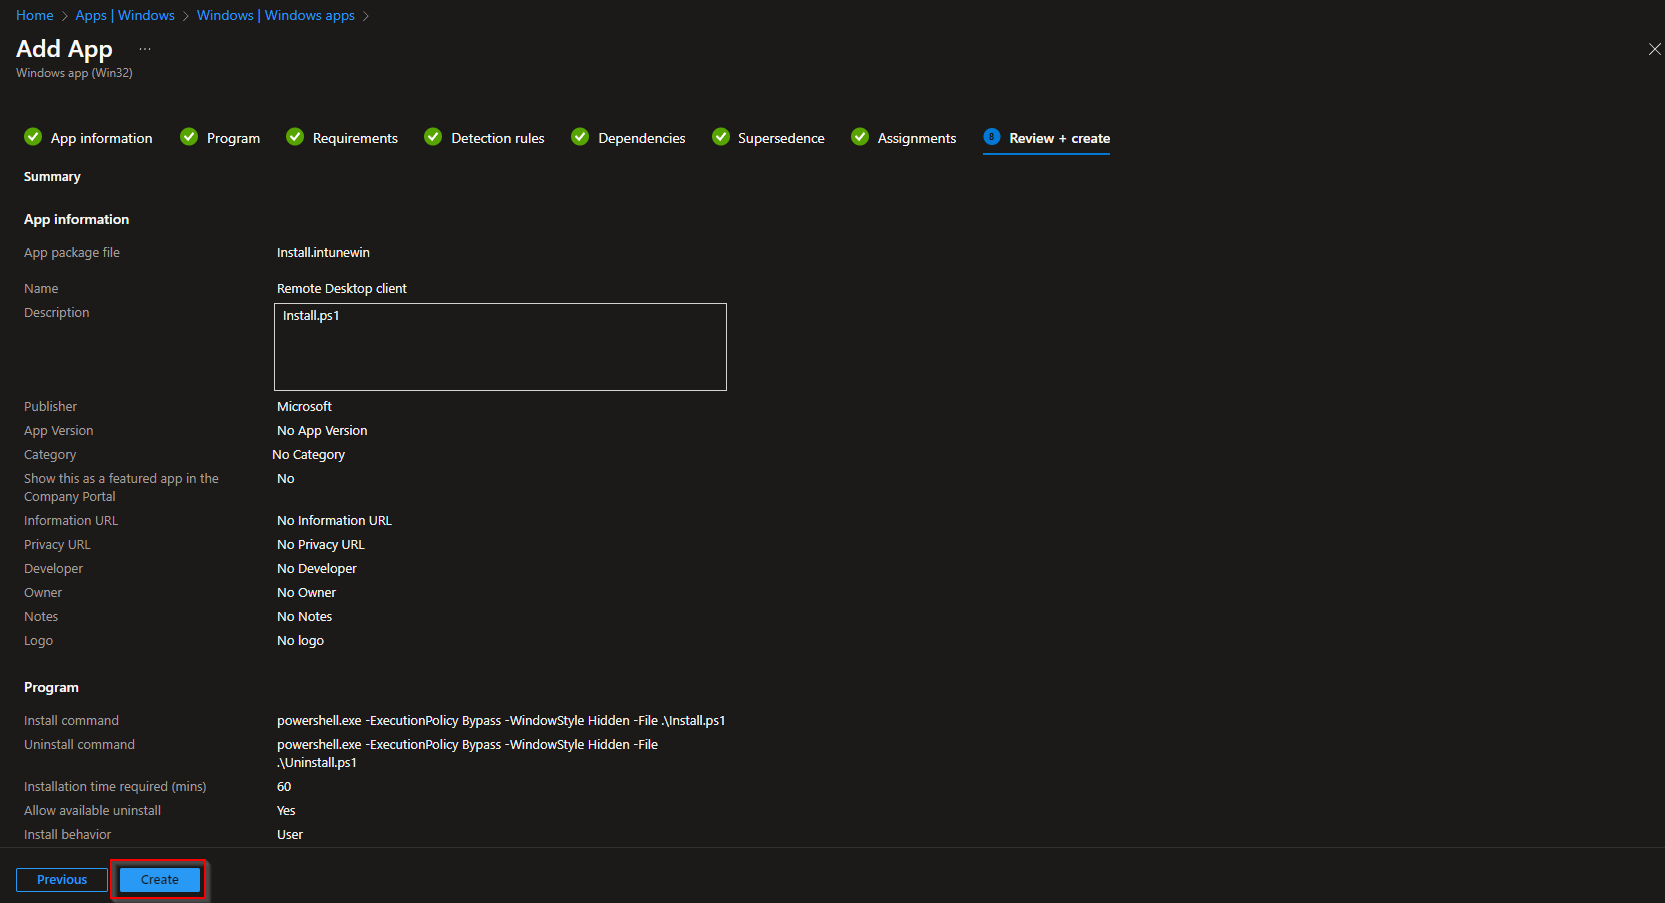
- And Review + Create the Policy
Congratulations! You have successfully deployed the policy.


