Welcome to our new blog post about How to Rename Built-in Administrator Account with Microsoft Intune. Renaming the built-in Administrator account is a crucial security measure that helps protect Windows devices from unauthorized access and brute-force attacks. By default, this account exists on all Windows systems and is often targeted by malicious actors. With Microsoft Intune, IT administrators can remotely rename the built-in Administrator account across all managed devices, reducing security risks while maintaining control over administrative access. In this guide, we’ll walk you through the process and explain why this simple change can significantly enhance your organization’s security.
Table of Contents
Why not use the default Administrator Account?
Many cyberattacks target the default Administrator account because its name is predictable, making it an easy entry point for brute-force attacks. Even if you use a strong password, attackers can still attempt to exploit it through credential-based attacks. Renaming the account adds an extra layer of security by making it harder to identify, forcing attackers to guess both the username and password. This, combined with other security measures like limiting local admin privileges and enabling multi-factor authentication (MFA), significantly strengthens device protection against unauthorized access.
You might also want to check out the blog post about How to configure LAPS with Microsoft Intune. LAPS, or Local Administrator Password Solution, is a Microsoft tool that allows organizations to securely manage the local administrator passwords of their computers. In many organizations, all computers are set up with a default local administrator account. If this password is the same across multiple machines, it poses a security risk. LAPS will automatically use a different administrator password for all devices and will change it regularly.
How to Rename Built-in Administrator Account with Microsoft Intune
In this section we will create a new configuration profile in Microsoft Intune. Just follow the steps below.
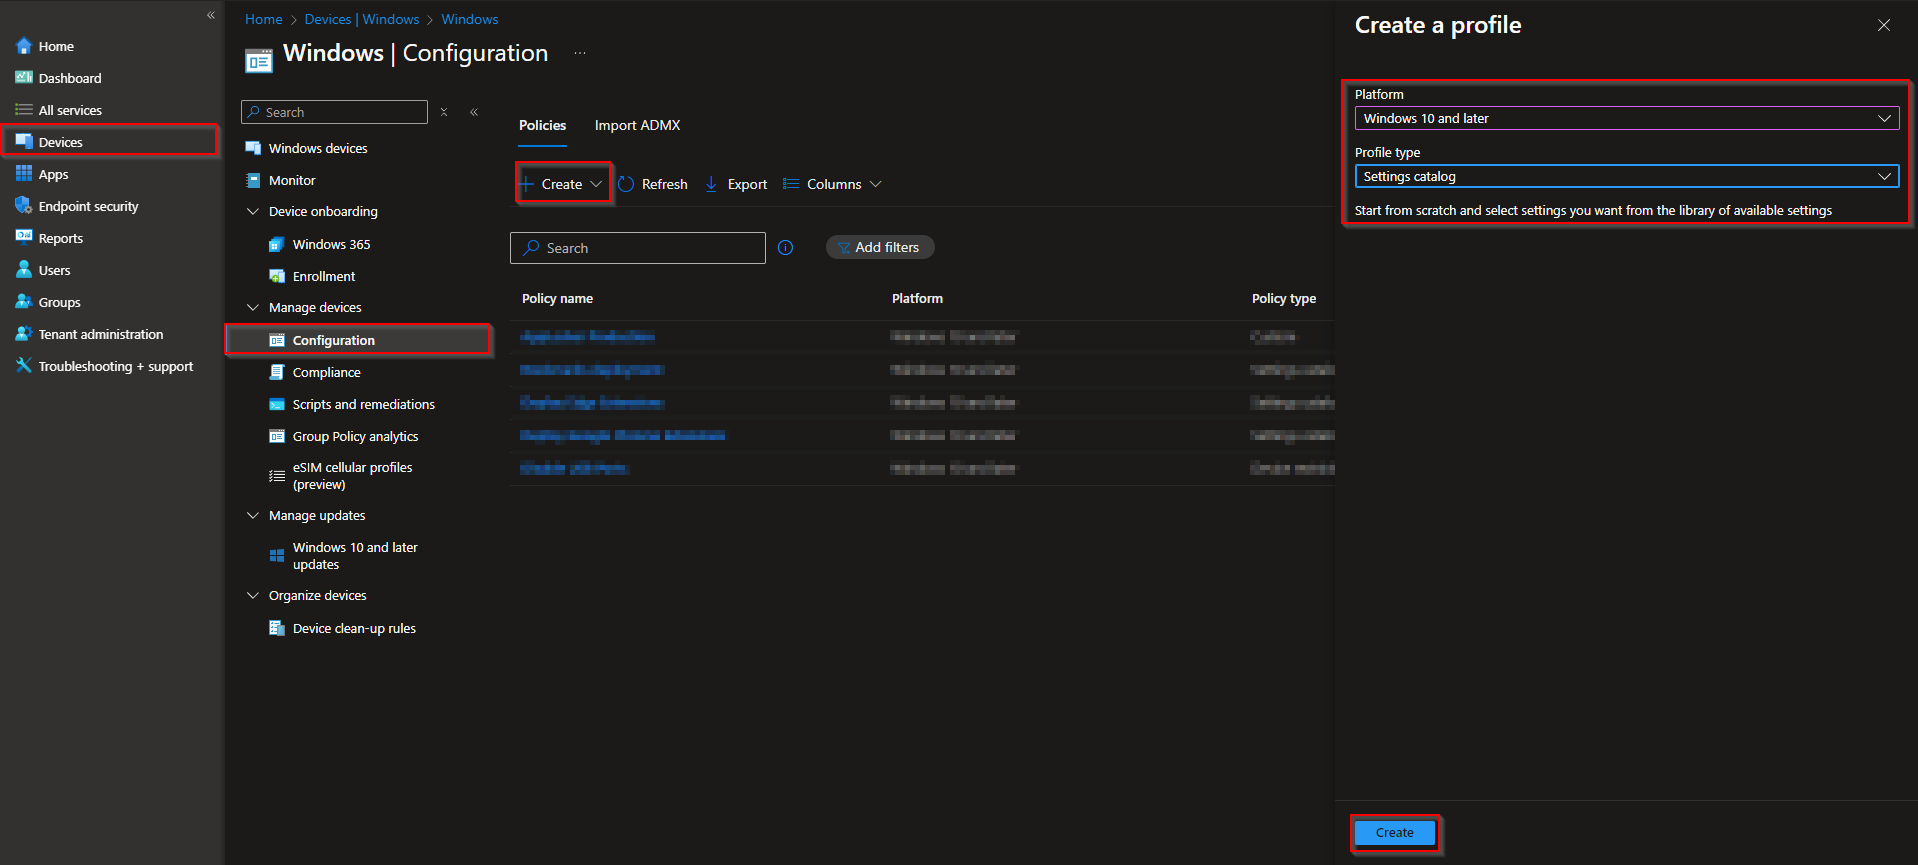
- Go to intune.microsoft.com
- Click on Devices
- Click on Windows
- Click on Configuration profiles
- Click on Create
- Click on New Policy
- Platform: Windows 10 and later
- Profile type: Settings catalog
- Click on Create
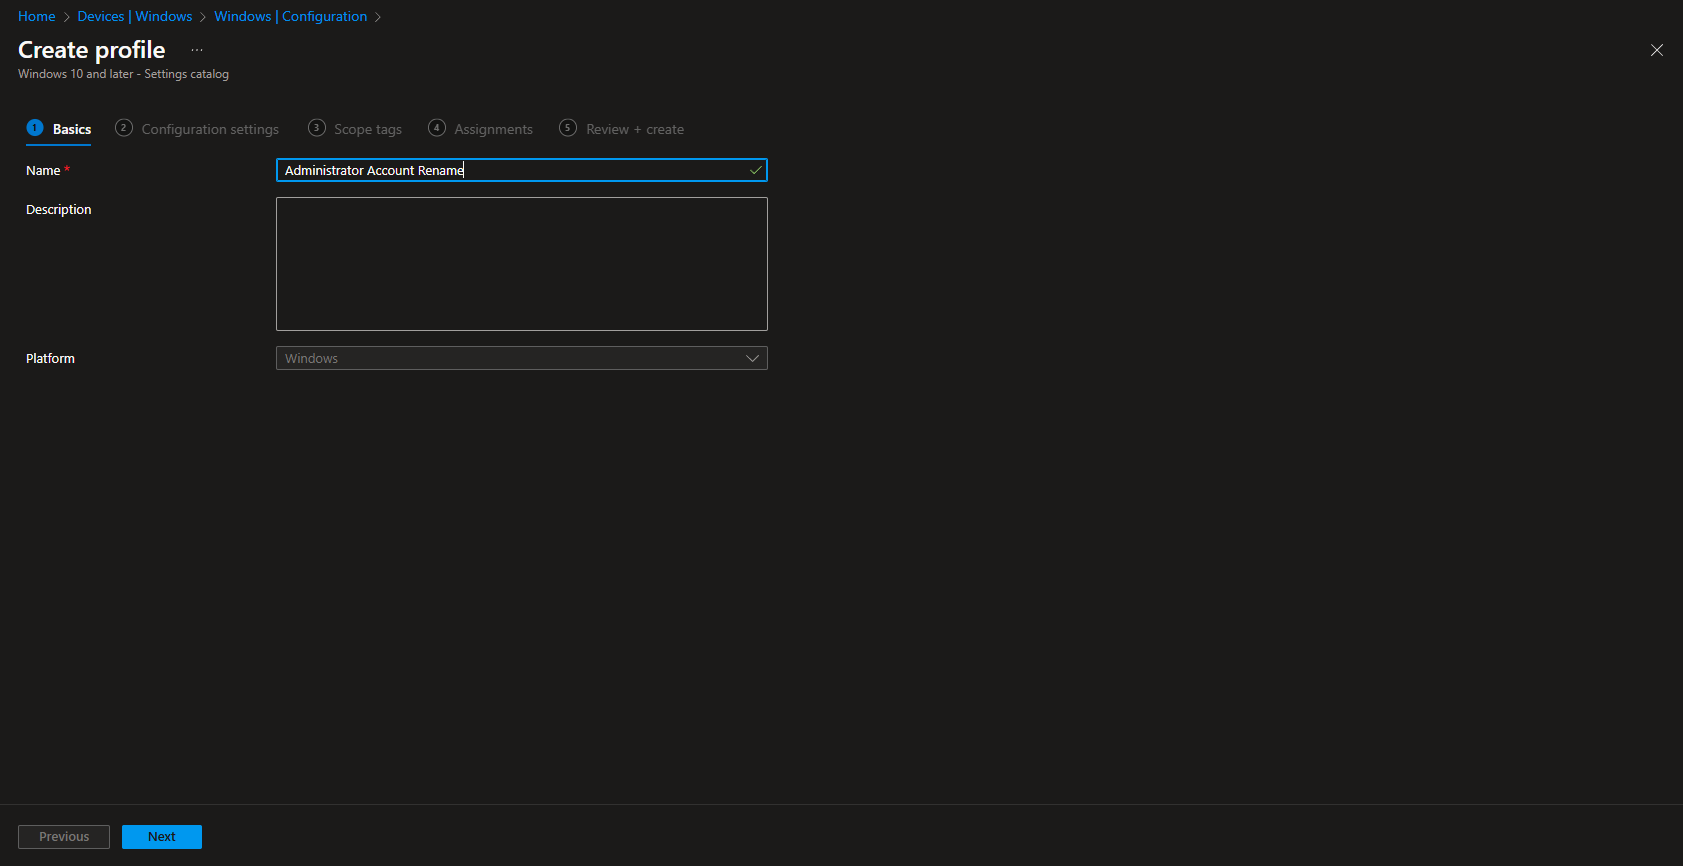
Give it a meaningful name and description. Click on Next.
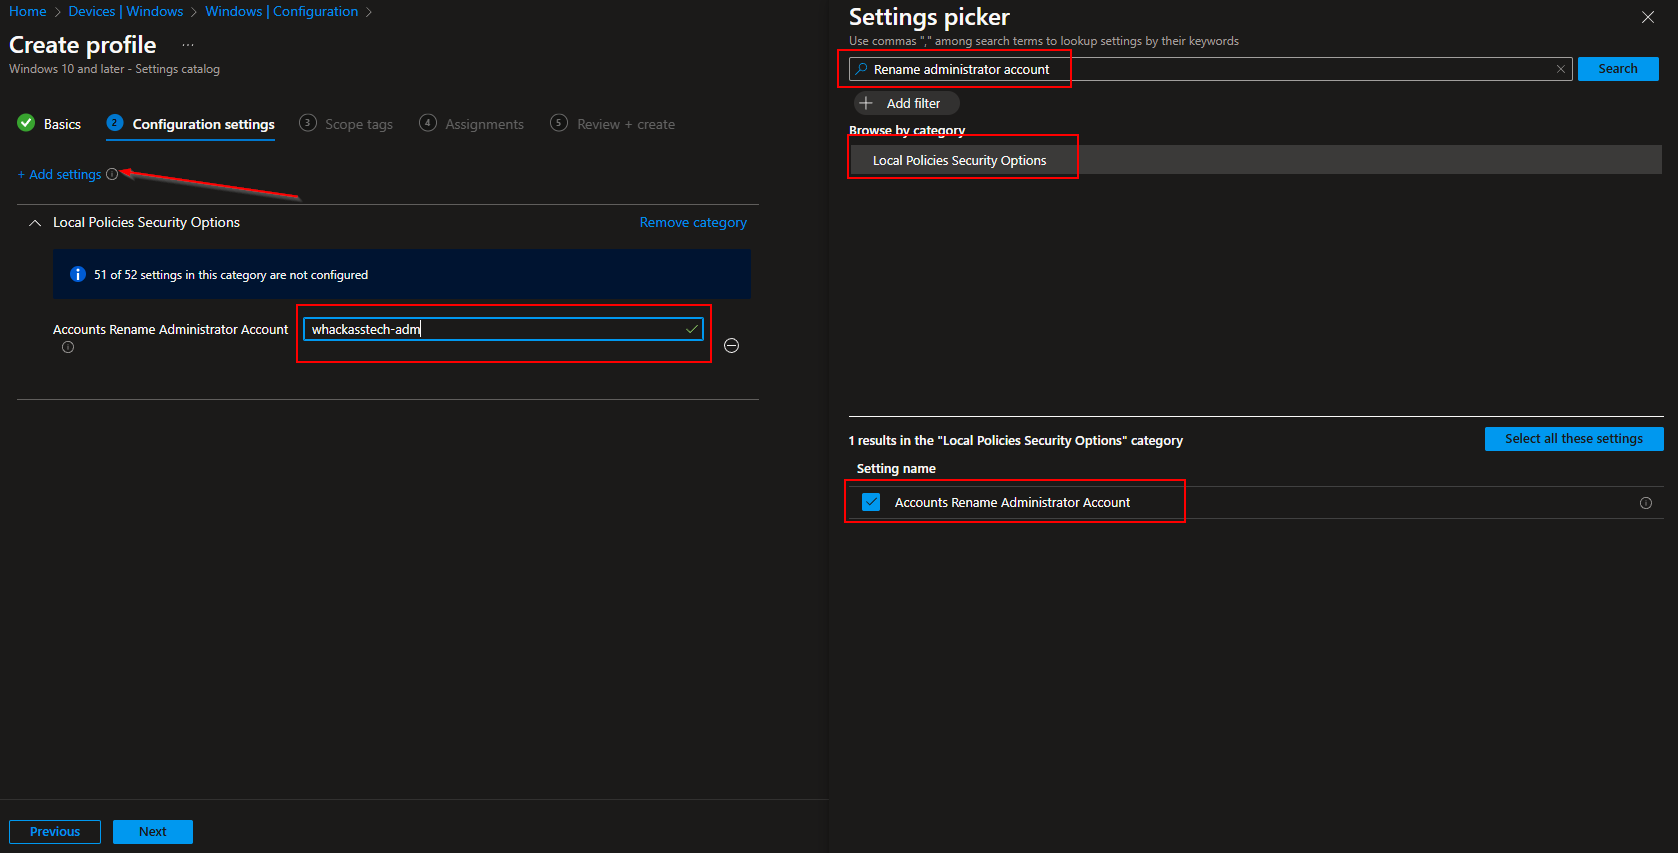
On the Configuration settings tab do the following:
- Click on Add settings
- Search for Multiple Display Mode
- Choose Display
- Click on Configure Multiple Display Mode
- On the left site choose which Display Mode you want to deploy.
- Define your Scope if applicable and click on Next
- On the Assignments tab assign the Policy to a Group or to All Users / All Devices
- And Review + Create the Policy
Congratulations! You have successfully deployed the policy.
Conclusion
In this blog post we Learn about How to Rename Built-in Administrator Account with Microsoft Intune. We created a new configuration policy and configured the new Administrator Account Name. We hope this guide has provided you with valuable insights to improve your device management strategy. Did you enjoy this article? Dont forget to follow us and share this article. If you have any questions or need further assistance, feel free to reach out or leave a comment below.


