How configure and deploy Sensitivity Labels with Microsoft Purview. In today’s digital landscape, data protection is paramount. With the increasing importance of data governance and compliance, organizations must implement robust strategies to safeguard their sensitive information. Microsoft Purview, a powerful data governance solution, offers a seamless way to configure and deploy sensitivity labels, ensuring that data is classified and protected appropriately. In this guide, we’ll delve deeper into each step to provide a comprehensive understanding of how to effectively set up and deploy sensitivity labels with Microsoft Purview.
Table of Contents
What are we going to set up?
In this blog post we will show you, How to configure and deploy Sensitivity Labels with Microsoft Purview. We will show you the configuration and process with the following steps:
- Step 1: Understand Sensitivity Labels
- Step 2: Set Up Microsoft Purview
- Step 3: Define Sensitivity Labels
- Step 4: Configure Sensitivity Labels in Purview
- Step 5: Apply Sensitivity Labels
- Step 6: Monitor and Review
Step 1: Understand Sensitivity Labels
Before diving into configuration, it’s essential to understand the use of sensitivity labels. Sensitivity labels are metadata tags applied to documents and emails to classify and protect sensitive information. They play a crucial role in enforcing data protection policies, ensuring compliance with regulatory requirements, and safeguarding sensitive data from unauthorized access or misuse.
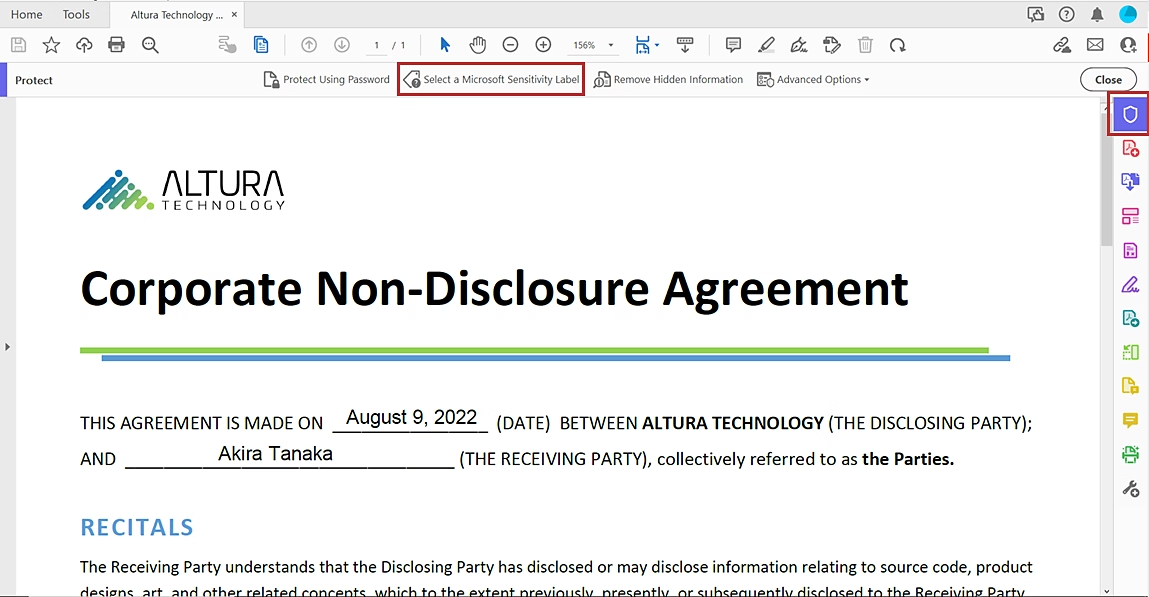
With the setup of Sensitivity Labels you can for example also setup the Data Loss Prevention Policies. This will allow you to define for example, that you cannot sent mails or share files with an high sensitivity label applied. We will show you the setup of Data Loss Prevention in another Blog Post. For now we will be deploying the Labels. In the end you will be able to apply Labels to Documents as shown here.
Step 2: Set Up Microsoft Purview
The foundation of How configure and deploy Sensitivity Labels with Microsoft Purview begins with setting up the platform. Ensure you have access to Microsoft Purview by signing up for a subscription and configuring your account according to your organization’s specific requirements.
By default, global administrators for your tenant have access to this admin center and can give compliance officers and other people access, without giving them all of the permissions of a tenant admin. For this limited admin access, you can use the following role groups:
- Information Protection
- Information Protection Admins
- Information Protection Analysts
- Information Protection Investigators
- Information Protection Readers
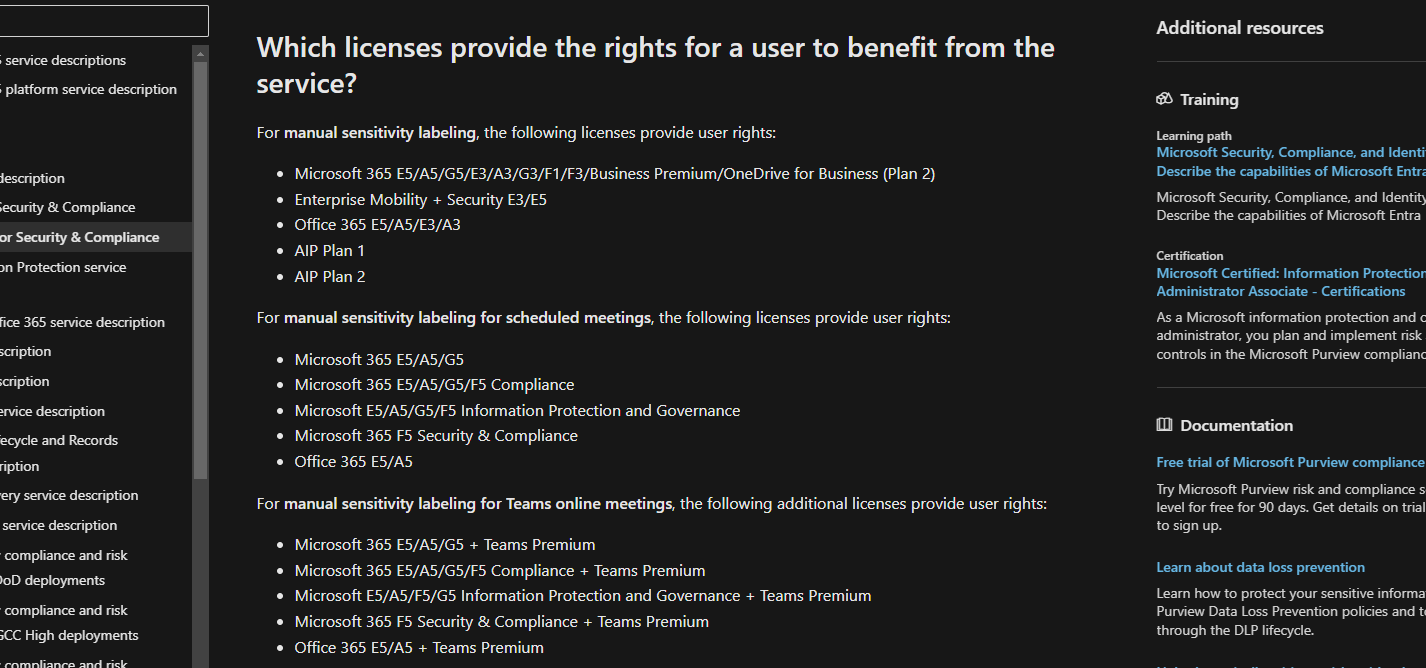
Also check the License requirements on the official Microsoft Documentation.
Step 3: Define Sensitivity Labels
With Microsoft Purview, the next step is to define sensitivity labels based on your organization’s data classification policies and requirements. Take the time to identify the sensitivity levels that align with your data classification schema, such as Public, Internal, Confidential, or Highly Confidential. Determine the protection settings associated with each sensitivity level, including encryption, access controls, and data retention policies.
I always try to use as little as possible sensitivity labels. Just to give you some ideas, here are my go to labels I use a lot.
- Public
- Internal
- Confidential
- High confidential
Step 4: Configure Sensitivity Labels in Purview
Once sensitivity labels are defined, it’s time to configure them within Microsoft Purview. Navigate to the sensitivity labeling settings within Purview’s administration portal and follow the intuitive prompts to import or create sensitivity labels. Ensure that labels are accurately mapped to your organization’s data classification schema and that the appropriate protection settings are applied to each label.
- Go to https://compliance.microsoft.com/
- Click on Information protection
- Click on Labels
- Click on Create a label

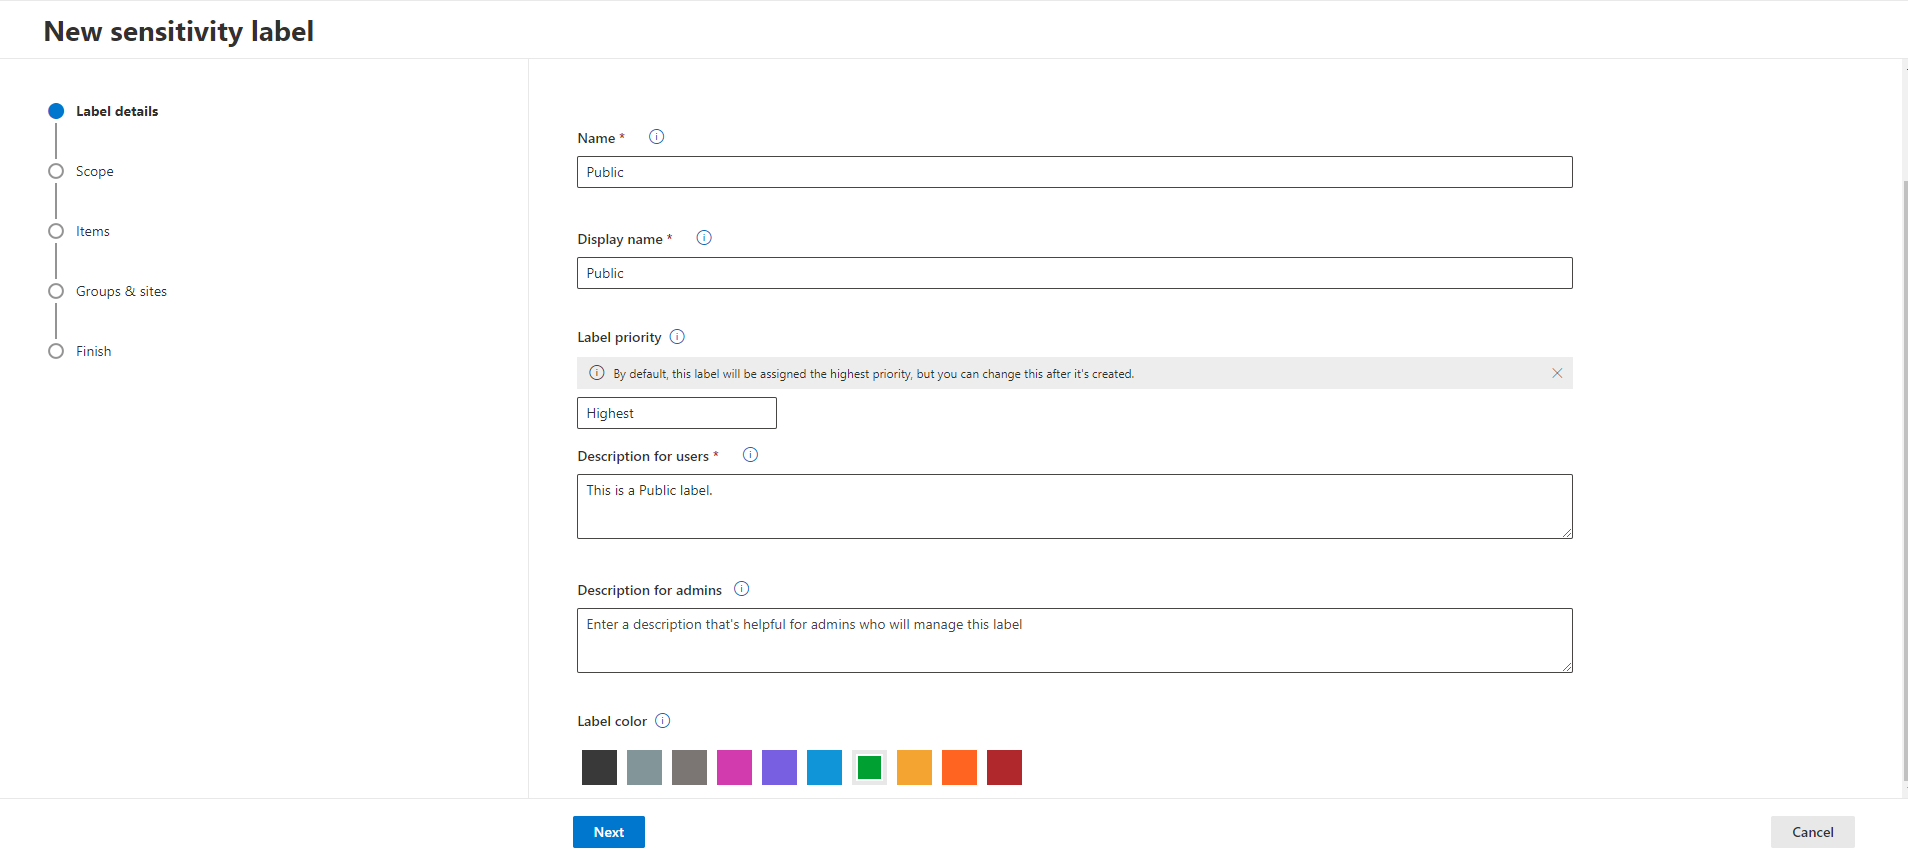
On the tab add all informations of the Label. I will start with the Public Label.
- Name: This is the name of the label your admins will see in the compliance portal when configuring or managing labels.
- Display Name: This is the name of the label your users will see in the apps where it’s published (like Word, Outlook, and SharePoint). Be sure to come with a name that helps them understand what it’s used for (for example, ‘Confidential’ or ‘Personal’).
- Label priority: Priority is used to determine how labels appear to users and which label is applied in scenarios like auto-labeling and label inheritance. You can change the priority from the list of labels.
- Description for users: When this label is applied to content, this tooltip will appear to users when they view the label in their apps (like Word, Outlook, and Teams)
- Description for admins: This description will appear only to admins who manage this label in the Purview portal.
- Label color: The color selected below is currently applied to the parent label. As a result, all sublabels of the parent label will inherit the same color. If you want to use a different color, edit the parent label.
In the next tab define where this label should be applyable. I will just tick Items with Files and Emails.

In this tab you can choose to enable the following settings for this label:
- Apply or remove encryption: Control who can access items that have this label applied
- Apply content marking: Add custom headers, footers, and watermarks to items that have this label applied.
For this demonstration I will leave this disable. When you enable an option you will be asked to setup the configuration in the next steps.

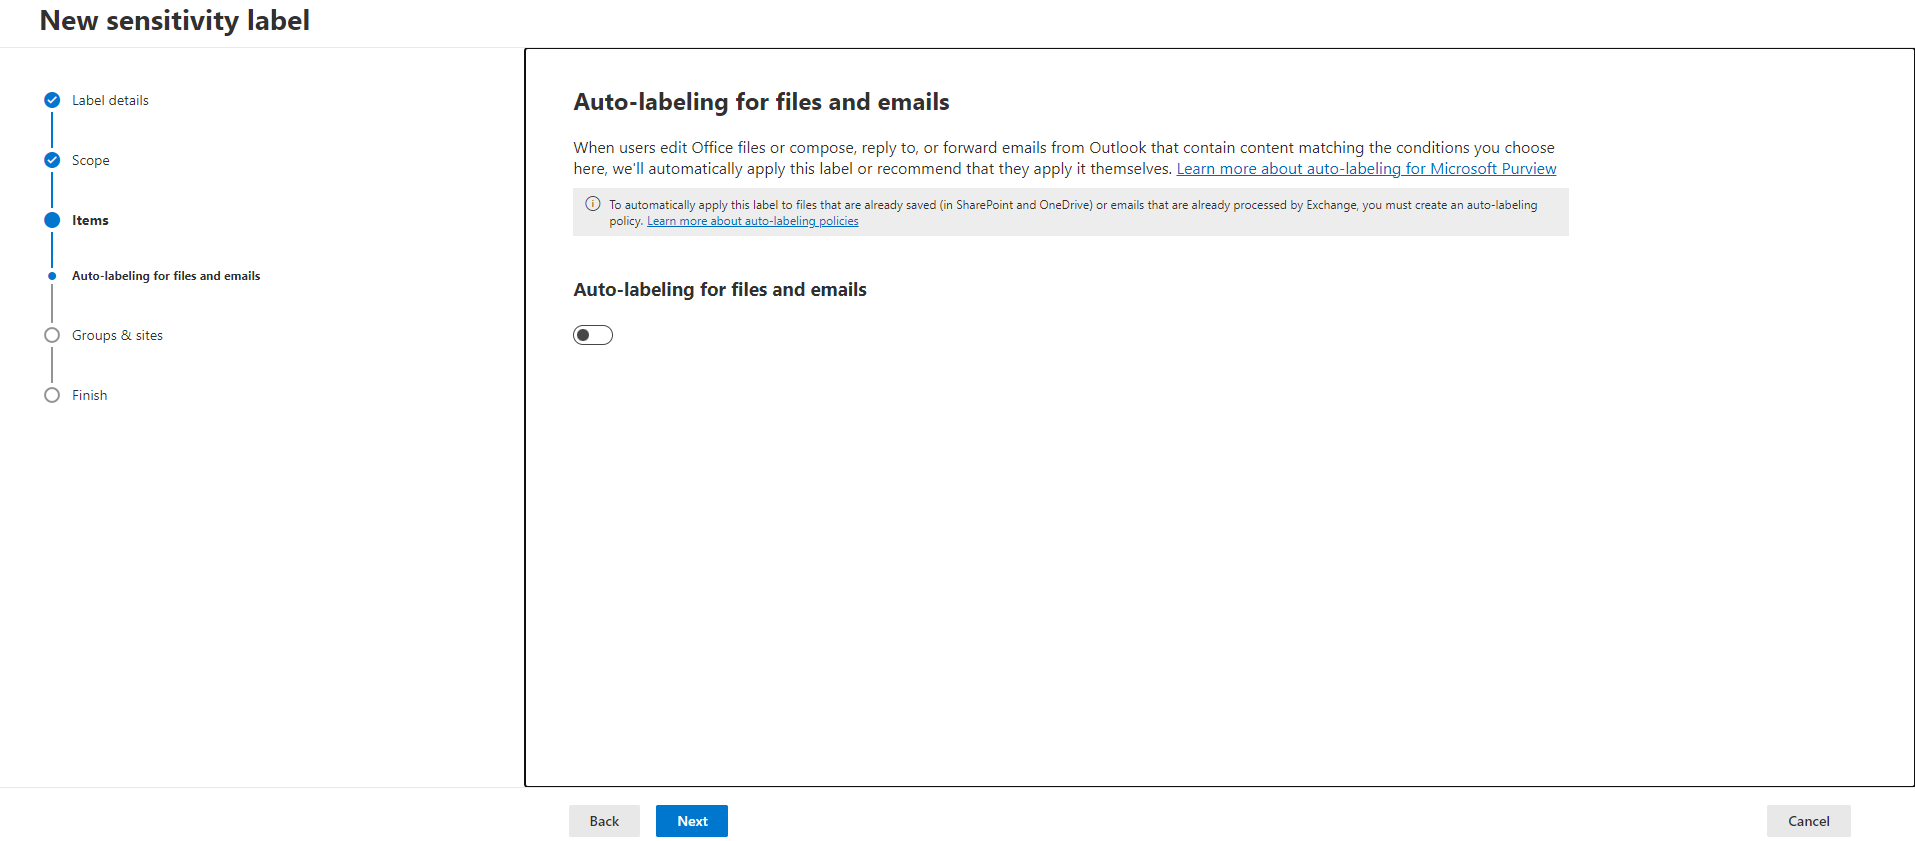
In this tab you can choose to enable Auto-labeling for files and emails. When users edit Office files or compose, reply to, or forward emails from Outlook that contain content matching the conditions you choose here, we’ll automatically apply this label or recommend that they apply it themselves.
I will configure this in a second step so I will leave this as it is.
Finish up the setup and click on Create label on the Finish tab. Dont Publish the label to users yet. We are going to publish them all at once. So click on Dont create a policy yet and click on Done.

Now repeat this for all your labels. I have chosen to configure the following Labels:
- Public
- Internal
- Confidential
- High confidential
If you have created all the labels, you can go ahead to go to the next step where we are going to deploy them to our users.
Step 5: Apply Sensitivity Labels
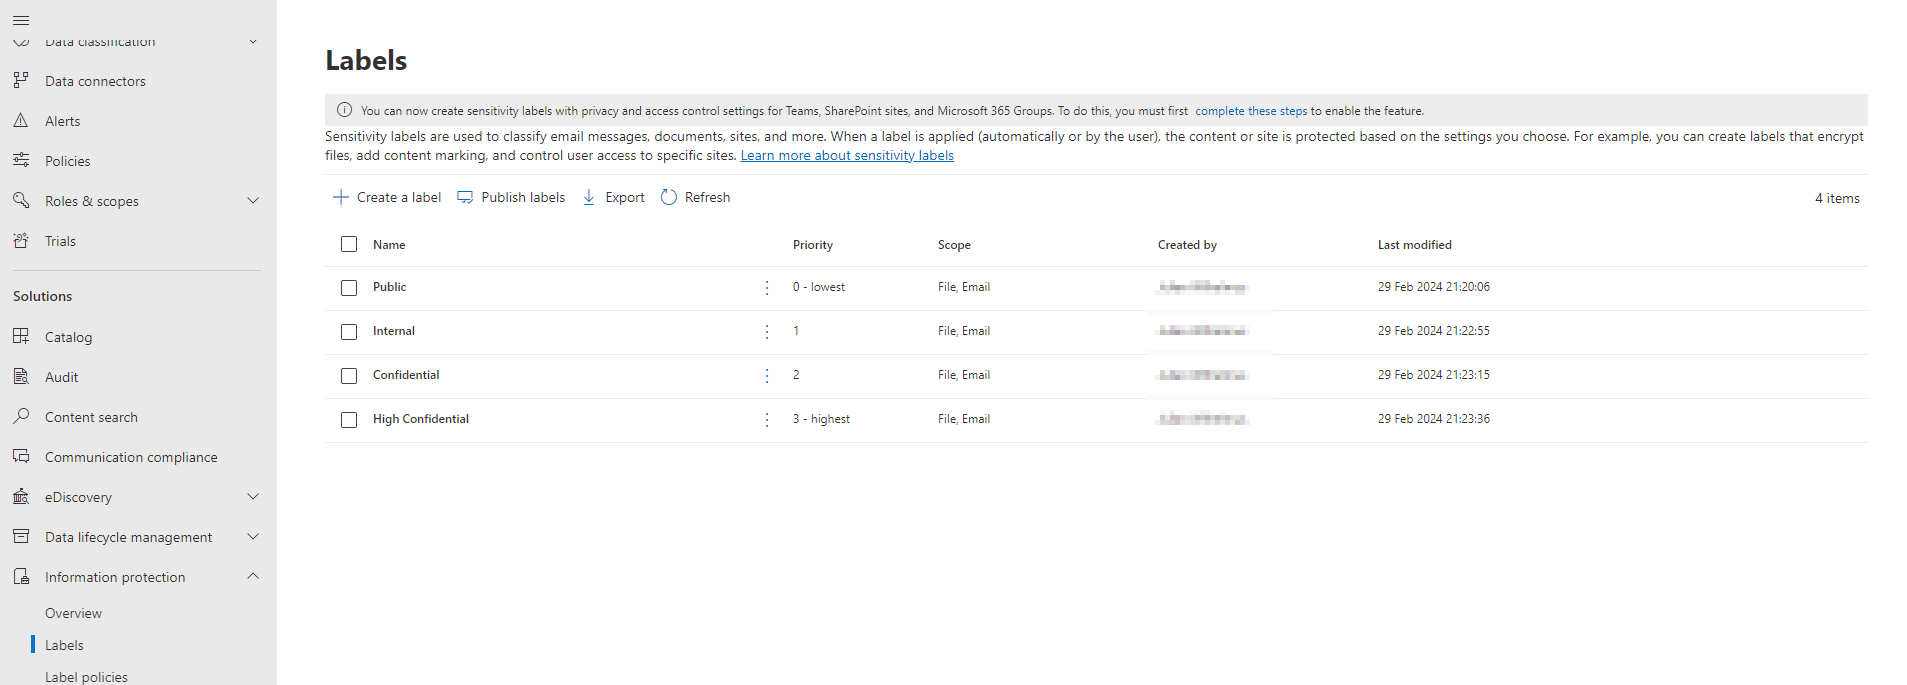
With sensitivity labels configured in Microsoft Purview, the next step is to apply them to your organization’s data assets. We will deploy them to our users now. But before we start, we need to check if the Priority is set correct.
Go to your Labels and check if the lowest and highest are correct. If not change the priority by Reprioritize the labels.

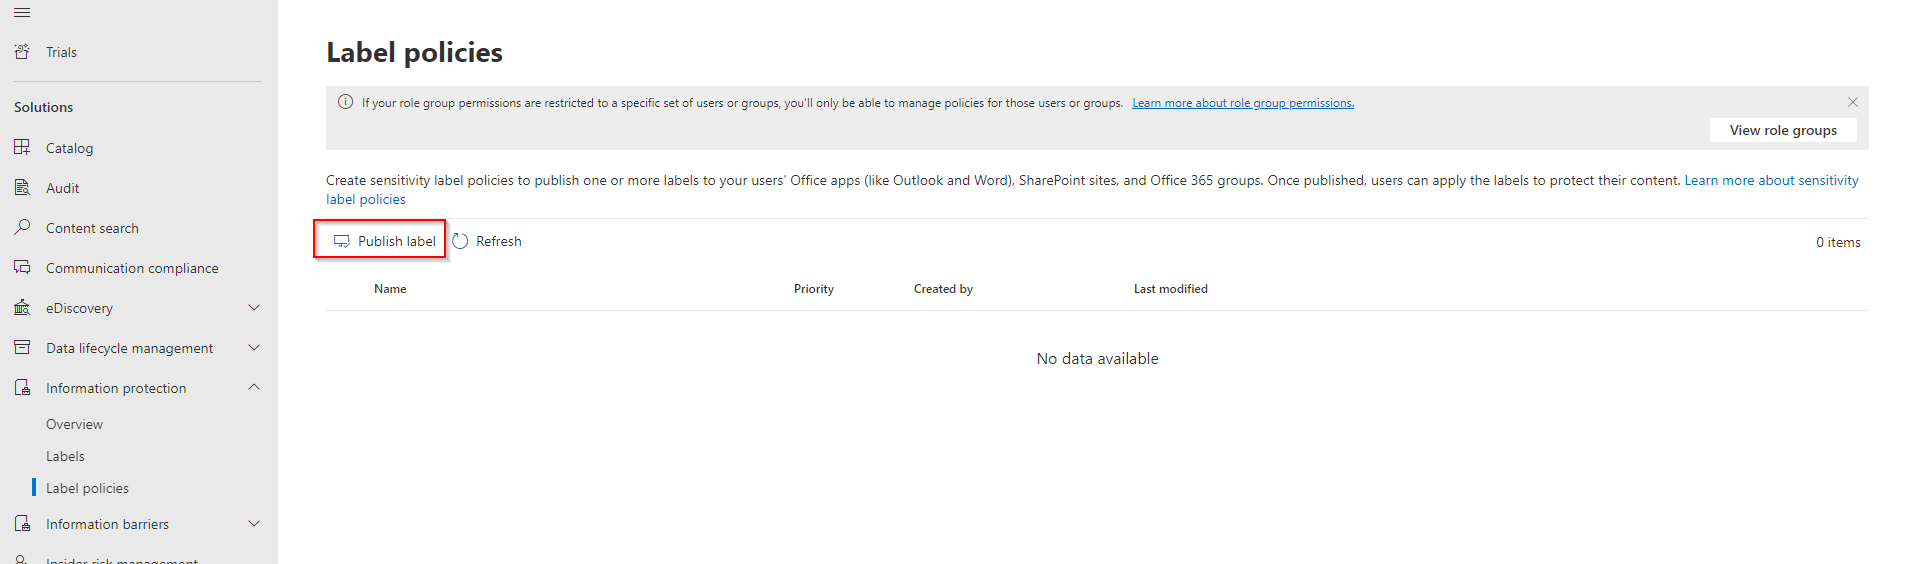
Now we can go ahead and deploy the labels to our users. To do that go to the Information protection and click on Label policies. With Label policies we can deploy the sensitivity labels. Go ahead and click on Publish label.
On the first tab choose which Sensitivity labels you want to publish. I will choose all of them and click on Next.
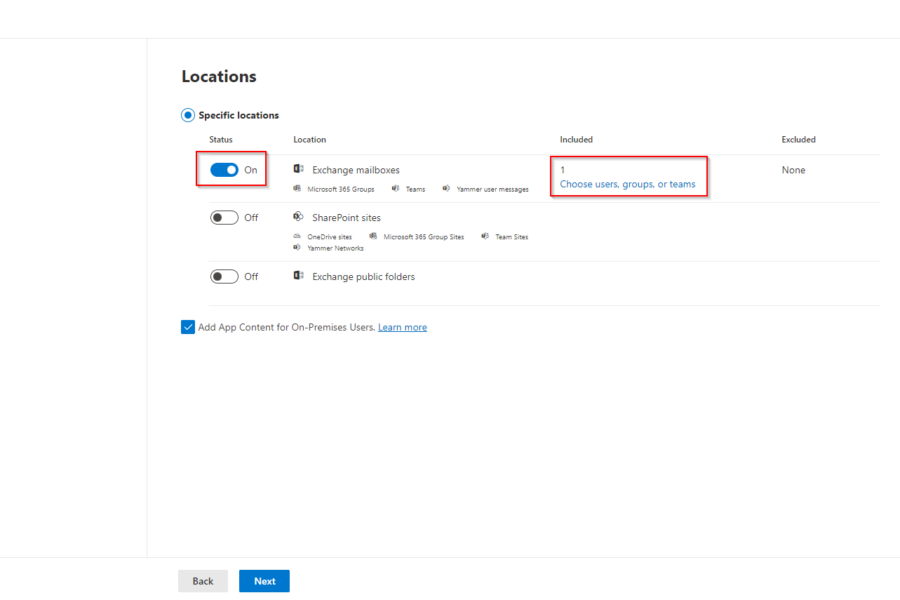
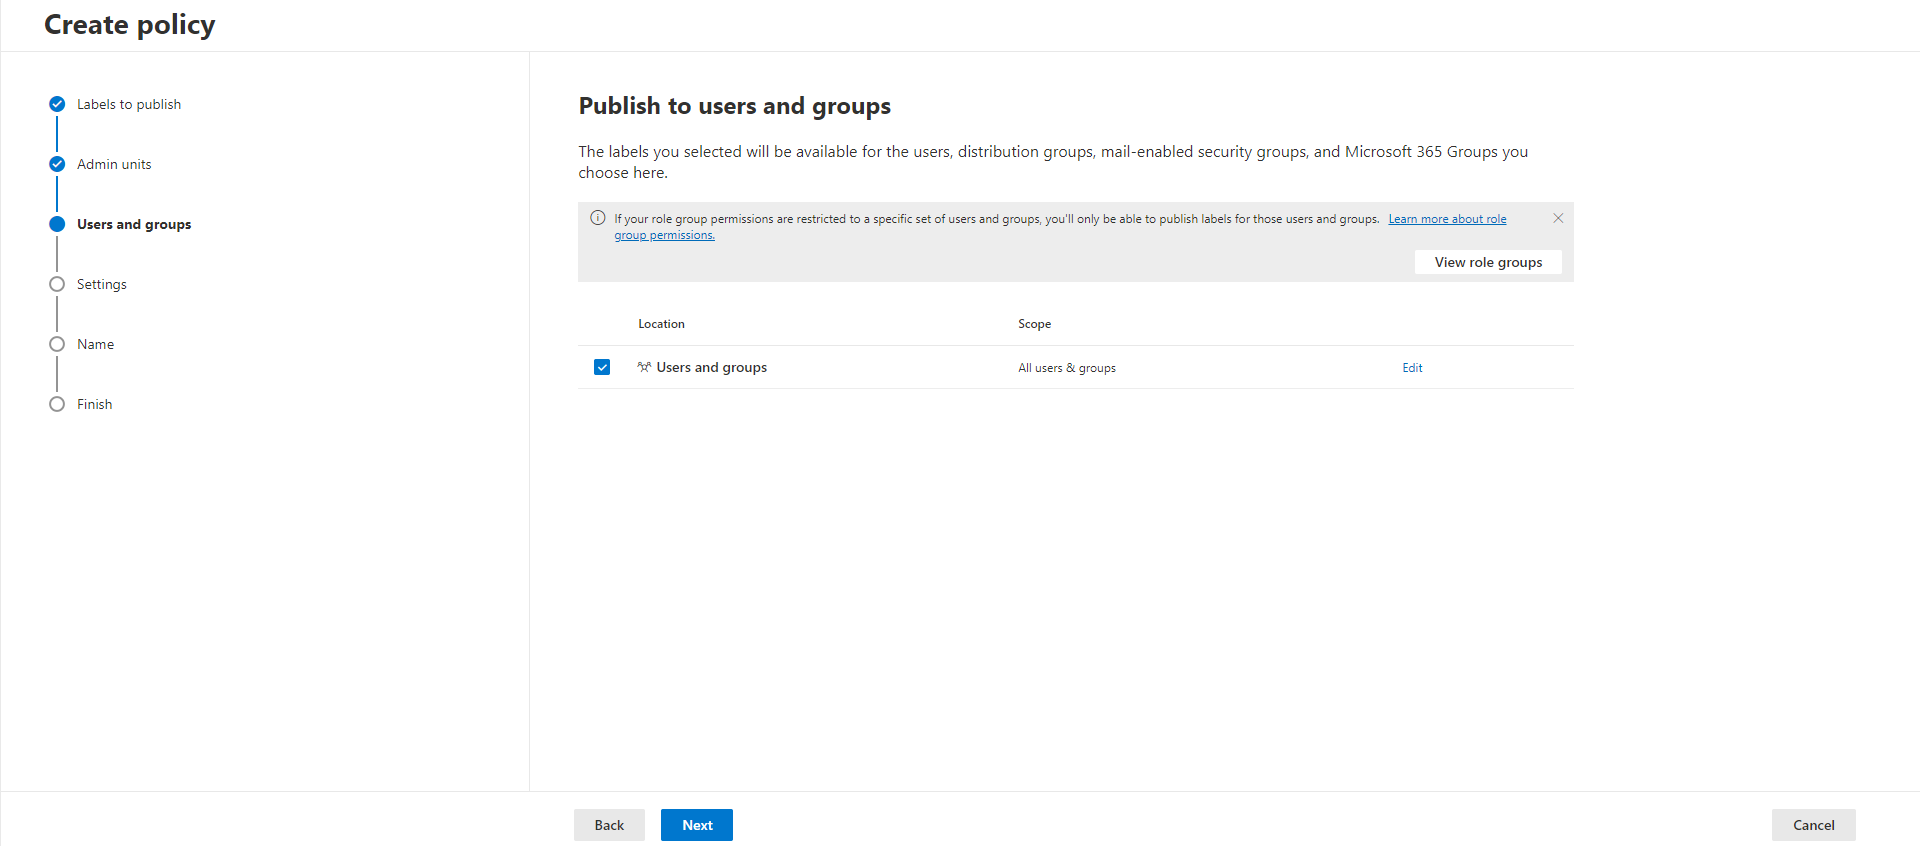
You can skip the Admin units for now. On the Users and groups page define, whom you want to deploy the sensitivity labels. I will publish them to all. So I leave it as it is.
On the next tab we have the following options:
- Users must provide a justification to remove a label or lower its classification: Users will need to provide a justification before removing a label or replacing it with one that has a lower-order number. You can use activity explorer to review label changes and justification text.
- Require users to apply a label to their emails and documents: Users will be required to apply labels before they can save documents or send emails (only if these items don’t already have a label applied).
- Require users to apply a label to their Fabric and Power BI content: Users will be required to apply labels to unlabeled content they create or edit in Fabric and Power BI.
- Provide users with a link to a custom help page: If you created a website dedicated to helping users understand how to use labels in your org, enter the URL here.

On the next tab you can choose which default label should be automatically applied to the documents, emails, meetings and Fabric and Power BI. Dont choose a to Hight Confidential label, start with a low one.
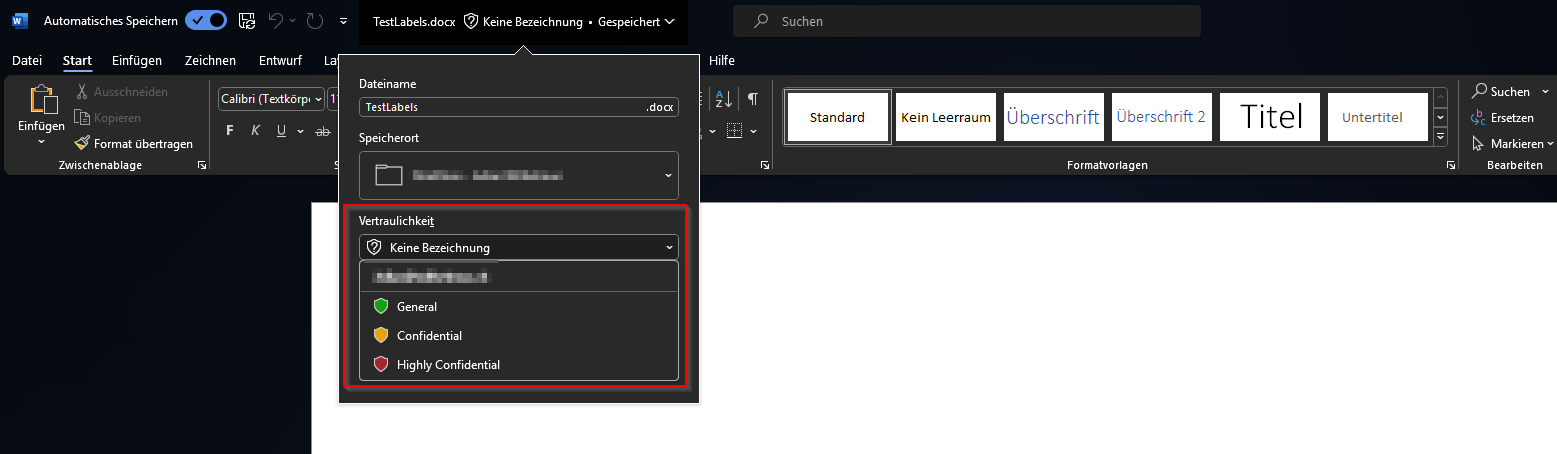
Give it a Name and Finish up the label policy. It can take up to 48 hours until your users can see the labels in their applications. So be patient.
Step 6: Monitor and Review
Where can I Monitor and Review the labels? The activities of the labels can be reviewed on the Overview tab under Information protection. You can see the most used sensitivity label, top activity, Encryption report and a lot more.
Conclusion
You learned how to configure and deploy Sensitivity Labels with Microsoft Purview. We have shown you the comprehensive steps to establish a robust sensitivity label framework. Did you enjoy this article? Dont forget to follow us and share this article. You may also like the the following articles.