How to use Microsoft Purview Sensitivity Labels with PDF files. The sensitivity labels from the Microsoft Compliance Purview center are quit nice. But what if I told you, that you not only can label word, excel or powerpoint file but also PDFs! Its really easy. In this blog post we are going to have a look on How to use Microsoft Purview Sensitivity Labels with PDF files.
Table of Contents
What is Microsoft Purview Sensitivity Labels
Sensitivity labels are metadata tags applied to documents and emails to classify and protect sensitive information. They play a crucial role in enforcing data protection policies, ensuring compliance with regulatory requirements, and safeguarding sensitive data from unauthorized access or misuse.
I have already created a blog post about all the key features of Sensitivity Labels. Have a look there first because its important you have configured the Sensitivity Labels already.
What are we going to set up?
If you have deployed your Sensitivity Labels you might want to start with labelling PDF files. In this blog post we will show you, How to use Microsoft Purview Sensitivity Labels with PDF files. We will configure the following:
- Step 1: Adding support for PDF
- Step 2: Change Label from PDF
- Option 1: From the SharePoint Online website
- Option 2: From the Adobe Reader Acrobat application
How to use Microsoft Purview Sensitivity Labels with PDF files
In this section we will show you the process of How to use Microsoft Purview Sensitivity Labels with PDF files. Its important you have already deployed your Sensitivity Labels and are ready for the next step. Just follow the instructions below.

Adding support for PDF
In the first step we need to add the support for PDF files. The simpliest way to do this, is a short PowerShell command.
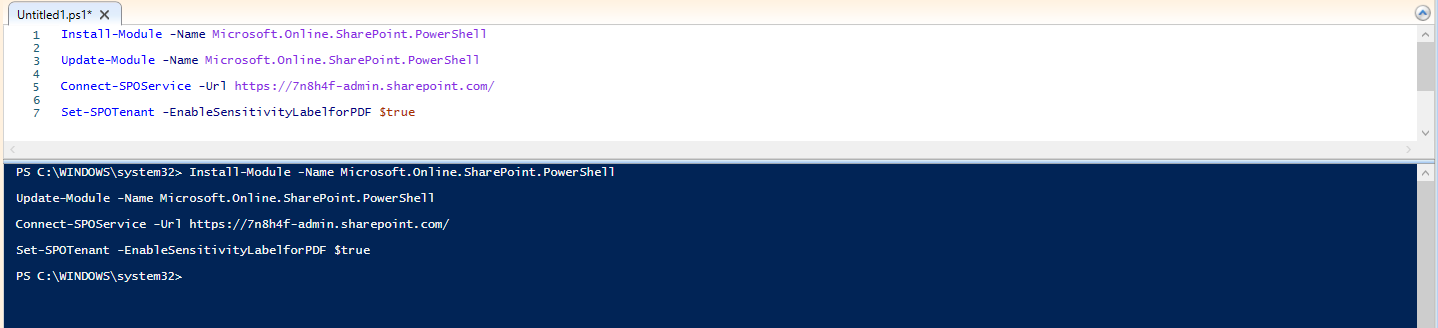
First we need to install the Microsoft Online SharePoint Module. Open a new PowerShell session and enter the following command.
Install-Module -Name Microsoft.Online.SharePoint.PowerShell
Just to make sure you have the correct version also enter the following command to update the module.
Update-Module -Name Microsoft.Online.SharePoint.PowerShell
Now we can start connecting to the SPO Service.
Connect-SPOService -Url https://contoso-admin.sharepoint.com
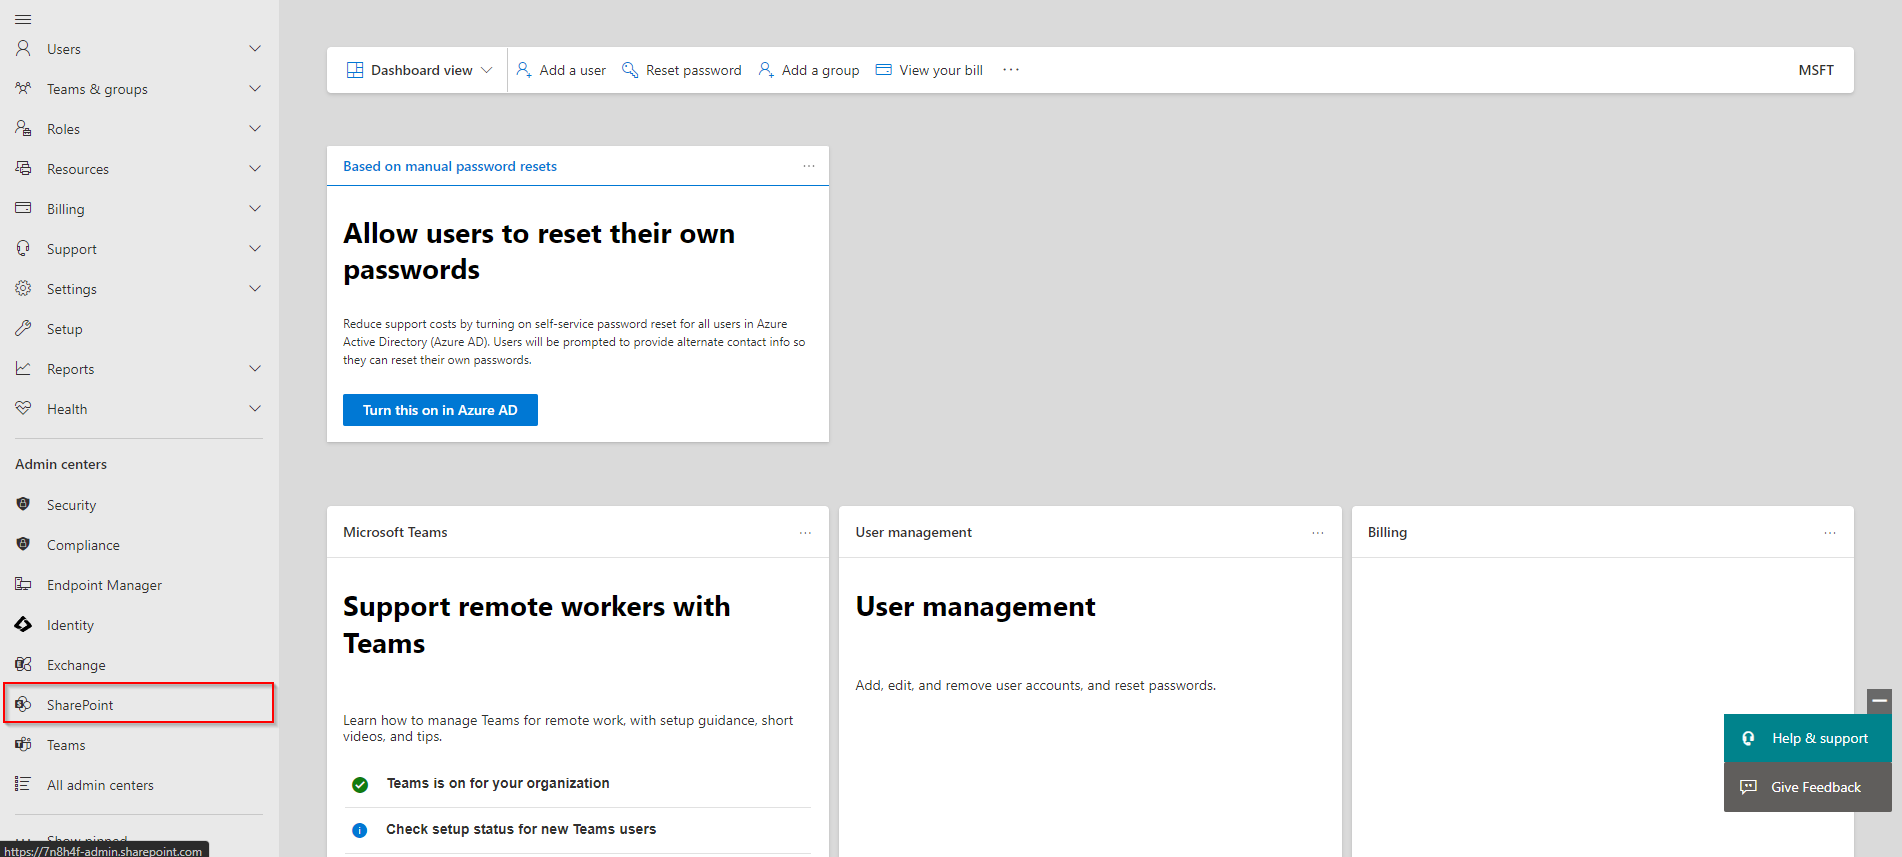
Change the Url to your SharePoint Admin Url. You can find this very easy, just go to the admin.microsoft.com website and click on SharePoint. Now just copy the Url and enter it with the command.

Now we can activate the PDF support with the following command:
Set-SPOTenant -EnableSensitivityLabelforPDF $true
Not that it can take a bit until you really can use PDF for labelling. Just to be sure wait 24 hours and come back.

Change Label from PDF
We have now activated the PDF support. But how can we change the label on the PDF files? On the date of this writing there are two options available.
- Option 1: From the SharePoint Online website
- Option 2: From the Adobe Reader Acrobat application
Option 1: From the SharePoint Online website
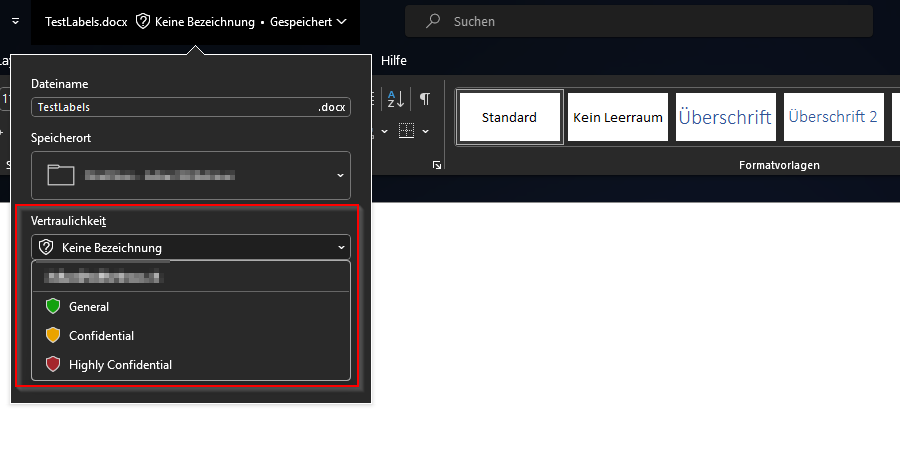
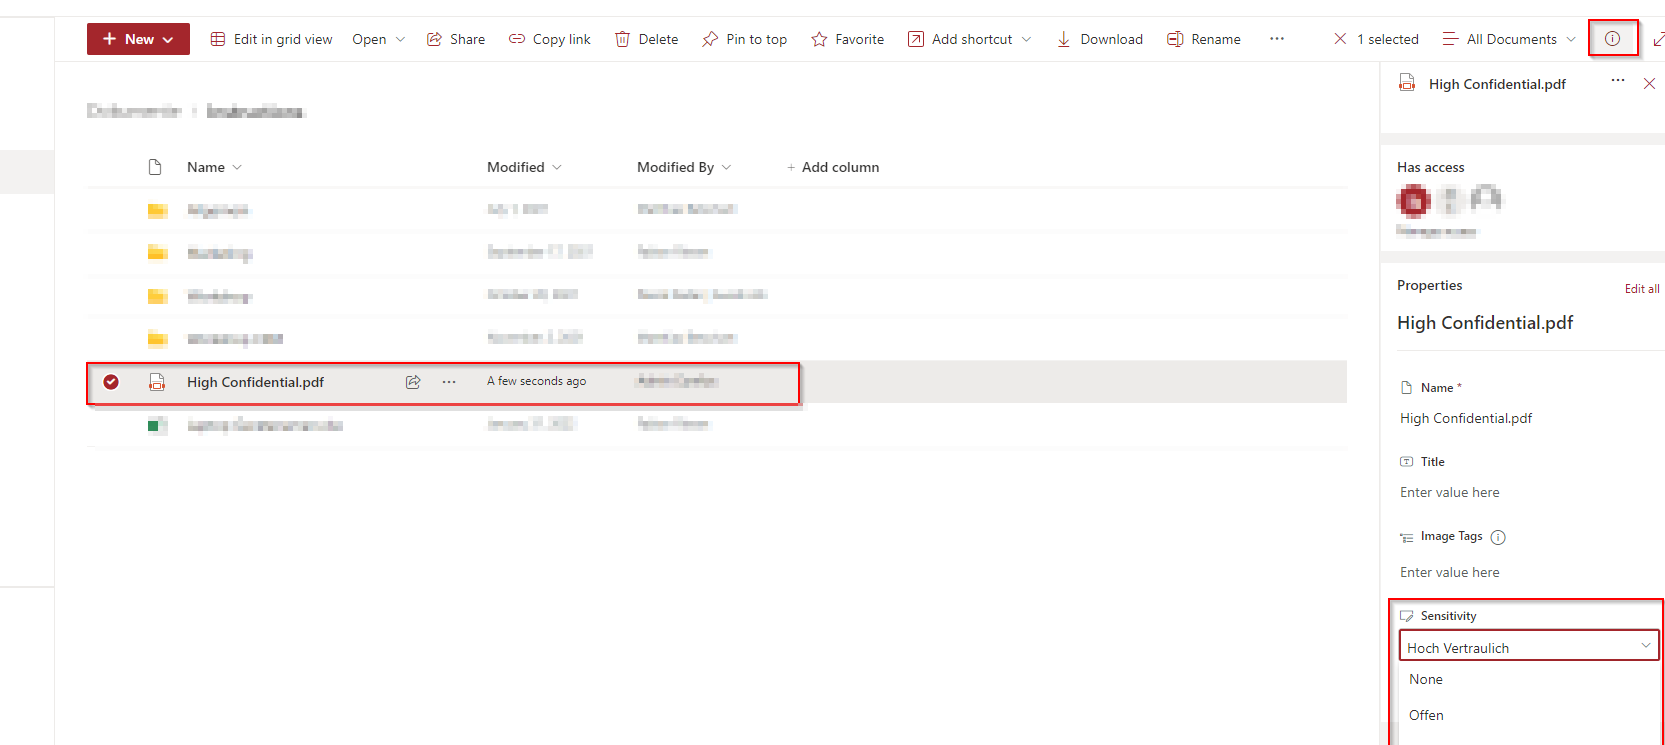
This is the simpliest way. Go to the SharePoint site where you have saved some PDF files. Navigate to the SharePoint site, click on the PDF (Do not open it, just highlight it). Now click on the information (top right). When you scroll down you should see a section with Sensitivity. There you can change the label from the PDF file.
Option 2: From the Adobe Reader Acrobat application
Important. To label PDF files on the Adobe Reader Acrobat application you need the Acrobat Standard or Acrobat Pro version. The Adobe Reader DC is not compatible with the Microsoft Purview Sensitivity Labels.
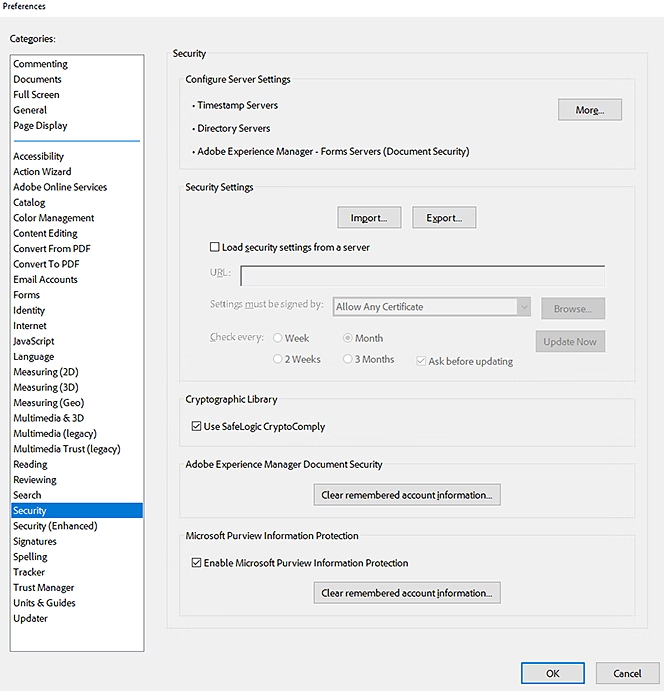
To get started we first need to check a configuration in the application.
- Open Acrobat
- Navigate to Preferences > Security
- Check Enable Microsoft Purview Information Protection
- After you have checked the setting, restart Acrobat to apply the settings.
There is also an option to deploy this setting. This is optional you can always do it manually in the Acrobat settings. If you want to deploy it you just need to deploy a registry setting as descriped here:
Computer\HKEY_LOCAL_MACHINE\SOFTWARE\WOW6432Node\Policies\Adobe\Adobe Acrobat\DC\FeatureLockDown
And set the value bMIPLabelling to 1
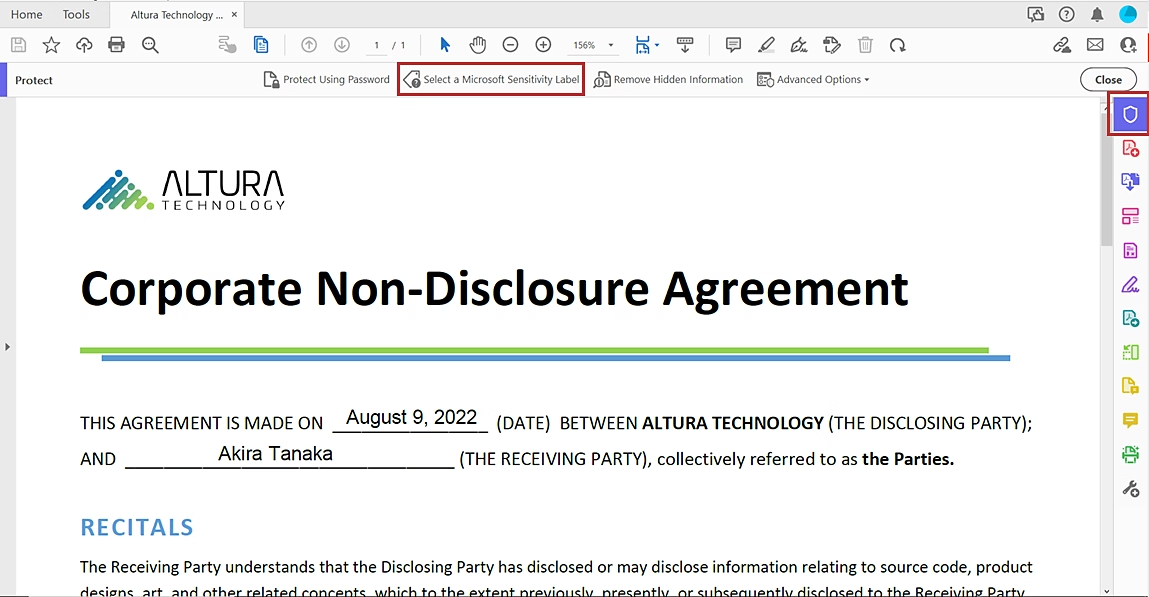
Now open a labelled PDF file. You will be asked to enter your Microsoft credentials. After you have entered the credentials you will see under Protect the Microsoft Sensitivity Label option.
Conclusion
You learned How to use Microsoft Purview Sensitivity Labels with PDF files. We first added the support for PDF labelling with a quick PowerShell command. We than showed you, How you can change the label on the SharePoint website and how you can setup the support for in the Acrobat application. Did you enjoy this article? Dont forget to follow us and share this article. You may also like the following articles.