Welcome to our new blog post about How to hide “Turn on an ad privacy feature” in Chrome with Microsoft Intune. If you’re managing devices in an enterprise environment, user experience and control are top priorities, especially when it comes to browser settings. With recent updates, Google Chrome has introduced a prompt urging users to “Turn on an ad privacy feature.” While this feature is designed to give users more control over targeted ads, it can cause confusion in managed environments. In this post, we’ll walk through how to suppress this prompt using Microsoft Intune, ensuring a cleaner, more consistent experience for your end users.
Table of Contents
Why You Should Hide It
From an IT admin’s perspective, leaving Chrome’s “Turn on an ad privacy feature” prompt visible can lead to a host of small but avoidable issues. Users may not fully understand the implications of enabling ad privacy features, leading to support tickets or misconfigured settings that interfere with web-based apps or enterprise policies. More importantly, in a corporate environment, browser configurations should align with company compliance and privacy strategies—not vary based on individual user choices. Hiding this prompt helps maintain consistency, reduce distractions, and streamline support across your organization.

How to hide “Turn on an ad privacy feature” in Chrome with Microsoft Intune
Step 1: Download and Import Google Chrome ADMX templates
First we will need to Download and Import the Google Chrome ADMX templates. Unfortunately this setting is not yet available in the Microsoft Intune Settings Cataloge. So just follow the steps below to Download and Import the Google Chrome ADMX templates.
- Click on the link to download the Google Chrome ADMX templates
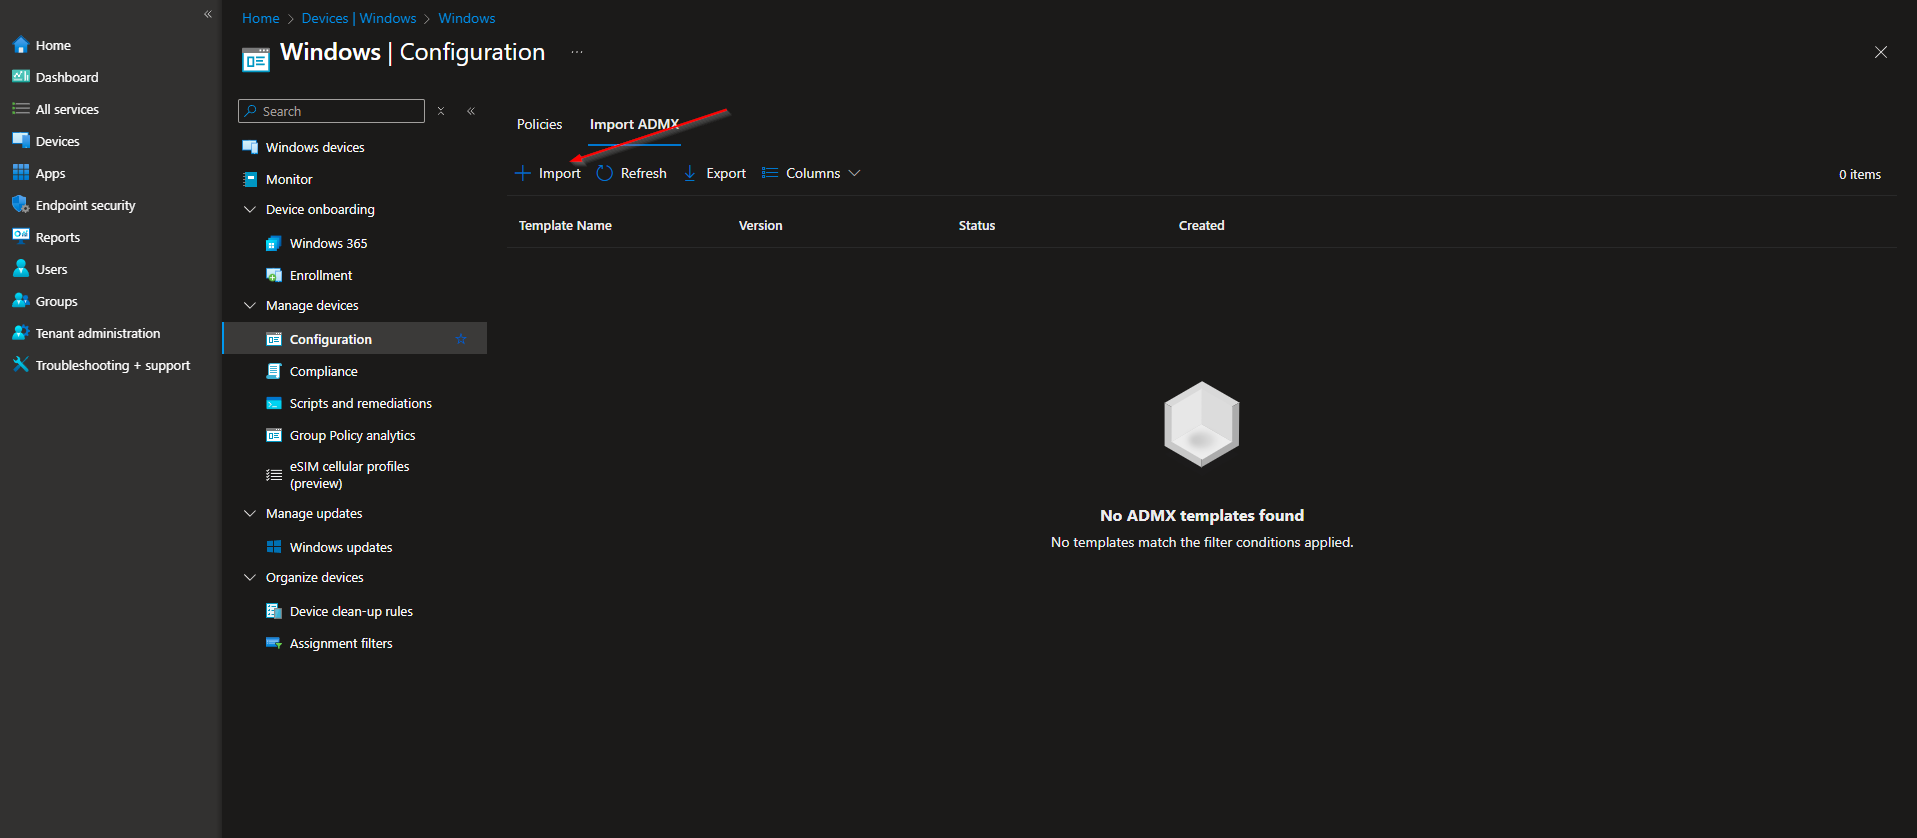
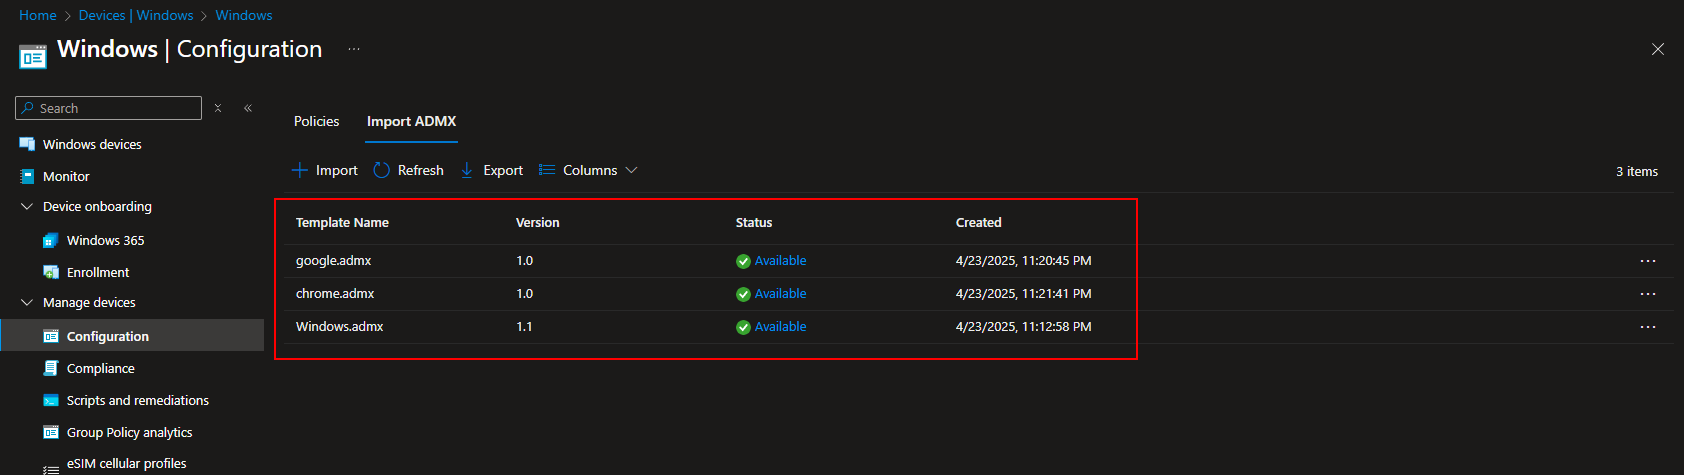
We will now need to import the ADMX templates on the Microsoft Intune Portal. But wait! Before we will import the Google Chrome ADMX templates, we will first need to import the Windows templates. This is very important. Otherwise there will be an error. But where are the Windows templates? They are already downloaded to your Windows device. You can just follow the steps below.
- Go to intune.microsoft.com
- Click on Devices
- Click on Windows
- Click on Configuration profiles
- Click on Import ADMX
- Click on Import
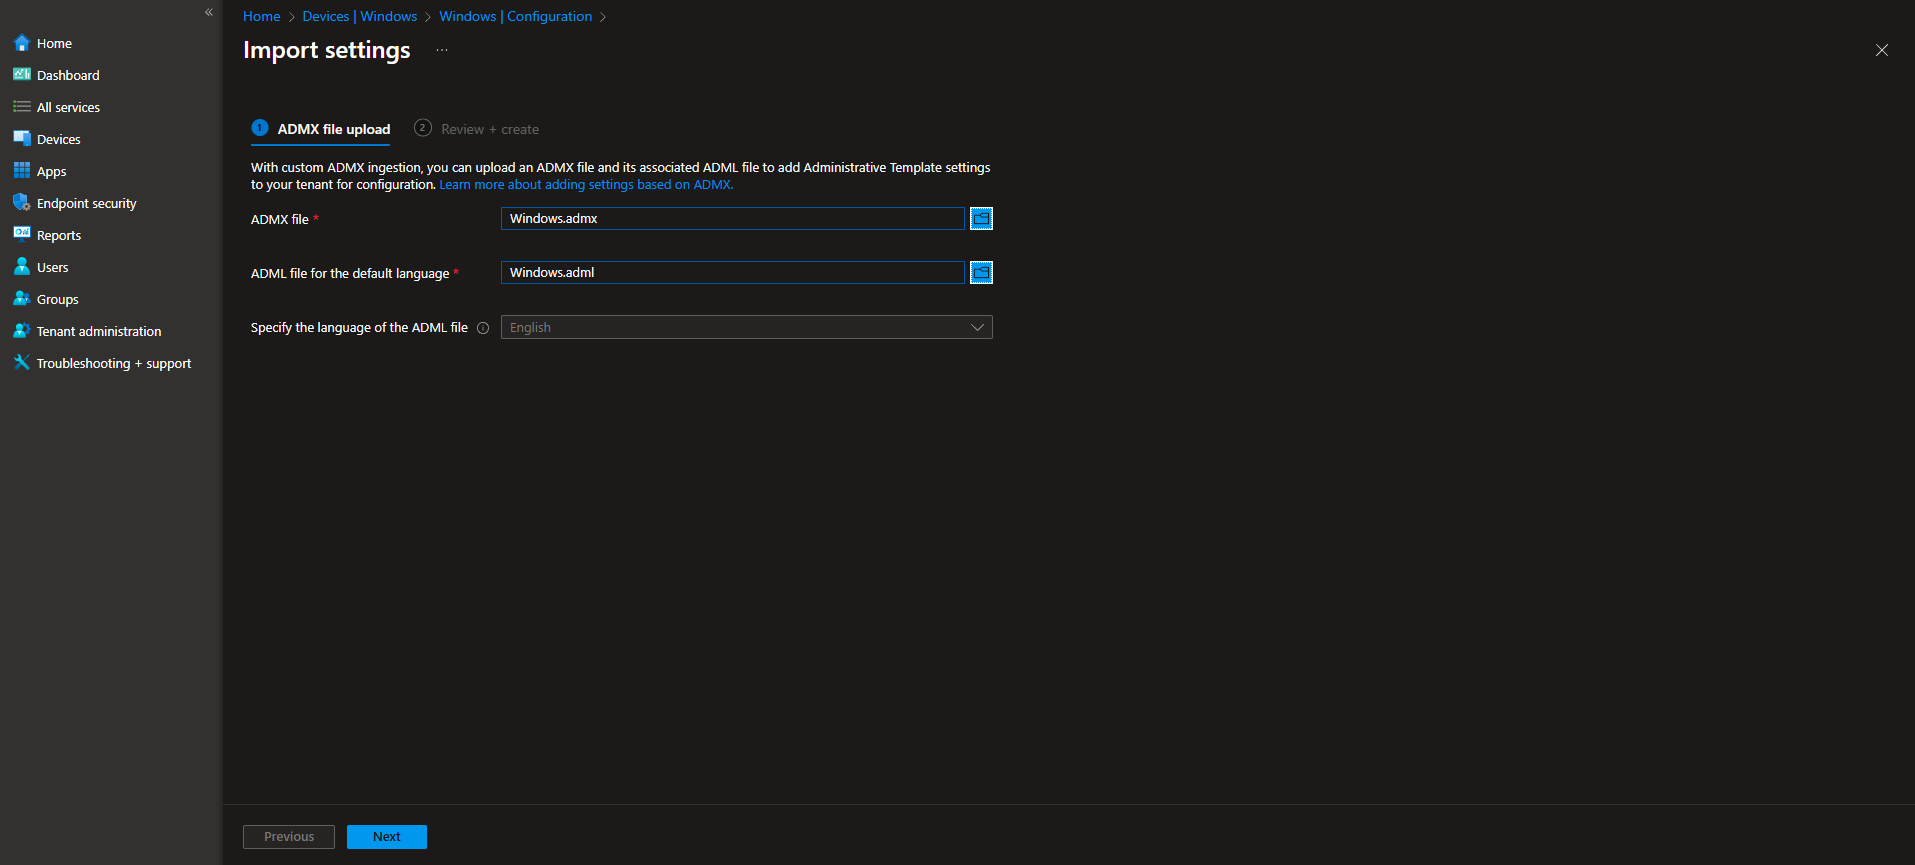
Now we will need to select the windows.admx and windows.adml file. Both the files are stored on C:\Windows\PolicyDefinitions folder.
- For ADMX file select windows.admx from C:\Windows\PolicyDefinitions
- For ADML file select windows.adml from C:\Windows\PolicyDefinitions\[LANGUAGEFOLDER]
- Click on Next and Import
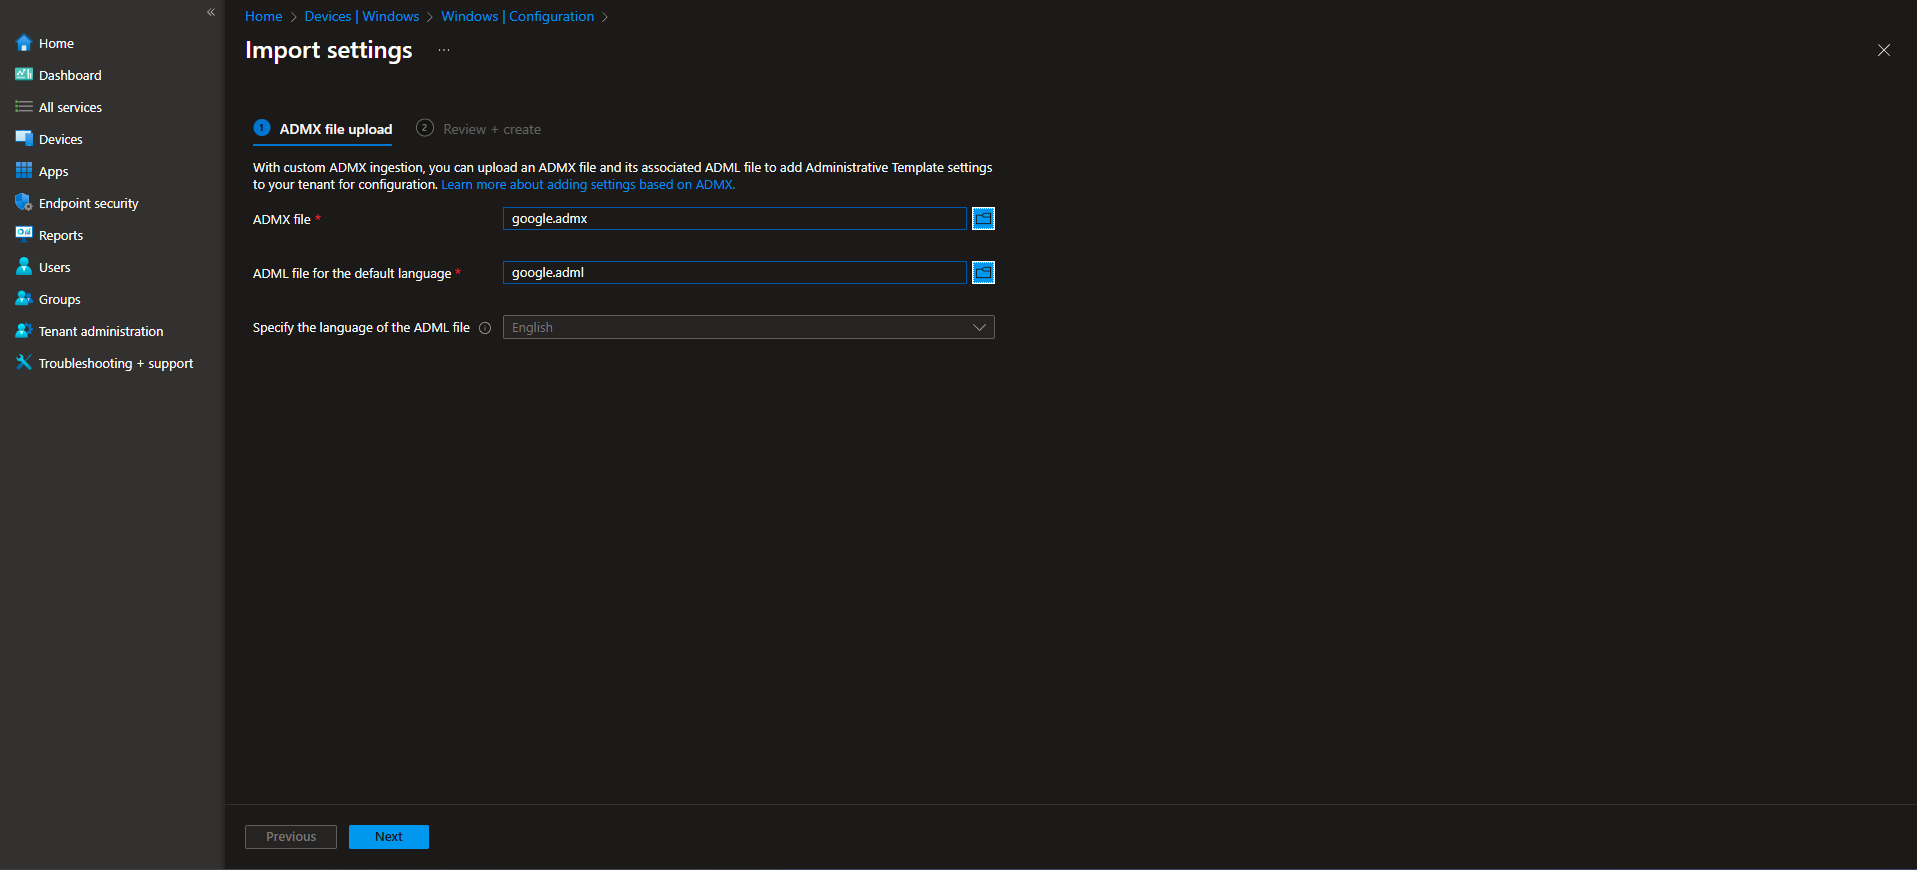
Now we will need to do the same with the google.admx and google.adml files. Both files are in the downloaded folder.
- For ADMX file select google.admx from \policy_templates\windows\admx\google.admx
- For ADML file select google.adml from \policy_templates\windows\admx\[LANGUAGEFOLDER]\google.adml
- Click on Next and Import
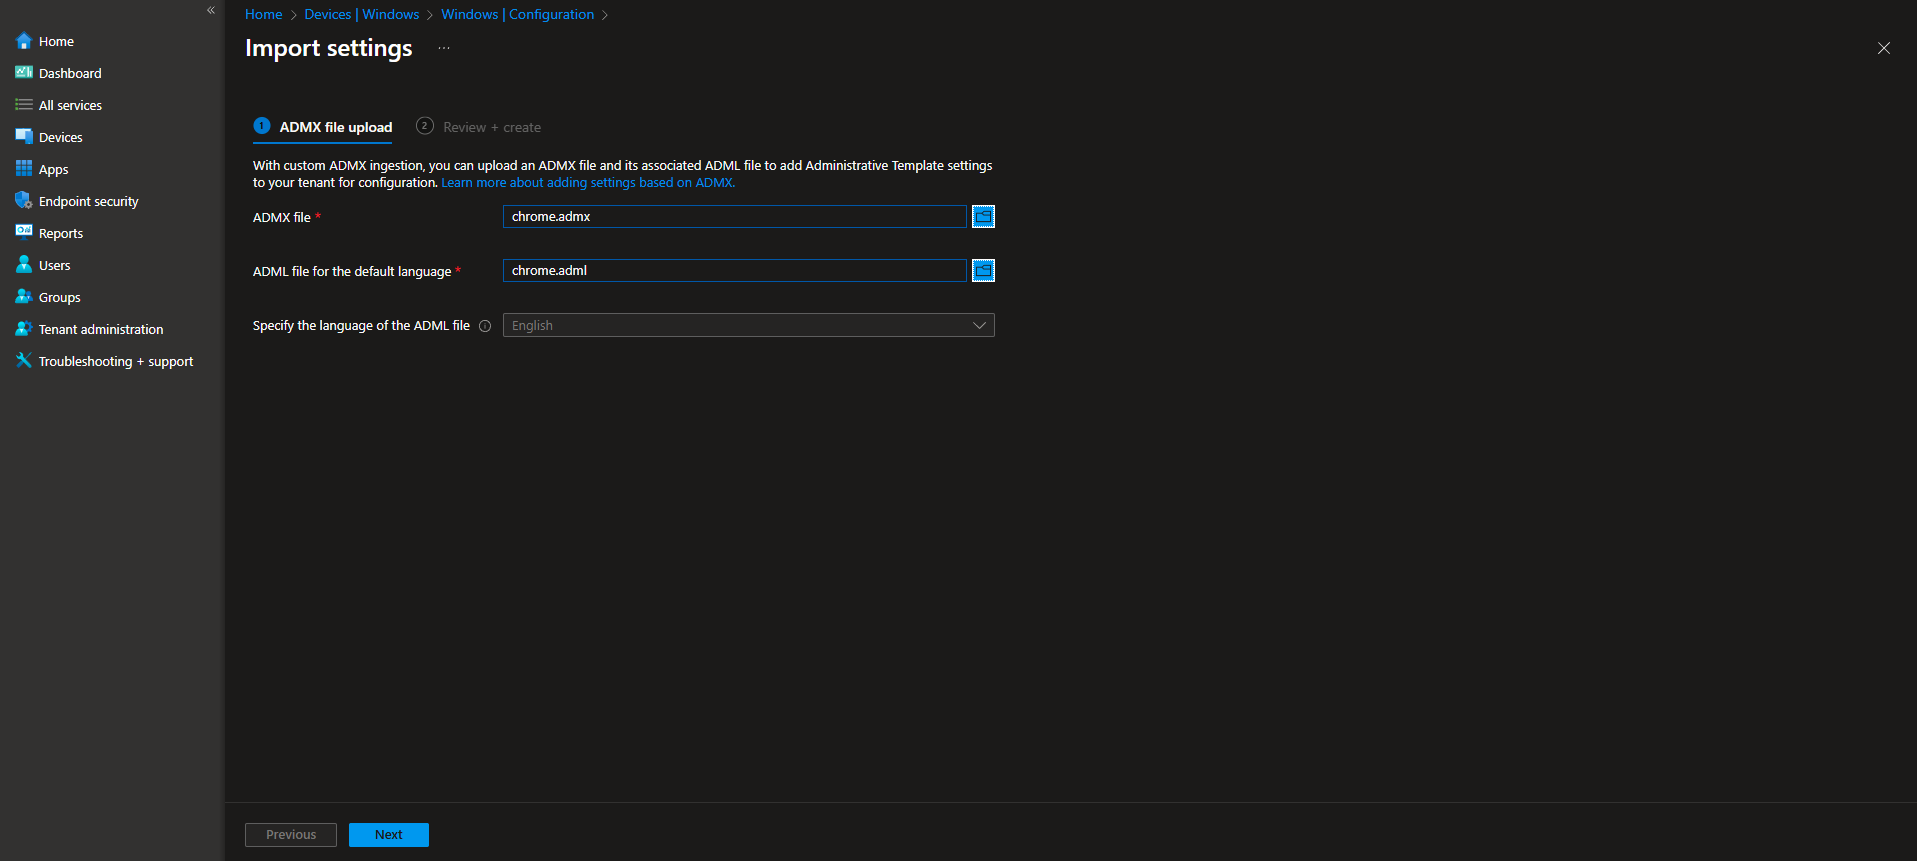
Last, we will need to do the same with the chrome.admx and chrome.adml files. Both files are in the downloaded folder.
- For ADMX file select chrome.admx from \policy_templates\windows\admx\chrome.admx
- For ADML file select chrome.adml from \policy_templates\windows\admx\[LANGUAGEFOLDER]\chrome.adml
- Click on Next and Import
Step 2: Create Configuration Policy
Now we can start with creating a new configuration policy and configure the settings. Just follow the steps below.
- Go to intune.microsoft.com
- Click on Devices
- Click on Windows
- Click on Configuration profiles
- Click on Create
- Click on New Policy
- Platform: Windows 10 and later
- Profile type: Templates
- Choose Imported Administrative templates
- Click on Create

On the Basics tab give it a meaningful name and description. Click on Next.
On the Configuration settings tab do the following:
- Click on All Settings
- Search for Choose whether the Privacy Sandbox prompt can be shown to your users
- You can either deploy the policy to the User or Device type. I will deploy it to Device type.
- Click on the policy and choose Disabled
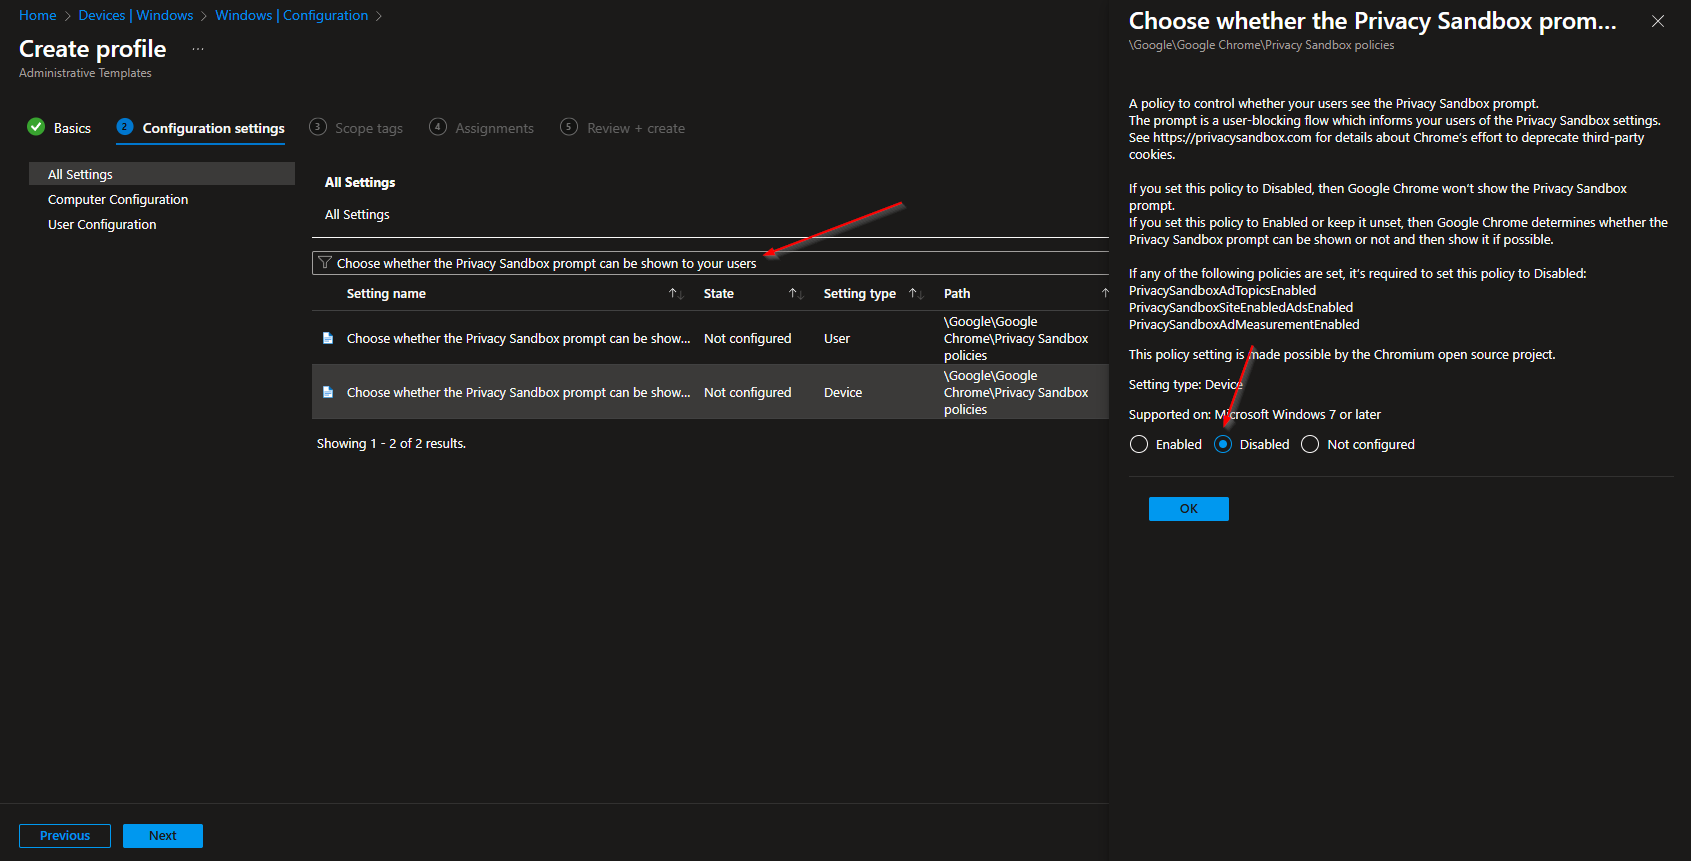
- Define your Scope if applicable and click on Next
- On the Assignments tab assign the Policy to a Group or to All Users / All Devices
- And Review + Create the Policy
Congratulations! You have successfully deployed the policy.
Conclusion
In this blog post we Learn about How to hide “Turn on an ad privacy feature” in Chrome with Microsoft Intune. We first imported windows, google and chrome templates to Microsoft Intune. We created a new Configuration Profile in Microsoft Intune and configured the Turn on an ad privacy feature. Did you enjoy this article? Dont forget to follow us and share this article. If you have any questions or need further assistance, feel free to reach out or leave a comment below.


