Welcome to our new blog post about How to Uninstall Microsoft Office Completely. Microsoft Office is one of the most widely used software suites for productivity, but sometimes things don’t go as smoothly as expected. Whether you’re dealing with installation issues, version conflicts, or persistent error messages, there may come a point where uninstalling Office completely is the best—or only—solution. In this post, we’ll look at why a full uninstall might be necessary, and what steps you can take to remove Microsoft Office thoroughly from your system.
Table of Contents
Why You Might Need to Uninstall Office Completely
There are several scenarios where a clean uninstall of Microsoft Office becomes necessary. For example, if you’re trying to upgrade from an older version (like Office 2016 or Office 2019) to Microsoft 365, leftover files and settings can sometimes cause the new installation to fail. You might also encounter issues where Office apps crash, fail to open, or hang indefinitely. In some cases, uninstalling through the regular “Apps & Features” menu doesn’t remove everything, leaving behind registry entries or activation data that cause further problems.
Common errors that often lead users to seek a full uninstall include:
- Error Code 30010-4: “Something went wrong” during installation.
- Error Code 0x80070005: Access denied due to permission issues.
- “We’re sorry, but we can’t verify the signature of files required to install your Office product.”
- Office apps failing to open with messages like “Something went wrong” or “Office needs to repair itself.”
In these cases, a thorough removal followed by a clean reinstall is often the most effective way to resolve the problem.
How to Uninstall Microsoft Office Completely
In the past, Microsoft offered the Support and Recovery Assistant (SaRA) tool as a go-to solution for completely uninstalling Office when standard methods failed. However, as of recent updates, the standalone SaRA tool is no longer available for direct download. Instead, its functionality has been integrated into the Get Help app on Windows. This app now provides guided support—including the option to fully uninstall Microsoft Office. In this blog post, we’ll walk you through how to use the Get Help app to remove Office completely from your system, ensuring all leftover files, registry entries, and services are properly cleared out.
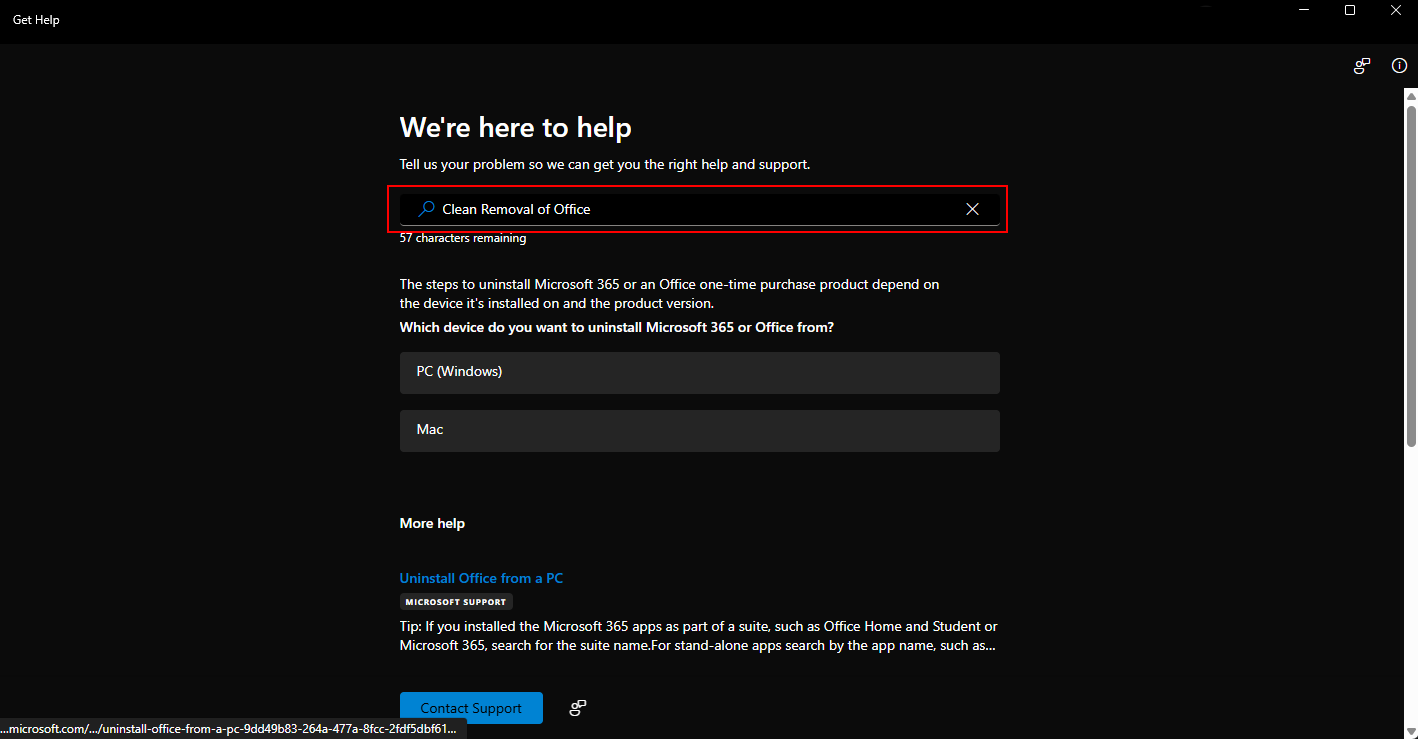
- Open the Get Help application
- Search for Clean Removal of Office
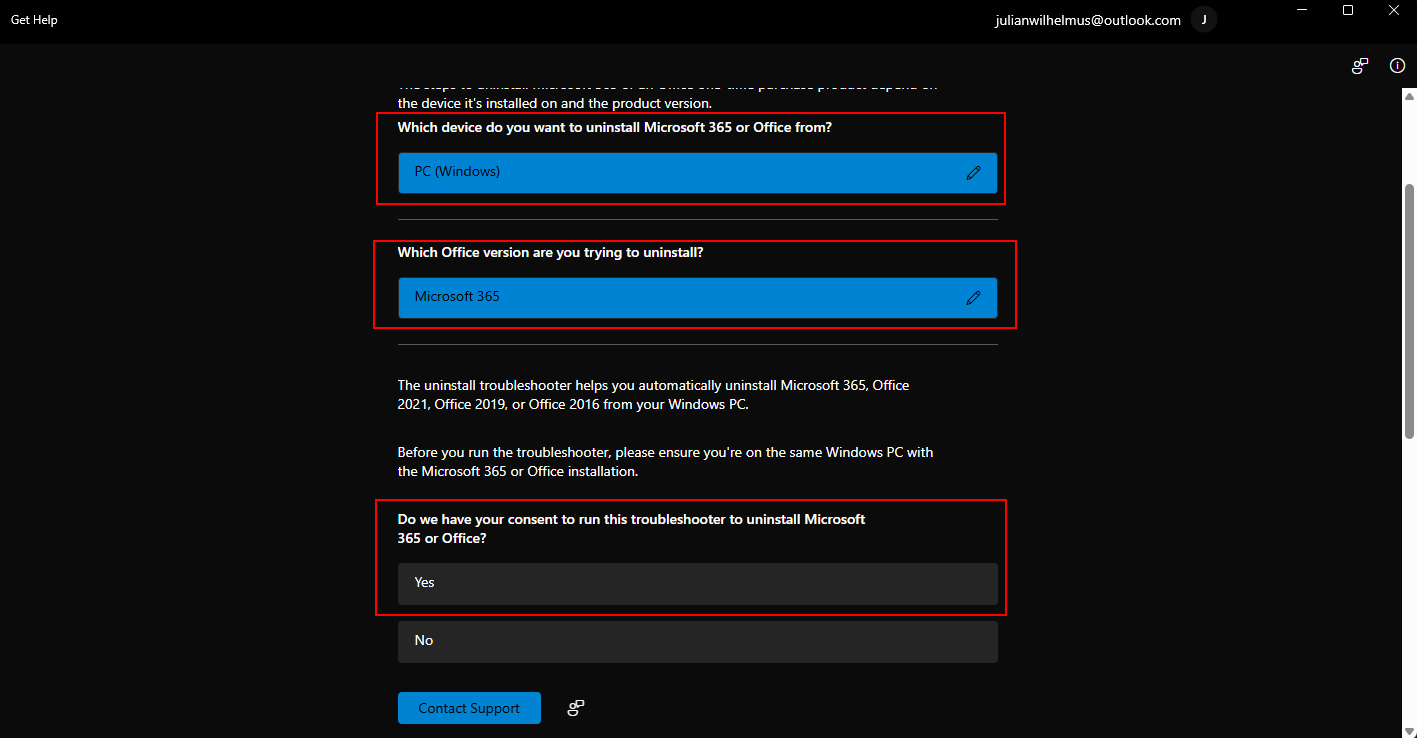
Now follow the steps to uninstall Microsoft 365 or an Office one-time purchase product depend on the device it’s installed on and the product version.
Enter the device and Office version installed. Last click on Yes to start the Uninstall.
It will now start to uninstall your Microsoft Office version. Note: after some time there will be another window which will uninstall the Office applications. After the window is closed the uninstall was successful.
Conclusion
In this blog post we Learn about How to Uninstall Microsoft Office Completely. Completely uninstalling Microsoft Office may seem daunting, especially when traditional methods don’t remove all components or resolve persistent issues. With the transition from the standalone SaRA tool to the integrated Get Help app, Microsoft has made the process more streamlined and accessible. Whether you’re troubleshooting installation errors, cleaning up remnants of a previous version, or preparing for a fresh install, using the Get Help app ensures a thorough and supported approach. By following the steps outlined in this post, you can confidently remove Office and start with a clean slate. Did you enjoy this article? Dont forget to follow us and share this article. If you have any questions or need further assistance, feel free to reach out or leave a comment below.