How to export and import Azure Automation Runbooks. Azure Automation Runbooks are powerful tools that help automate frequent, time-consuming, and error-prone cloud management tasks. Whether you’re managing updates, automating incident response, or orchestrating complex workflows across Azure services, Runbooks make it easier to maintain consistency and reliability in your operations. But there may come a time when you need to move these Runbooks between environments, share them with colleagues, or back them up for disaster recovery. In this post, we’ll walk through the steps to export and import Azure Automation Runbooks effectively.
Table of Contents
Why You Might Need to Export or Import Runbooks
There are several scenarios where exporting and importing Runbooks becomes essential. For example, during development and testing, you might create Runbooks in a non-production environment and later need to transfer them to production. Organizations with multiple Azure tenants or subscriptions often need to replicate automation assets across environments to maintain standardization. Additionally, exporting Runbooks can serve as a backup strategy or facilitate sharing scripts across teams for collaboration or review. Whatever the case, having a solid understanding of how to move Runbooks safely and efficiently can save time and reduce risk.
How to export and import Azure Automation Runbooks
Step 1: Install and Import Azure Module
In this step we will first Install and Import the Azure Module. I have already create a Blog Post about How to get started with the Azure PowerShell Module. Make sure you check it out! If you have already installed the Module you can skip this step. If you are experiencing problems make sure you are using Powershell 7 for this documentation. Just follow the steps below.
- Open PowerShell 7 as an administrator
First we will edit the Execution Policy. Run the following command to edit the Execution Policy.
Set-ExecutionPolicy -ExecutionPolicy RemoteSigned -Scope CurrentUser

Now we will install the Az Module. You can find the official Microsoft Az Module documentation here.
To install the Az Module enter the following Command.
Install-Module -Name Az -Repository PSGallery -Force

Great, you have successfully installed the Az Module. You can now proceed to the next step.
Step 2: Connect to Azure PowerShell Module
Now we will connect to the Azure PowerShell Module. Make sure you have you Microsoft 365 administrator ready. We will need this to authenticate. To connect to your Azure environment just enter the following command into the PowerShell session.
Connect-AzAccount -device
You will now need to open the website shown. There you will need to enter the shown code to the field.
- Open a Browser
- Go to https://microsoft.com/devicelogin
- Enter the code which is shown in the PowerShell command
- Login with your administrator and allow the Rest API


After you have logged in with your administrator, you will see in your PowerShell command that the login was successfully.
Step 3: How to export Azure Automation Runbooks
We have installed the Azure PowerShell Module and have connected our PowerShell session to the Azure environment. We can now export our Azure Automation Runbooks from our environment. To run the PowerShell script we will need to provide some informations. Make sure you have it ready.
Export-AzAutomationRunbook -ResourceGroupName "ResourceGroup01" -AutomationAccountName "ContosoAutomationAccount" -Name "Runbook03" -Slot "Published" -OutputFolder "C:\temp\"
- -ResourceGroupName: Enter the Resource Group where the Automation Account and your Runbooks are located.
- -AutomationAccountName: Enter the Automation Account Name.
- -Name: Enter the Runbook Name
- -Slot: Enter “Published”
- -OutputFolder: Enter the folder where you want the Runbooks been exported. You can enter any path on your local machine.

You will now have your Runbooks files in your Output folder. You can now use the file to import it on another tenant or just use it as an Backup. In the next step we will show you, how you can import the Runbook on another tenant for example.
Step 4: How to import Azure Automation Runbooks
In the previous step we have exported a Runbook from an Automation Account. In this step we are going to import the Runbook to an new Tenant. To do this you will need to have a Automation Account ready. If you dont have an Automation Account already, create one from the Azure Portal. You can then follow the steps below to import the Runbook. We will use the Azure Portal to do this.
- Make sure you have your Automation Account ready. If you dont have it already, create one!
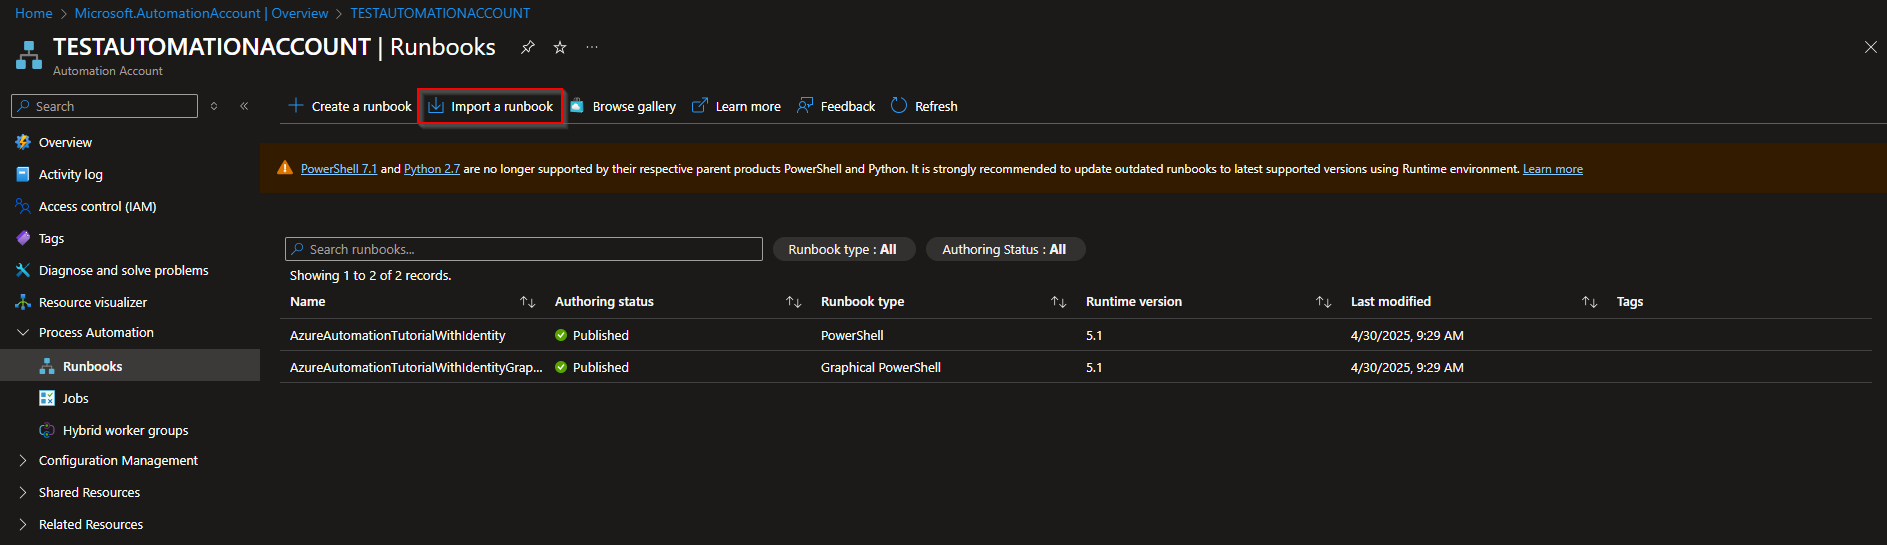
- Navigate to the Automation Account > Process Automation > Runbooks
- There you can click on Import a runbook
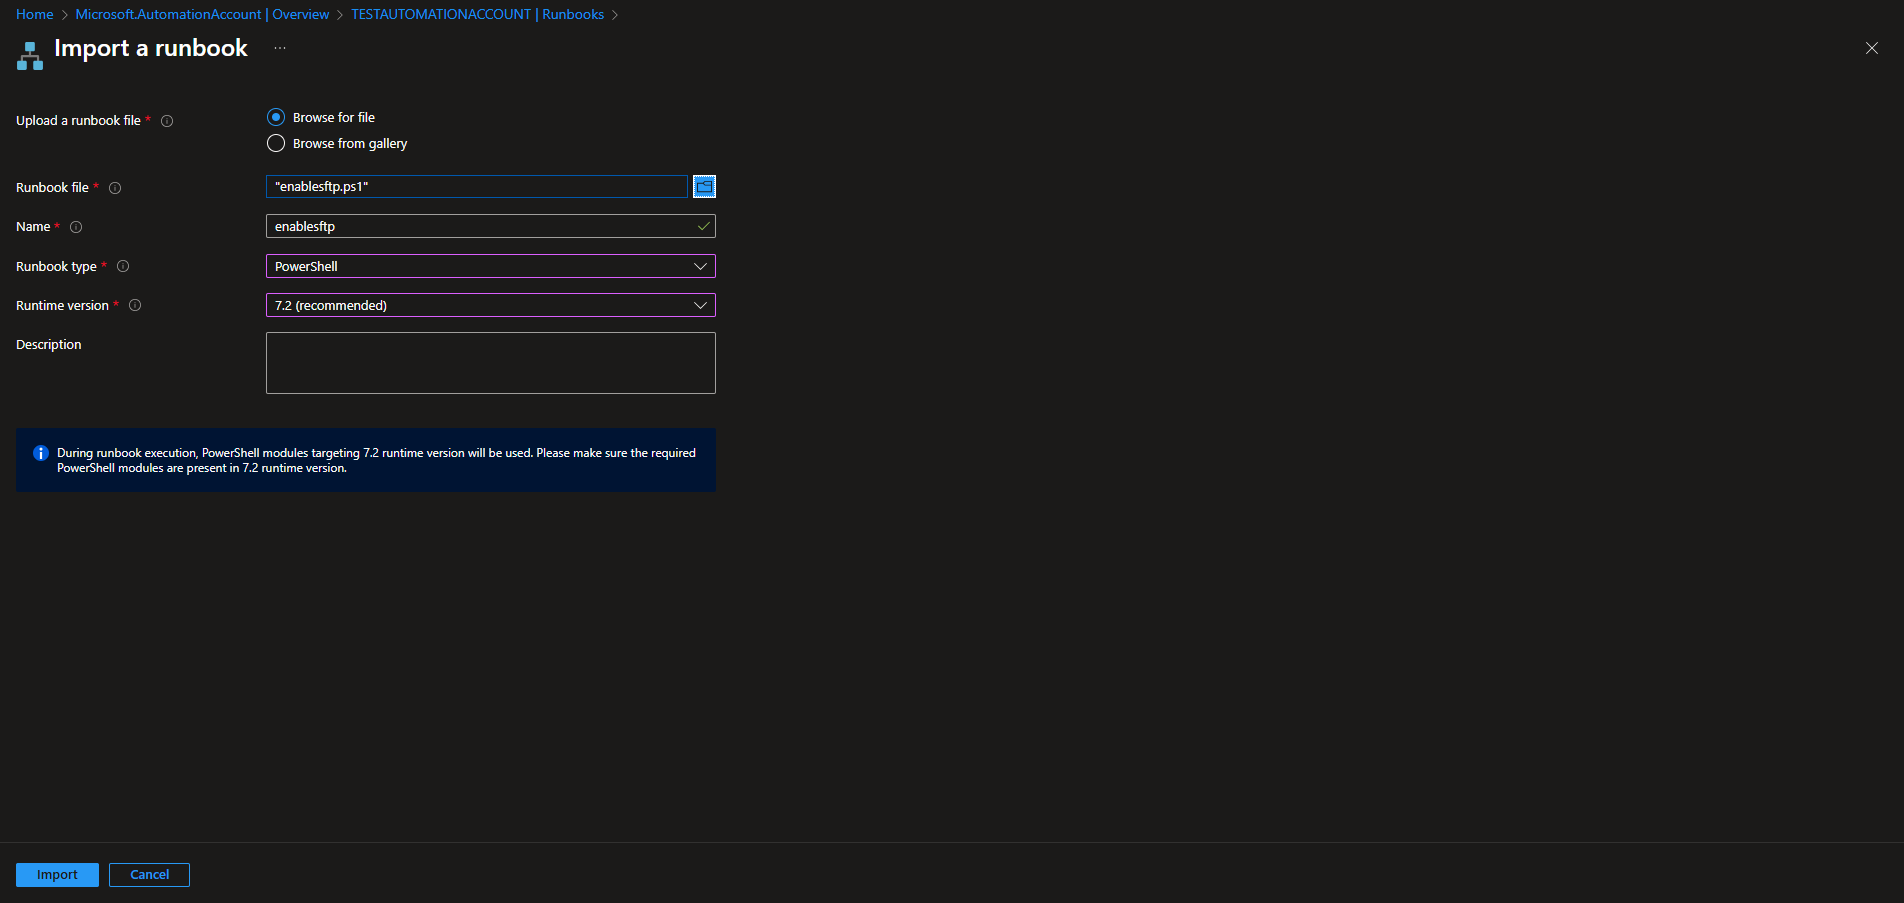
Now Browse for the file and upload the ps1 runbook file.
- Upload a runbook file: Browse for file
- Runbook file: Upload the Runbook in your Output folder
- Name: Give it a name
- Runbook type: Enter the type of the Runbook
- Runtime version: Enter the Version of the Runbook
- Description: Enter a description of the Runbook
Congrats, you have sucessfully imported a Runbook with the help of the Azure Portal. If you have any questions or problems, just comment below.
Conclusion
In this blog post we Learn about How to export and import Azure Automation Runbooks. Exporting and importing Azure Automation Runbooks is a straightforward but crucial skill for maintaining flexible, scalable, and resilient automation workflows. Whether you’re promoting changes from development to production, backing up critical Runbooks, or sharing them across teams or environments, knowing how to move these assets properly helps ensure continuity and consistency.