Welcome to our latest blog post from this week on How to Show Microsoft 365 Room Mailbox Meeting Details. In this article, we’ll explore the best practices for change the calendar permission of users or rooms with PowerShell. With this blog post you as an admin can change calendar permission for any users in your organization. Whether you’re new with Microsoft 365 or looking to learn something new, these tips will guide you toward a more flexible infrastructure.
Table of Contents
Why change Microsoft 365 Room Calendar Permission?
Displaying Microsoft 365 Room Mailbox meeting details is essential for improving transparency and coordination within an organization. By showing details such as meeting subject, organizer, and time, teams can quickly verify room availability, avoid scheduling conflicts, and ensure efficient use of shared meeting spaces. This visibility is particularly valuable in busy office environments where multiple teams rely on the same rooms, helping to streamline planning and reduce confusion.
I have already created a blog post about How to change Microsoft 365 Calendar Permission with PowerShell. There you will find some more deep-dives about how you can change Calendar Permission.
How to Show Microsoft 365 Room Mailbox Meeting Details
In this section we will show you the process of How to change Microsoft 365 Calendar Permission with PowerShell. We will show you step by step, how you as an admin can change users calender permission.
Step 1: Install and Import Exchange Online Module
First we will connect to the Exchange Online PowerShell module. If you are experience problems, make sure you use PowerShell 7.
First we will install the Exchange Online PowerShell module.
- Open PowerShell as an administrator
Run the following command to Install the Module. Accept with Yes to All.
Install-Module ExchangeOnlineManagement

Next we will Import the Module.
Import-Module ExchangeOnlineManagement

Step 2: Connect to Exchange Online PowerShell
Now we will connect to the ExchangeOnlineManagement module. Make sure you have you Microsoft 365 administrator ready. We will need this to authenticate.
Connect-ExchangeOnline -Device
You will now need to open the website shown. There you will need to enter the shown code to the field.
- Open a Browser
- Go to https://microsoft.com/devicelogin
- Enter the code which is shown in the PowerShell command
- Login with your administrator and allow the Rest API


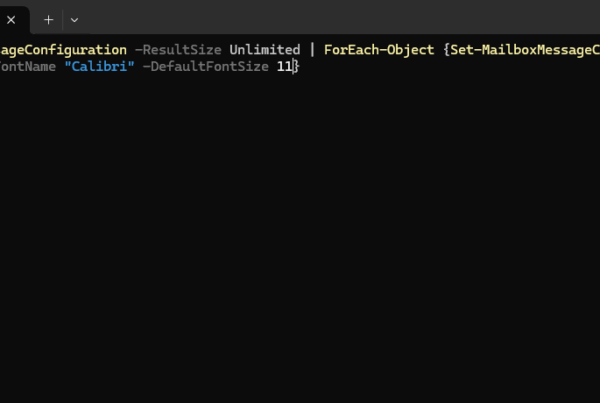
After you have logged in with your administrator, you will see in your PowerShell command that the login was successfully.
It should look something like this. You can go ahead to step 3.

Step 3: View the Calendar Permission of a User
We will first check, what Calendar Permissions are configured for the calendar.
Get-MailboxFolderPermission -Identity room01@whackasstech.com:\Calendar
Change the Orange part with the room email adress. You will receive something like this.
Note: In the picture we used hey@whackasstech.com to show the process. Just change hey@whackasstech.com with the room email address.

You can see all Calendar Permissions in the list. The User Default and Anonymous are default Permissions.
- Default User: This Permission apply to all authenticated users in your organization / tenant. If you change this Permission for example, everyone will see the calendar entries.
- Anonymous User: This Permission is for external or non-authenticated users.
Step 4: Change Calendar Permission
First we will have a look, what available calendar permissions there are. There are 10 available roles that you can set on calendars.
- Owner: Allows read, create, modify and delete all items and folders. Also allows manage items permissions
- PublishingEditor: Allows read, create, modify and delete items/subfolders.
- Editor: Allows read, create, modify and delete items.
- PublishingAuthor: Allows read, create all items. You can modify and delete only items you create.
- Author: Allows create and read items; edit and delete own items.
- NonEditingAuthor: Allows full read access and create items. You can delete only your own items.
- Reviewer: Read only.
- Contributor: Allows create items.
- AvailabilityOnly: Allows read free/busy information from calendar
- LimitedDetails: Allows view of the subject and location.
- None: No permissions to access calendar.
Step 4a: Change Default Calendar Permission (all users)
In this section I will change the default calendar permission. This permission apply to all authenticated users in your organization / tenant. To clarify a bit, a quick example.
I have my tenant from whackasstech.com. I want make sure, all users from this tenant can Read the calendar of room01@whackasstech.com. In this case, I will edit the default permission.
Set-MailboxFolderPermission -Identity room01@whackasstech.com:\calendar -User Default -AccessRights Reviewe
Note: In the picture we used hey@whackasstech.com to show the process. Just change hey@whackasstech.com with the room email address.

Step 4b: Create Custom Calendar Permission (specific users or group)
In this section I will show you, how you can create a custom calendar permssion. I will give you an example.
I want to share the calendar of room01@whackasstech.com to max@whackasstech.com. I want Max to be able to Read all calendar entries but he should not be able to edit them.
Add-MailboxFolderPermission -Identity room01@whackasstech.com:\calendar -User max@whackasstech.com -AccessRights Reviewer
Note: In the picture we used hey@whackasstech.com to show the process. Just change hey@whackasstech.com with the room email address.

Step 4c: Remove Calendar Permission
In this section I will show you, how you can delete a calendar permission. I will delete the permission which I have created in the last step.
I have a permission for the user max@whackasstech.com. Max has Read only permission for the calendar of room01@whackasstech.com. I want to remove this permission.
Remove-MailboxFolderPermission -Identity room01@whackasstech.com:\calendar -User max@whackasstech.com
Note: In the picture we used hey@whackasstech.com to show the process. Just change hey@whackasstech.com with the room email address.

Conclusion
You learned How to Show Microsoft 365 Room Mailbox Meeting Details. We installed and connected to the Exchange Online Module with PowerShell and had a look which permission options are available. We had a look ath the different PowerShell command Get-MailboxfolderPermission, Set-MailboxFolderPermission, Add-MailboxFolderPermission and Remove-MailboxfolderPermission. We hope this guide has provided you with valuable insights to improve your user management. Did you enjoy this article? Dont forget to follow us and share this article. If you have any questions or need further assistance, feel free to reach out or leave a comment below.