Microsoft Intune is a cloud-based service that provides mobile device management (MDM) and mobile application management (MAM) capabilities. It allows organizations to manage their devices and applications from a single console. PingID is a free authentication tool widely used. In this blog post, we will see how to deploy PingID with Microsoft Intune.
Table of Contents
What are we going to set up?
In this Blog post we will show you, How to deploy PingID with Microsoft Intune. We will perform the following steps to deploy PingID:
- Step 1: Download PingID application
- Step 2: Create WIN32 application
- Step 3: Import and deploy with Microsoft Intune
Step 1: Download PingID application
The first step is to download the FileZilla application from the official website. Once you have downloaded the application, you can proceed to the next step.
- Click on the link to download the PindID application: https://downloads.pingidentity.com/pingid/pc-client/PingID.exe
- You now have the PingID.exe application in your Downloads folder. We need this file in step 2.
Step 2: Create WIN32 application
After you have downloaded the PingID application the next step is to create an Intune Win App. Just follow the steps below:
- Create a new folder DeployePingID on C:. Copy the downloaded executable into this folder. Note that the executable can have a different name.
- Create a new folder Output on C:
Now we are going to create an Intune Win file with the official application. First of all download the official Microsoft Intune Win App Tool.
- Download the official Microsoft Intune Win App Tool
- After installation open the Intune Win App Tool. Important: You need to open the Tool with Administrator right. Otherwise there will be an error.
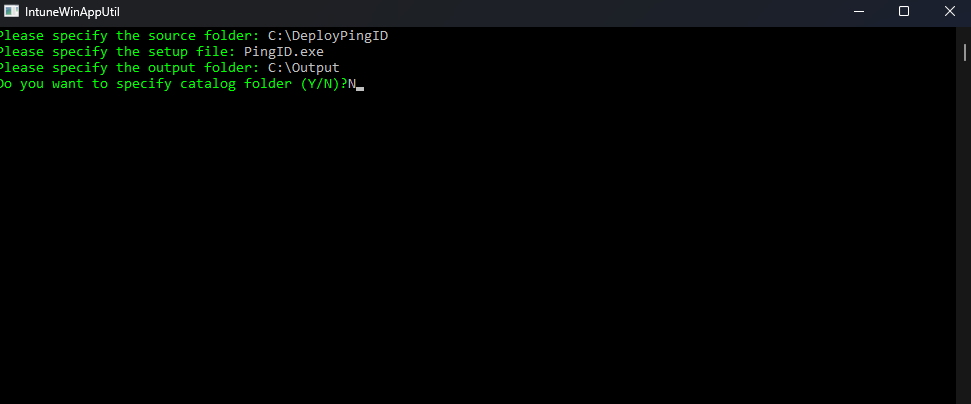
In the application specify the following things:
- Please specify the source folder: C:\DeployPingID
- Please specify the setup file: PingID.exe
- Please specify the output folder: C:\Output
- Do you want to specify catalog folder: N
In your Output Folder, there should be a new file called PingID.intunewin. We need this file in Step 2
Step 3: Import and deploy with Microsoft Intune
After we have created the intunewin file of the executable, we can now upload the application to Microsoft Intune and deploy it to our environment. Just follow these steps.
- Go to intune.microsoft.com
- Click on Apps
- Click on Windows
- Click on Add
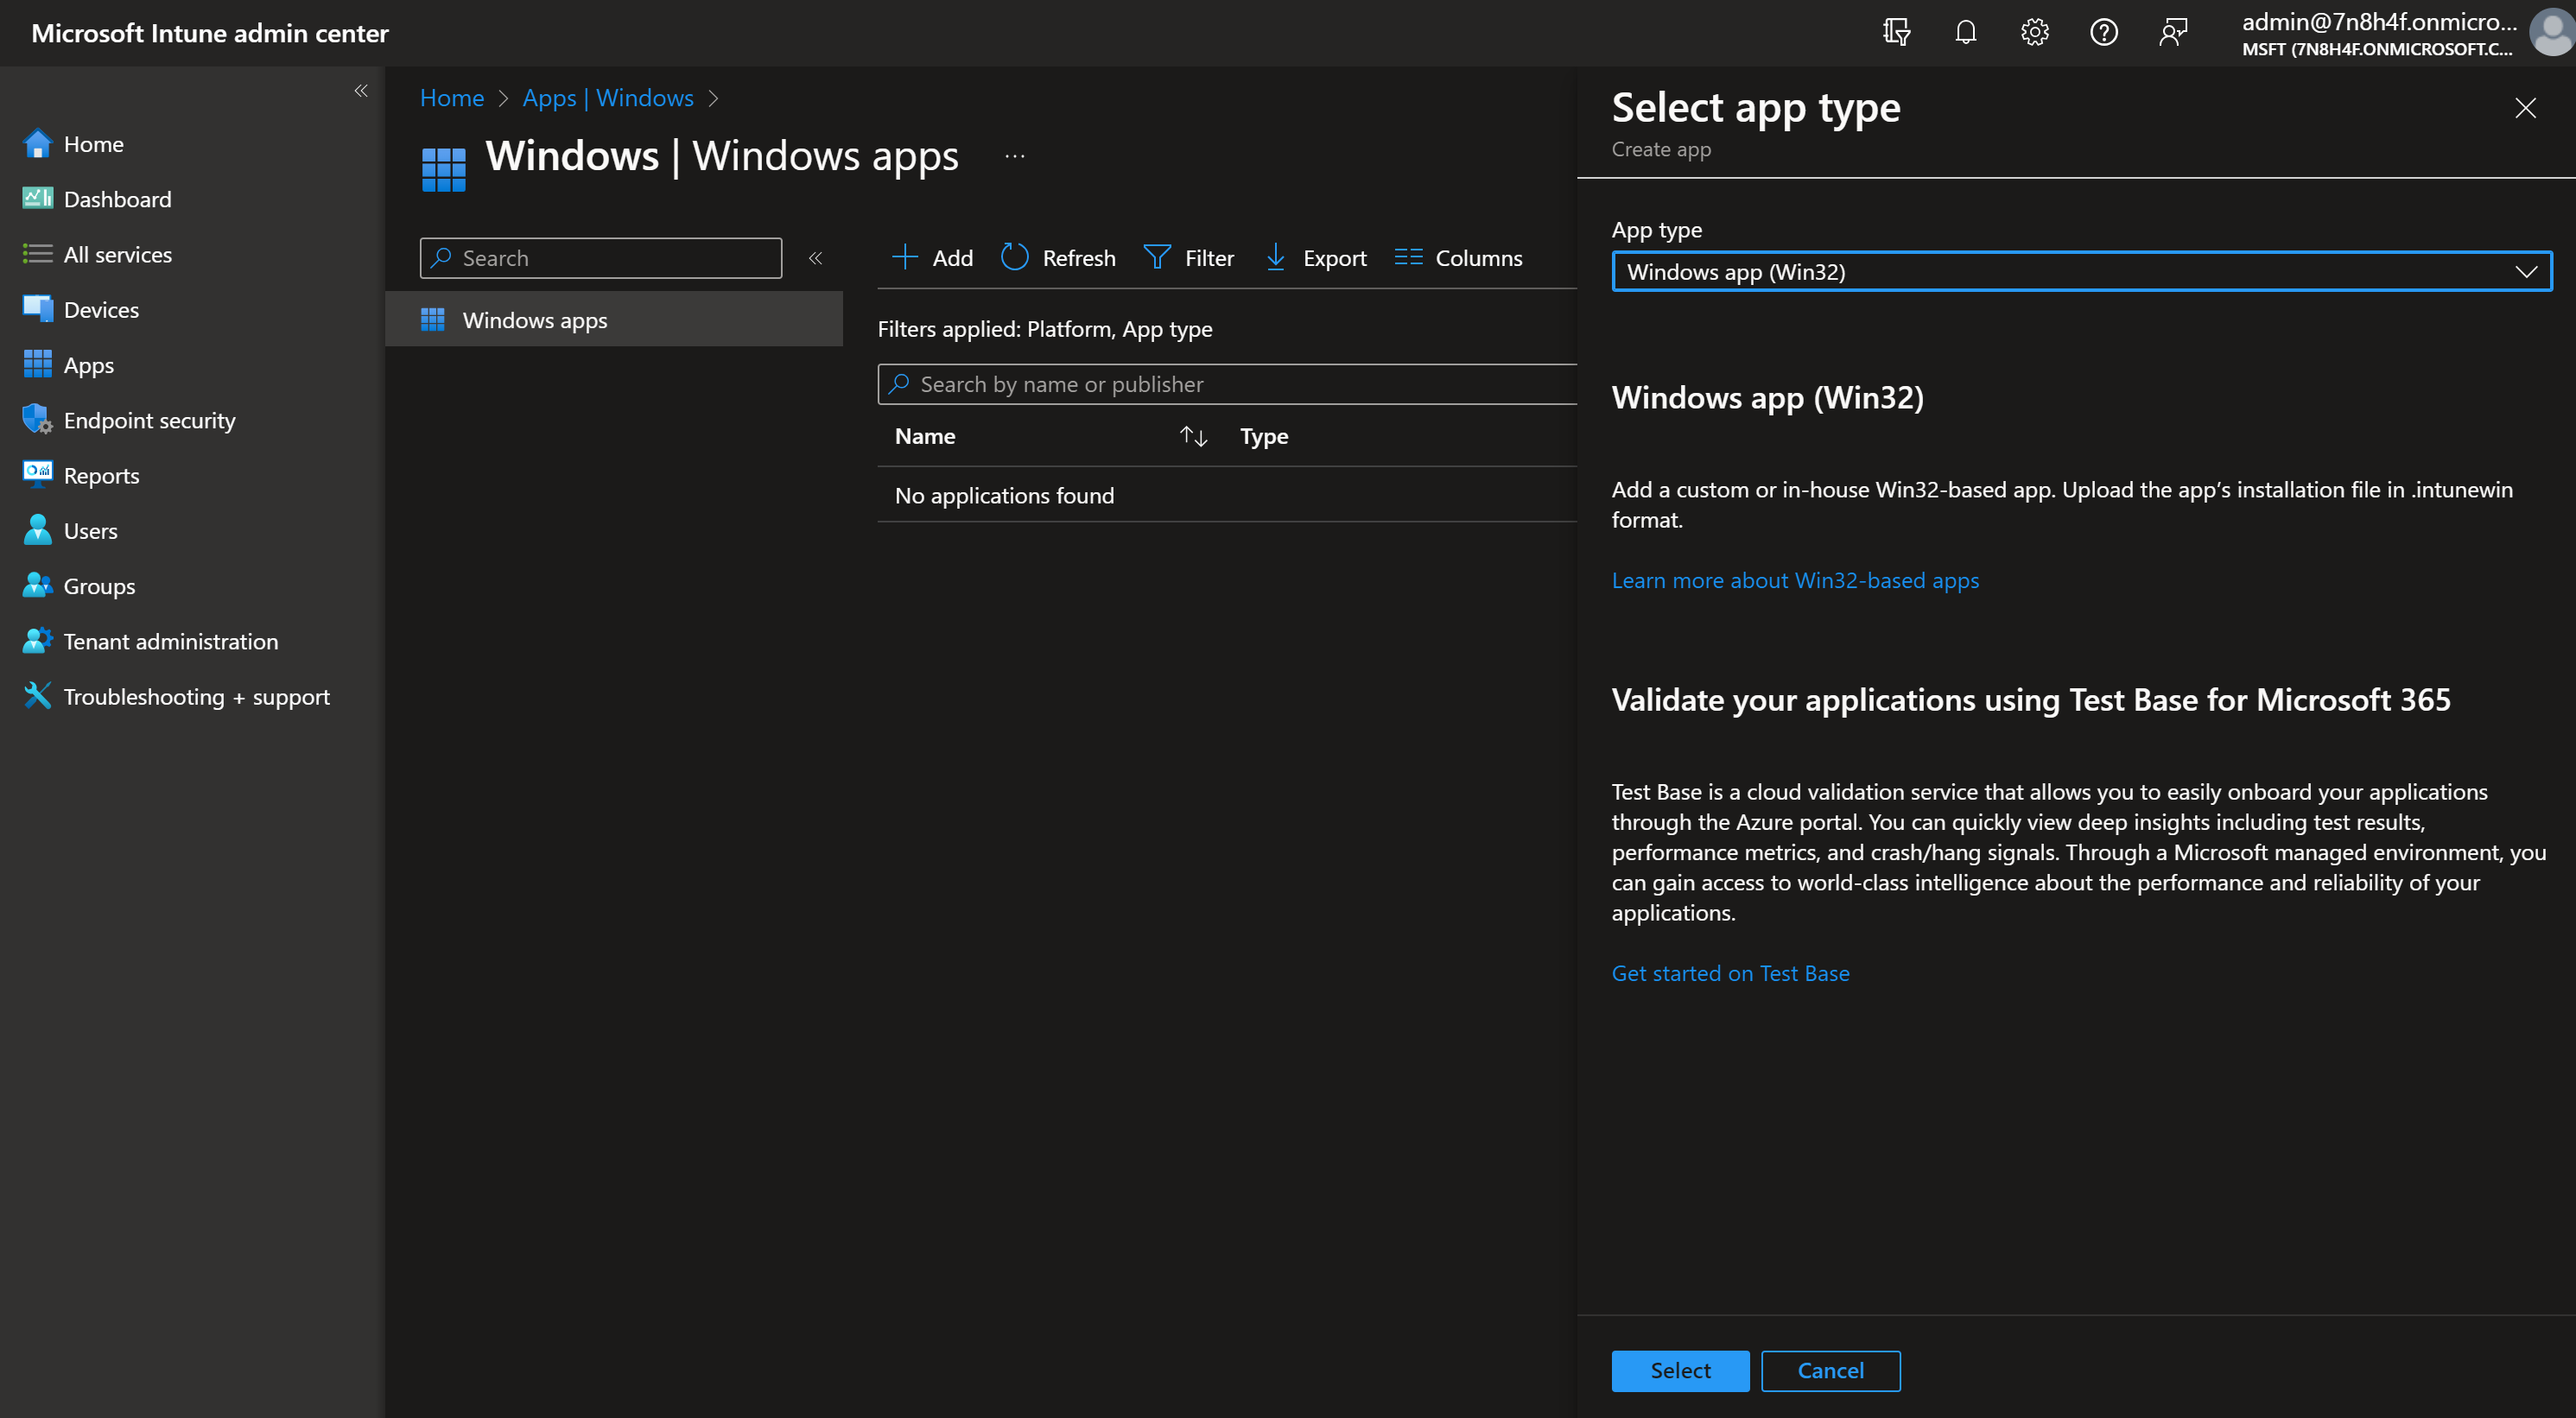
- Chose App type Windows app (win32)
- Click on Select
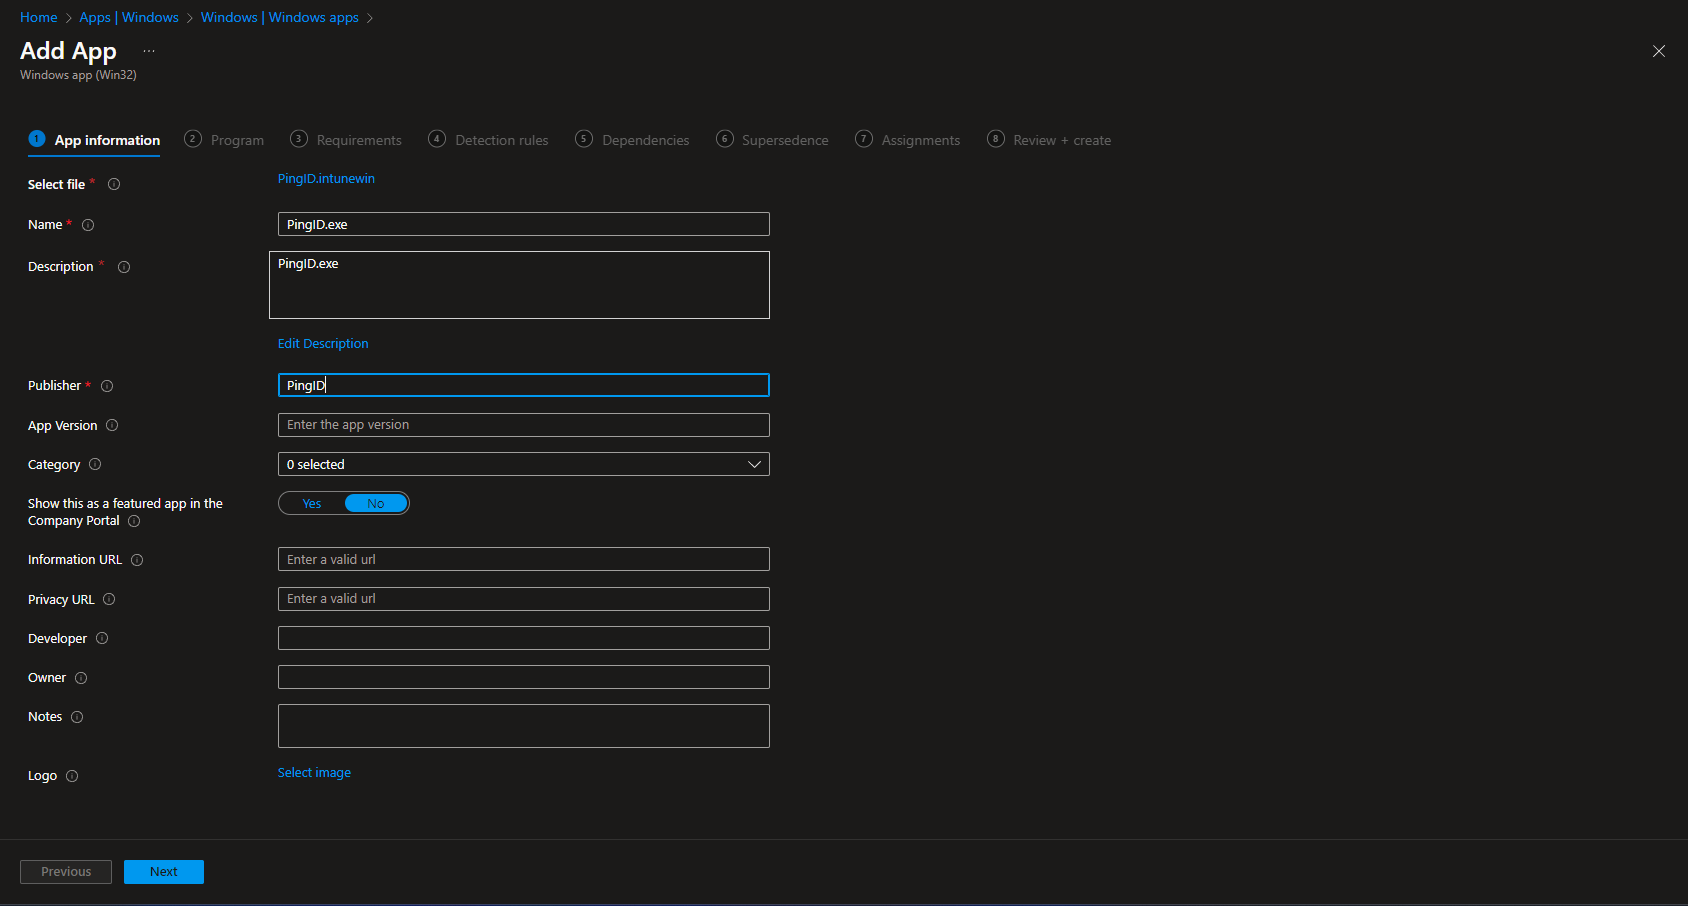
- Click on Select app package file
- Upload your IntuneWin file which is located in C:\Output
- Click on OK
- Click on Next
- Here you can change the Settings. I leave it as it is. Dont forget to enter a Publisher
- Click on Next
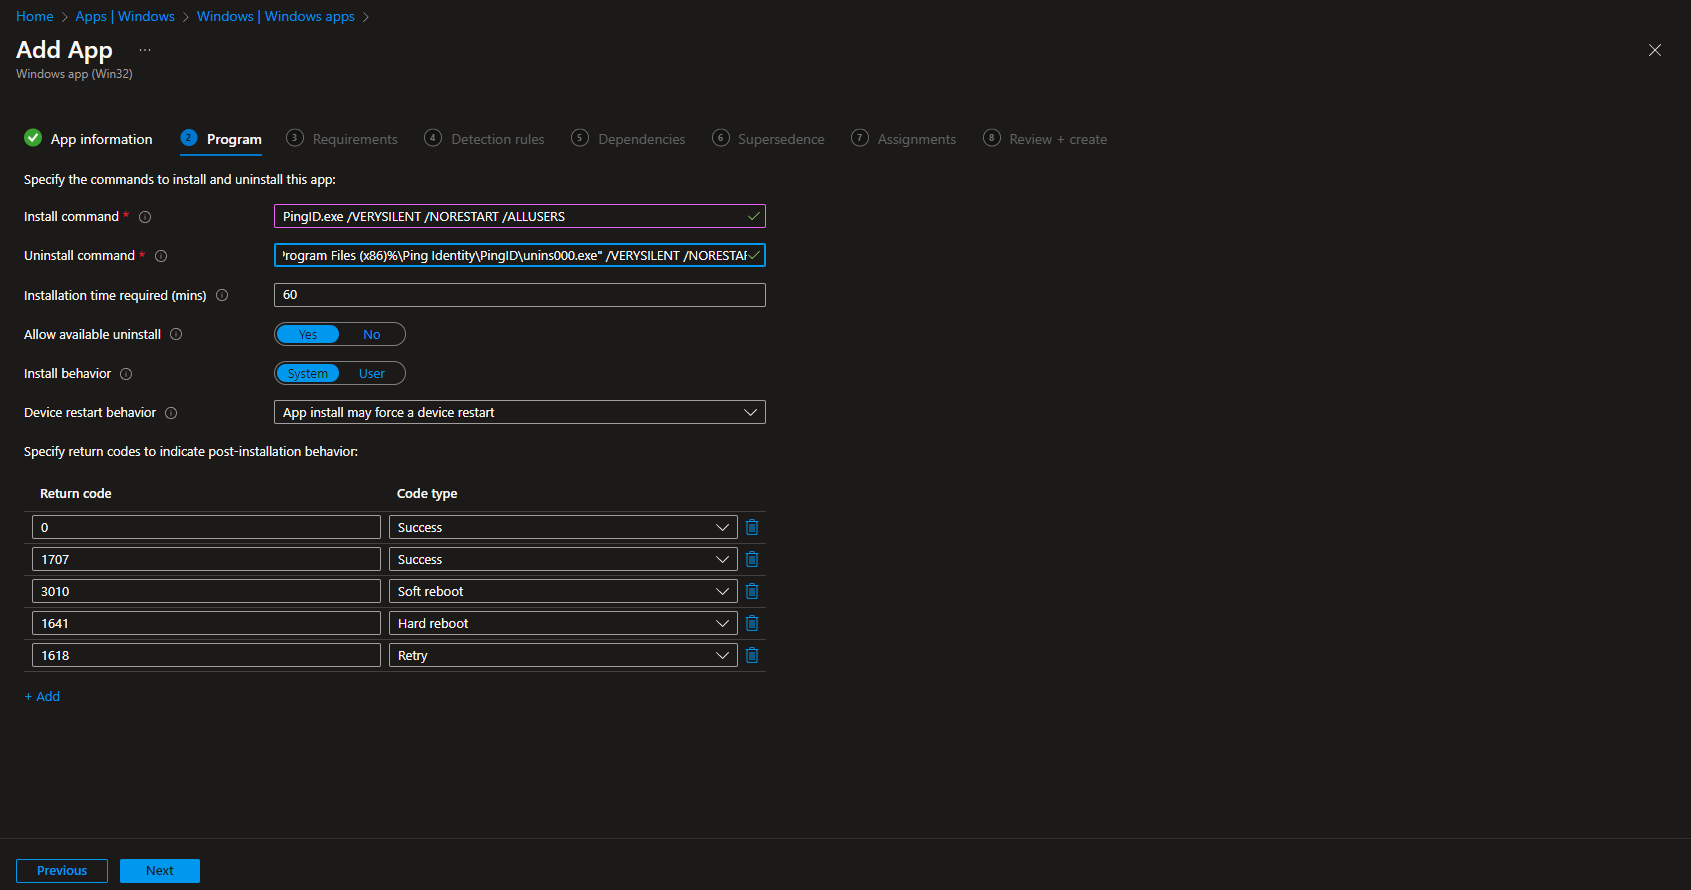
On the Program tab enter the following Commands:
- Install Command: PingID.exe /VERYSILENT /NORESTART /ALLUSERS
- Uninstall command: “%Program Files (x86)%\Ping Identity\PingID\unins000.exe” /VERYSILENT /NORESTART
- Allow available uninstall: Yes
- Install behavior: System
- Click on Next
On the Requirements tab enter:
- Operating system architecture: 32-bit and 64-bit
- Minimum operating system: Windows 10 1607
- Click on Next
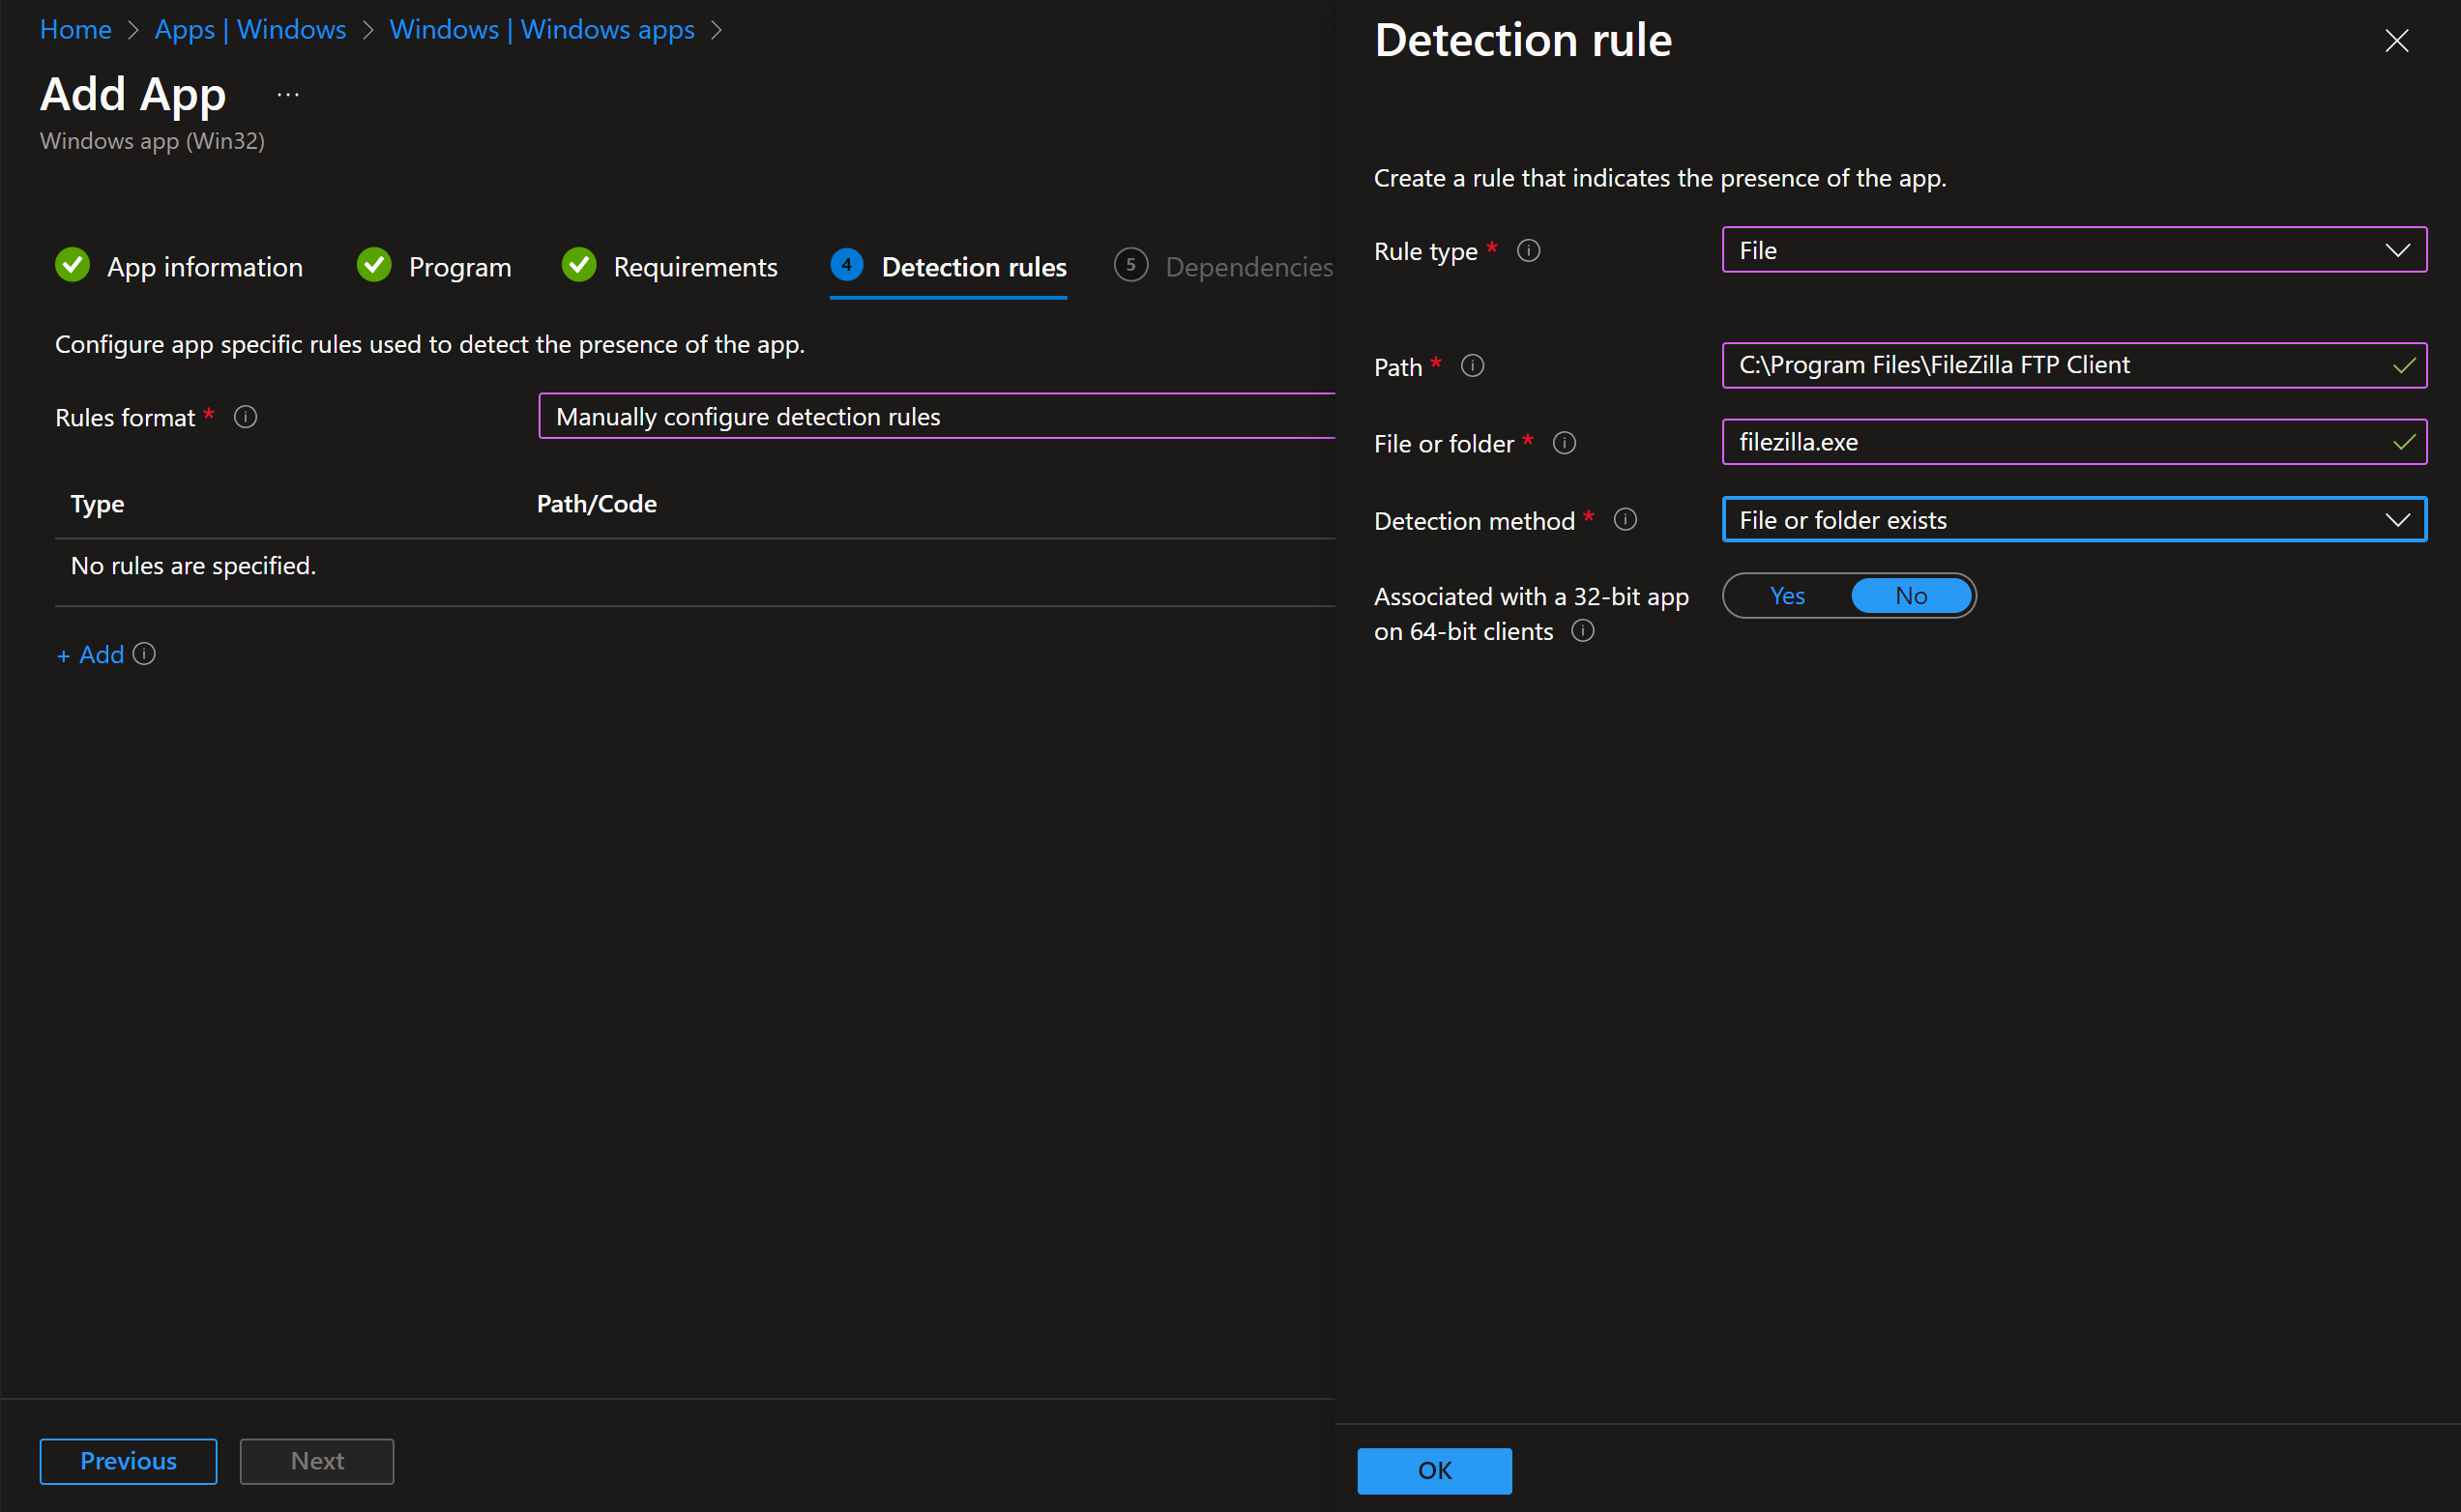
On the Detection rules tab enter the following:
- Rules format: Manually configure detection rules
- Click on Add
- Rule type: File
- Path: C:\Program Files (x86)\Ping Identity\PingID
- File or Folder: PingID.exe
- Detection method: File or folder exists
- Associated with a 32-bit app on 64-bit clients: No
- Click on Ok and on Next
- Define your Dependencies if applicable and click on Next
- Define your Supersedence if applicable and click on Next
- On the Assignments tab assign the Policy to a Group or to All User
- Click on Next
- And Review + Create the Policy
Congratulations! You have successfully deployed the policy.
Conclusion
You learned how to deploy PingID with Microsoft Intune. We have first created an WIN32 file with the official PingID executable. Last but not least we have uploaded the application to Intune and configured different settings.
Did you enjoy this article? Dont forget to follow us and share this article. You may also like the the following articles.











Thanks, but it looks like the uninstall command is not working.
In the logs, it says [Win32App] Failed to create installer process. Error code = 2