Welcome to our new blog post about Learn about How to configure Multi-factor unlock with Microsoft Intune. Microsoft Intune continues to evolve, making device management more seamless and efficient for IT admins. In this article, we’ll explore how to enhance your organization’s device security by enabling Multi-factor unlock (MFU) using Microsoft Intune. This feature adds an additional layer of protection to your managed devices by requiring users to authenticate with more than one method before unlocking their device.
Table of Contents
What’s Multi-factor unlock?
Multi-factor unlock (MFU) is a security feature that strengthens device access controls by combining multiple authentication methode, such as a PIN, biometric verification (fingerprint or facial recognition), or trusted device factors, before granting access. Users will have to authenticate with two different Windows Hello for Business methods.When managed through Microsoft Intune, administrators can define and enforce which authentication methods users need.
What’s the User Experience?
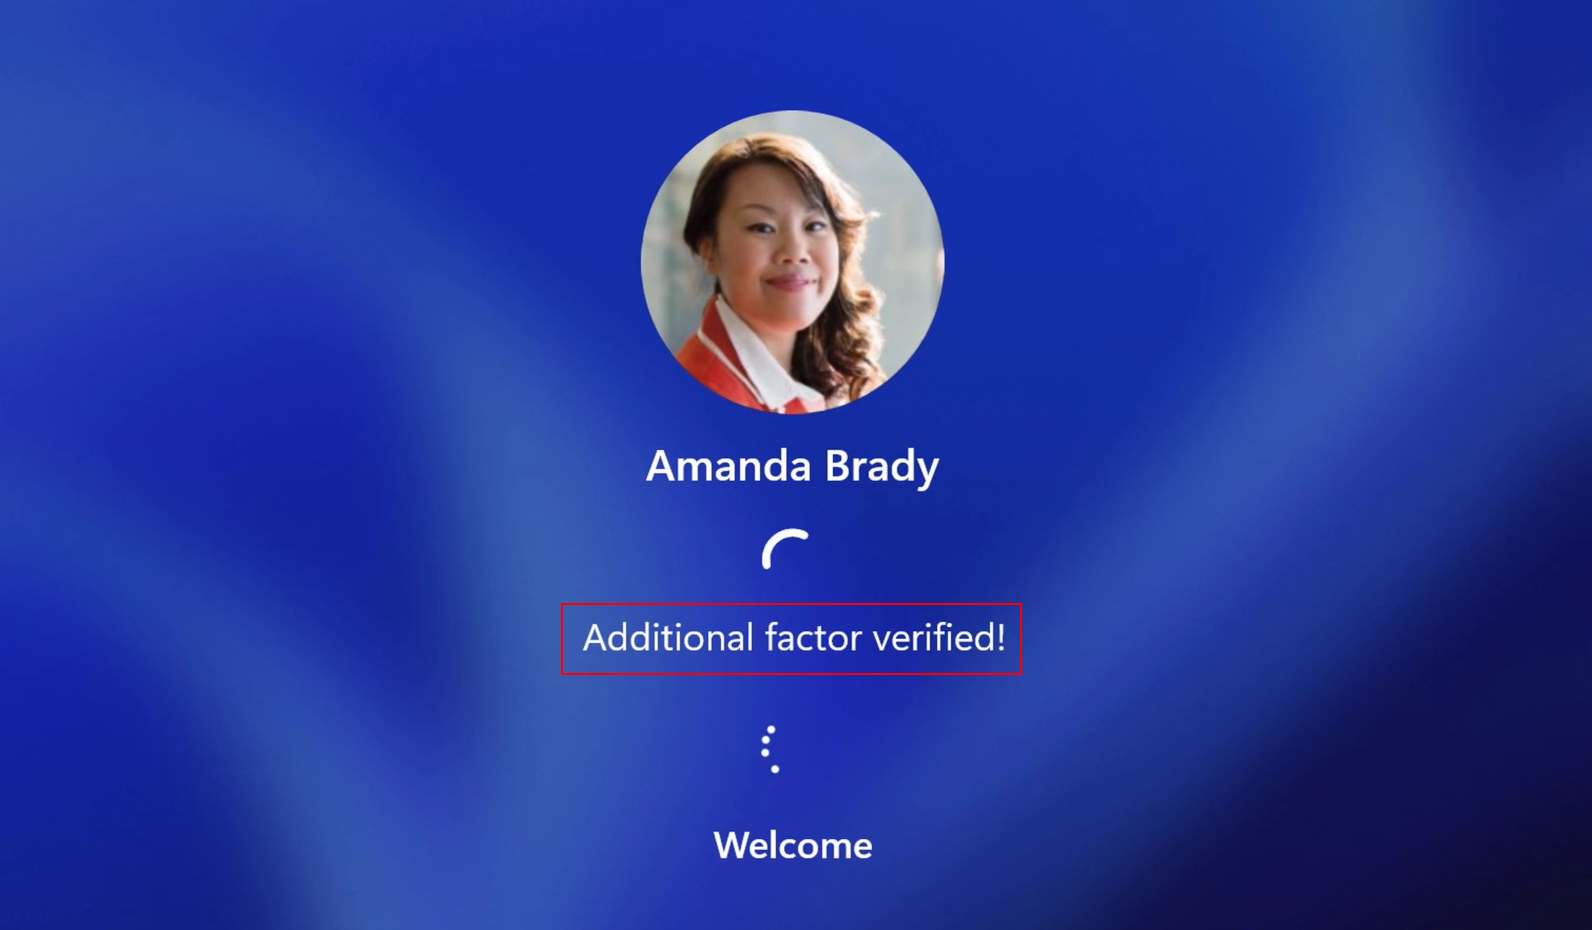
So, what does the User Experience look like in practice? I’ve included the official Microsoft Multi-Factor Unlock documentation video to illustrate this.
In the first clip, the user logs in using a fingerprint as the primary authentication method. For the second factor, a trusted device (the phone) is used. The phone simply needs to be connected to the Windows device via Bluetooth. This makes the process extremely smooth — the user only needs to place their finger on the sensor, and the phone automatically verifies the connection in the background.
In the second clip, the user again authenticates with a fingerprint, but this time the second factor is a PIN. While this approach isn’t quite as seamless as using a trusted device, it still provides an additional layer of security and a better experience than relying on a single authentication method.
How to configure Multi-factor unlock with Microsoft Intune
In this section we will show you, how you can configure Multi-factor unlock in Microsoft Intune. Make sure you have your Intune Administrator Account ready and follow the steps below.
- Go to intune.microsoft.com
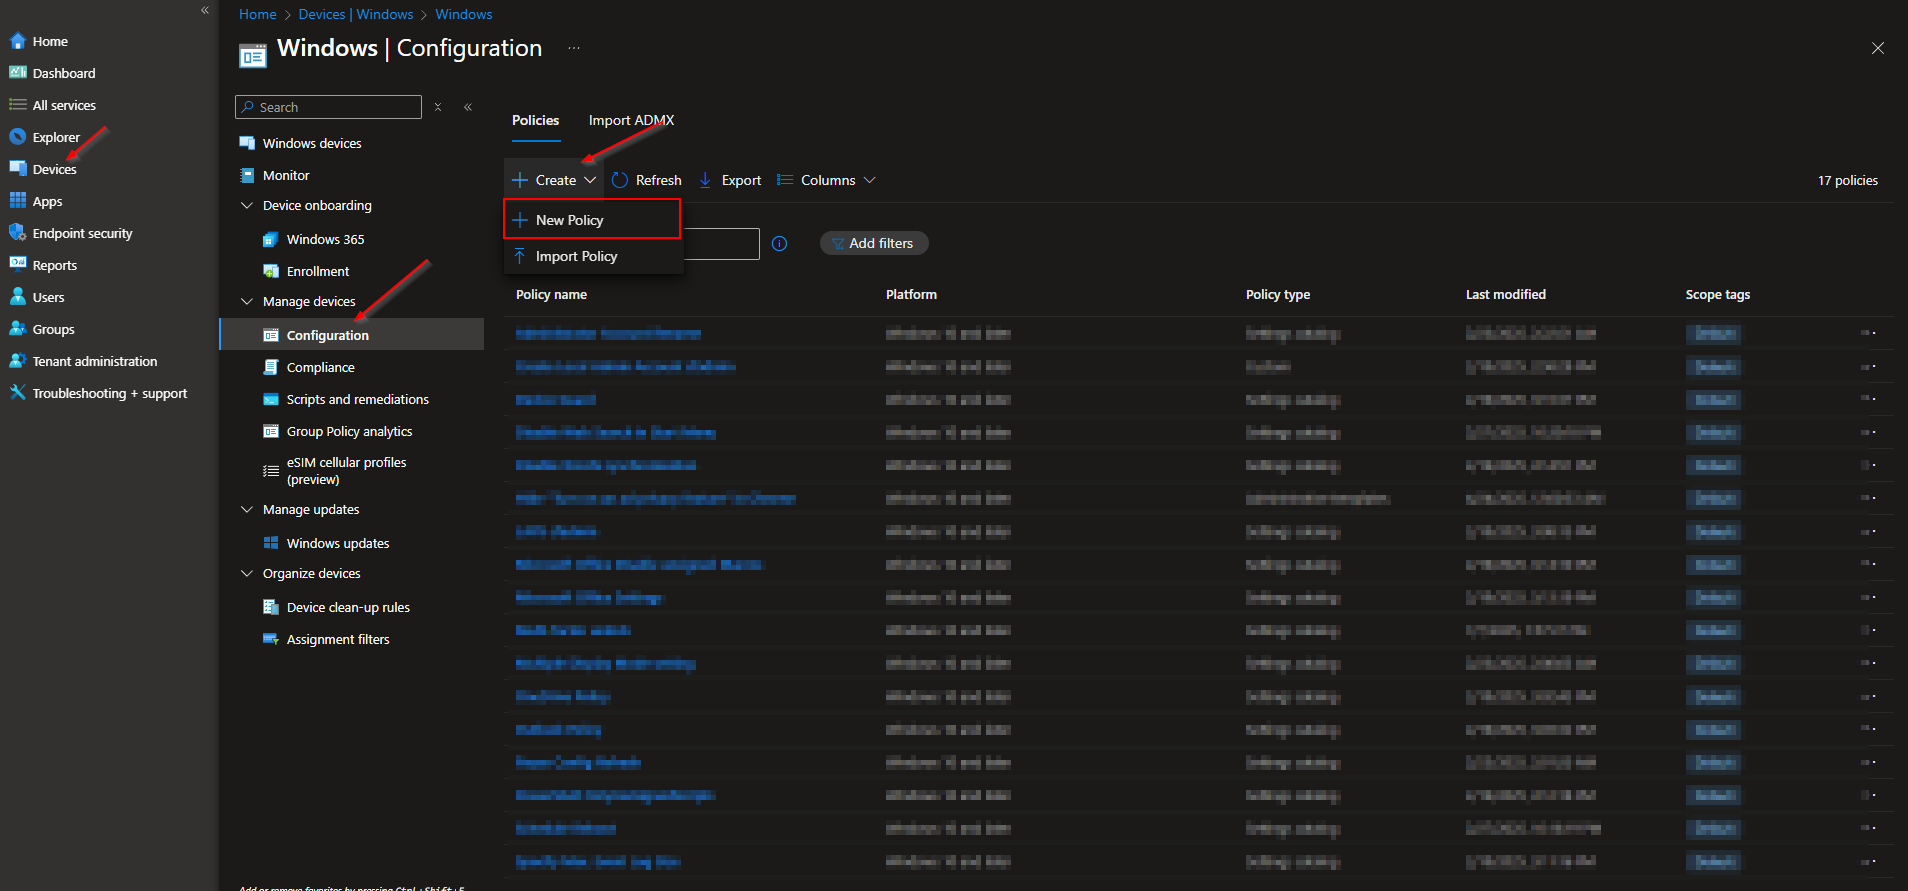
- Click on Devices
- Click on Windows
- Click on Configuration
- Click on Create and New Policy
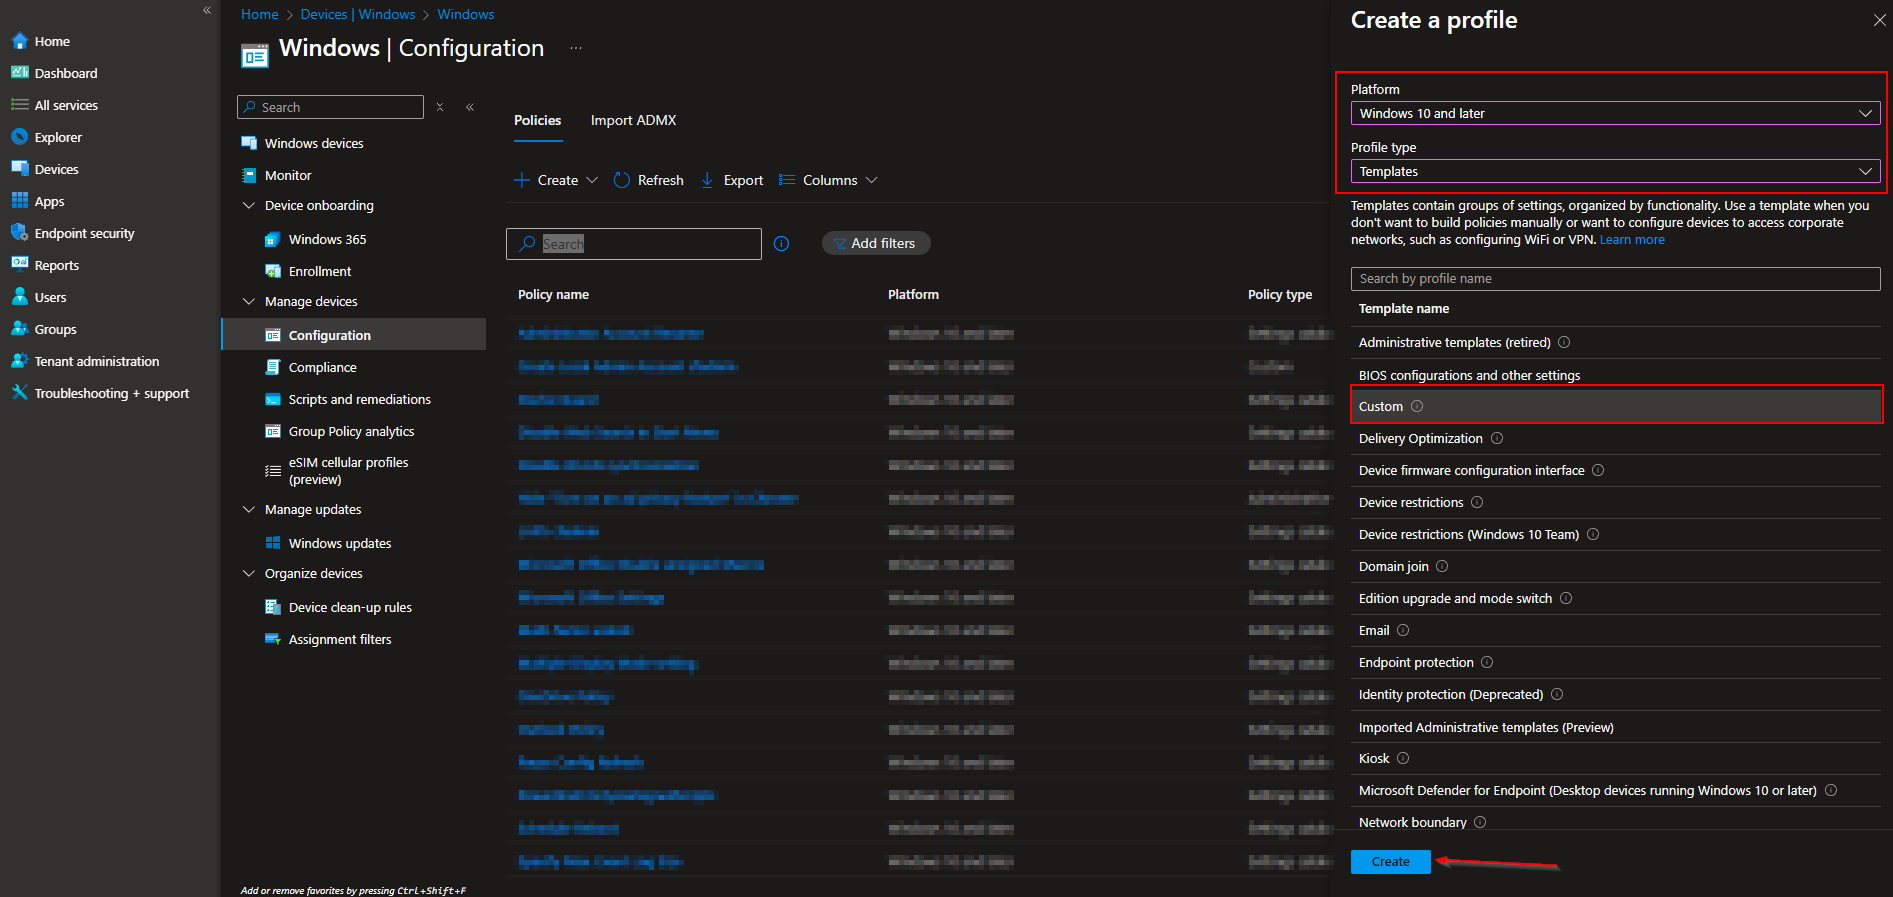
- For Platform choose Windows 10 and later
- For Profile type choose Templates
- Click on Custom
- Click on Create
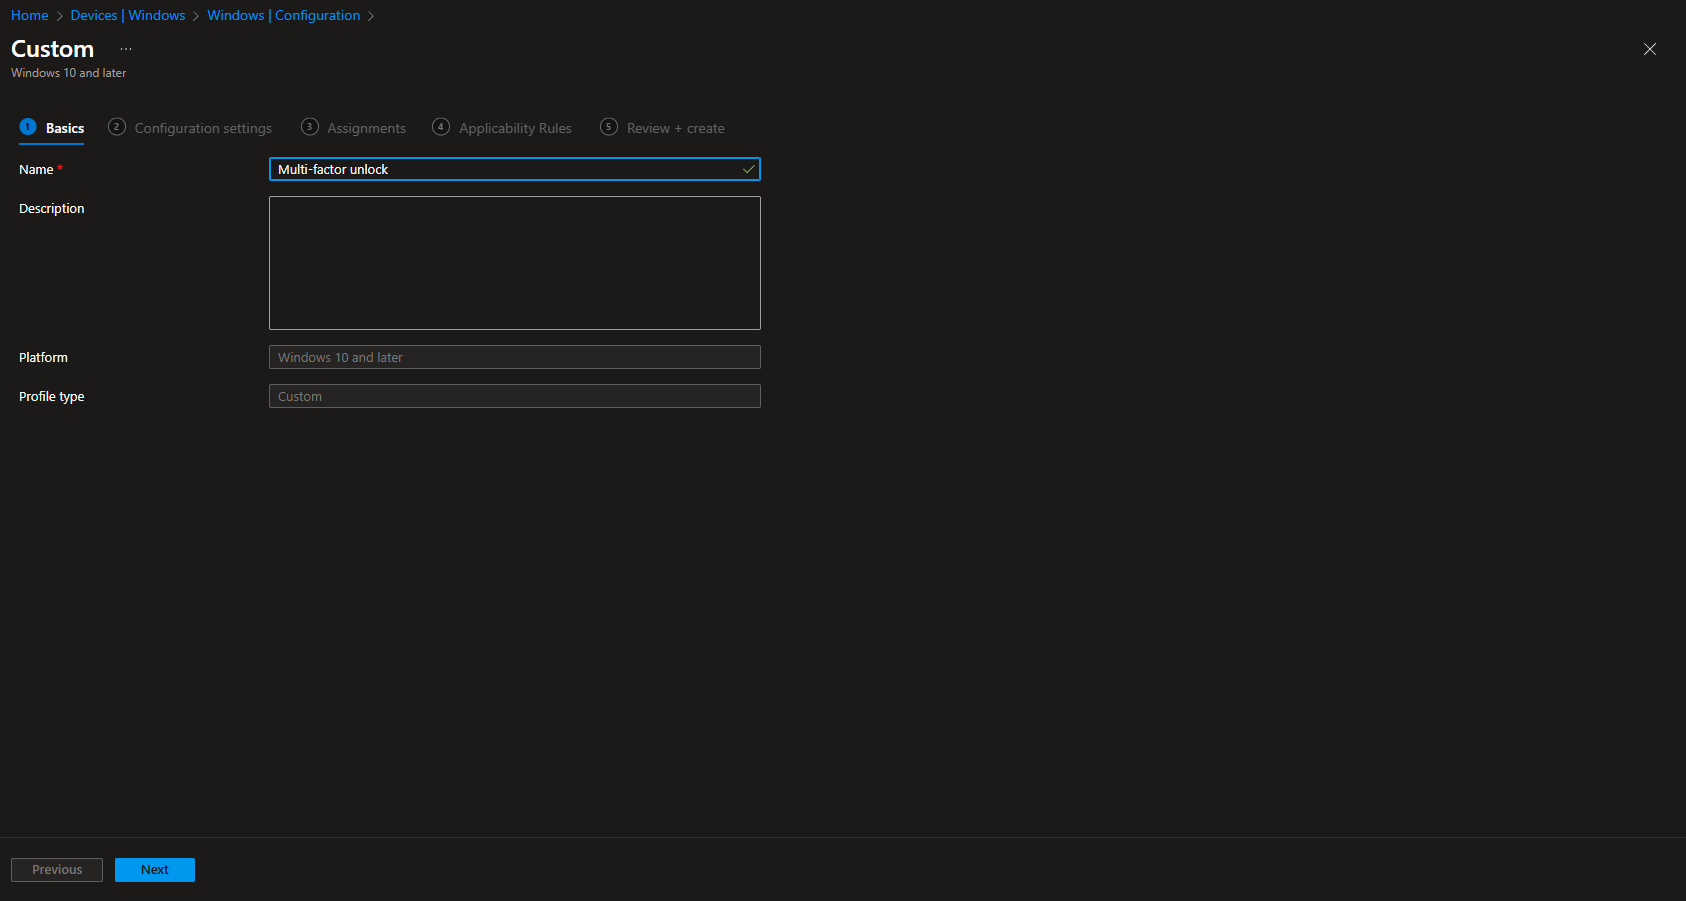
- Give a Name and Description (optional) to the profile.
- Click on Next
In the next step we will need to create 3 OMA-URI settings.
- OMA-URI setting 1: This setting is used to define the first unlock factor credential providers
- OMA-URI setting 2: This setting is used to define the second unlock factor credential providers
- OMA-URI setting 3: This setting is used to define the signal rules for device unlock
As already mentioned, we can define what authentication method the users can use for their first and second unlock. We can choose from Pin, Fingerprint, Facial Recognition and Trusted Signal (Phone proximity or Network location). I will list the GUID here, we will need this later.
- Pin: {D6886603-9D2F-4EB2-B667-1971041FA96B}
- Fingerprint: {BEC09223-B018-416D-A0AC-523971B639F5}
- Facial Recognition: {8AF662BF-65A0-4D0A-A540-A338A999D36F}
- Trusted Signal (Phone proximity, Network location): {27FBDB57-B613-4AF2-9D7E-4FA7A66C21AD}
Let’s create the policy. The first OMA-URI policy will be the allowed first unlock credentials. I will allow all 3 Pin, Fingerprint and Facial Recognition. But you can change this for your needs.
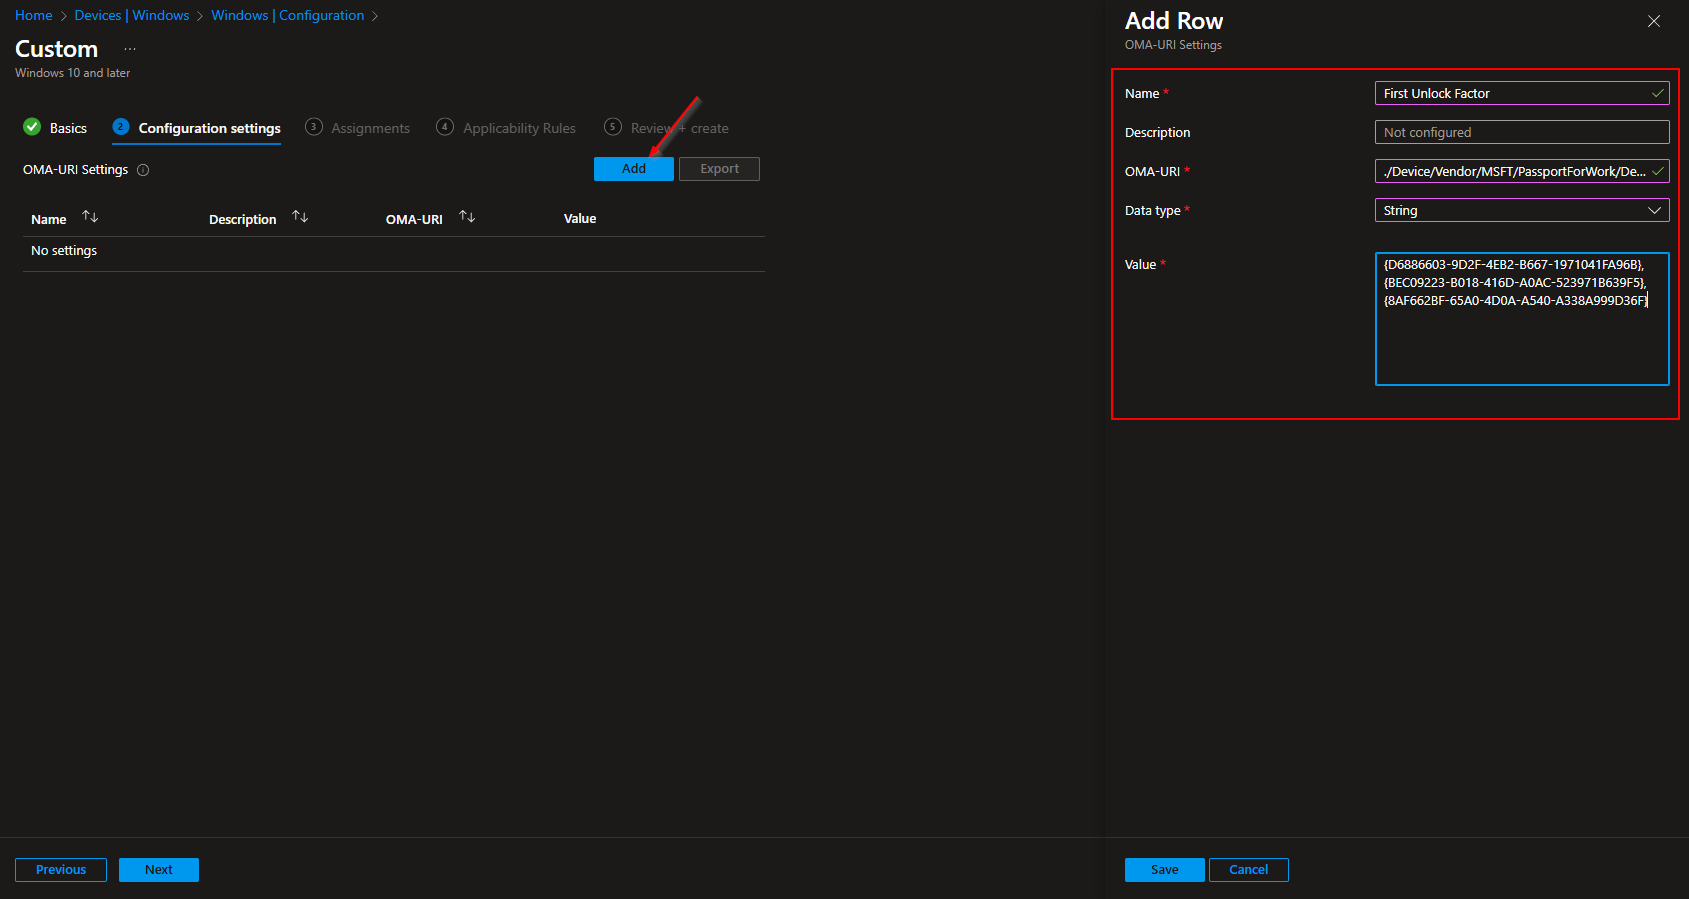
- Click on Add
- Name: First Unlock Factor
- Description: Optional
- OMA-URI: ./Device/Vendor/MSFT/PassportForWork/DeviceUnlock/GroupA
- Data type: String
- Value: {D6886603-9D2F-4EB2-B667-1971041FA96B},{BEC09223-B018-416D-A0AC-523971B639F5},{8AF662BF-65A0-4D0A-A540-A338A999D36F}
Change the Value if you want to allow other Factors or not all.
Let’s create the second policy. The second OMA-URI policy will be the allowed second unlock credentials. I will allow Pin and Trusted Signals (If the Phone is connected with Bluetooth). But you can change this for your needs.
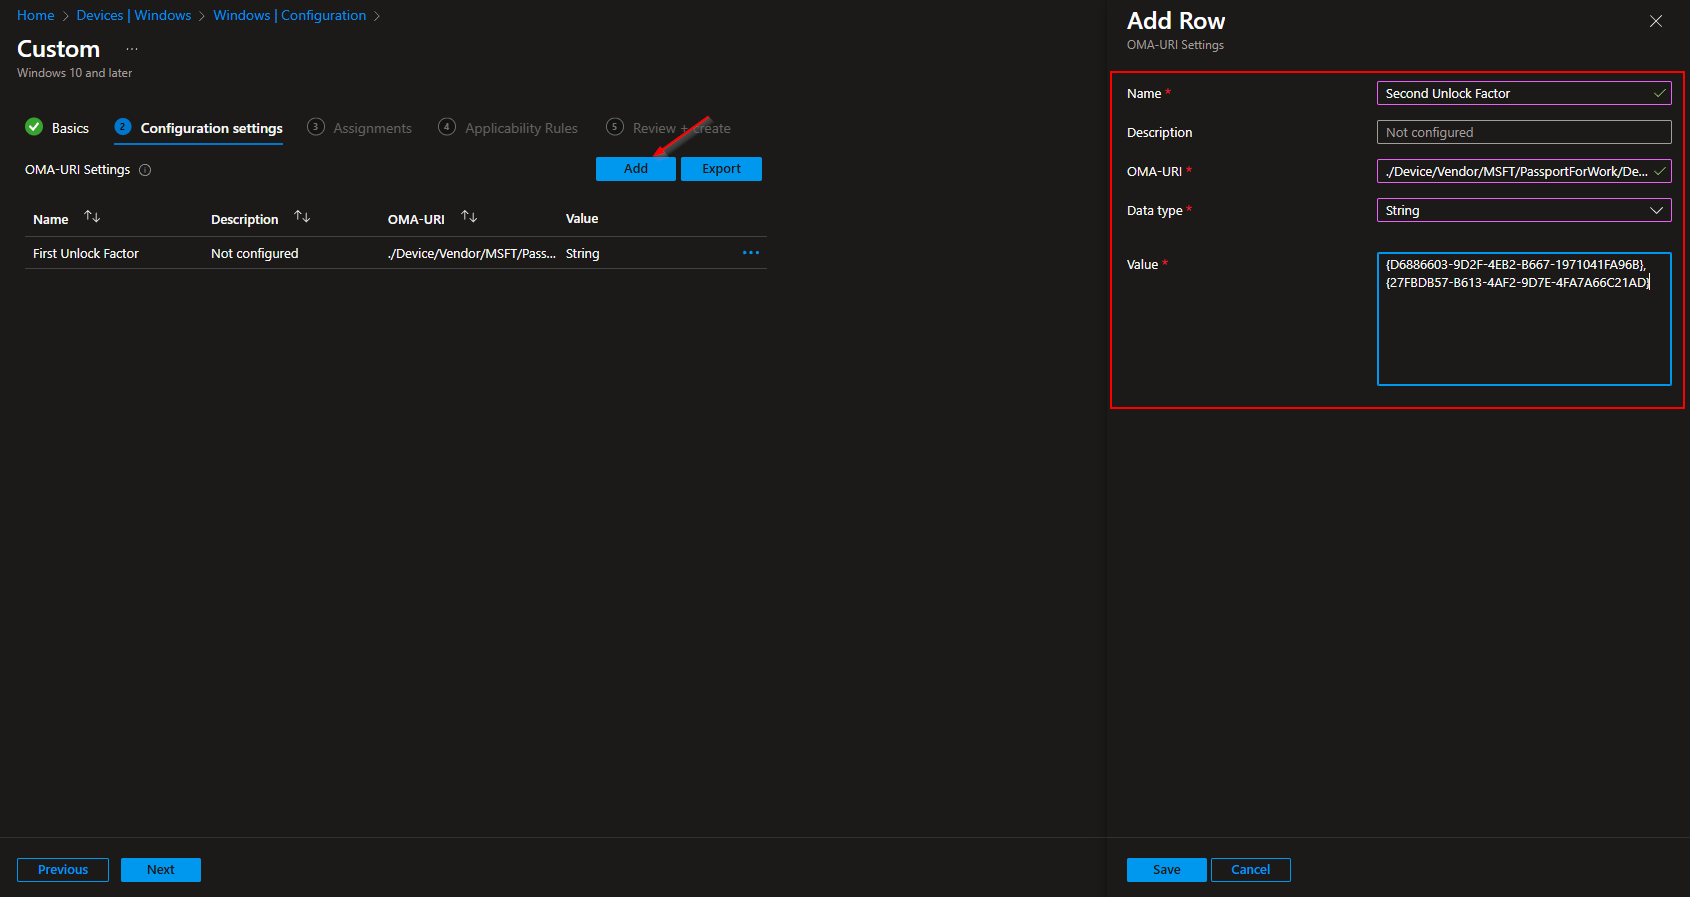
- Click on Add
- Name: Second Unlock Factor
- Description: Optional
- OMA-URI: ./Device/Vendor/MSFT/PassportForWork/DeviceUnlock/GroupB
- Data type: String
- Value: {D6886603-9D2F-4EB2-B667-1971041FA96B},{27FBDB57-B613-4AF2-9D7E-4FA7A66C21AD}
Change the Value if you want to allow other Factors or not all.
Let’s create the last policy. The third OMA-URI policy will be the Signal Rules for Device Unlock. I will enter just a default Value. There is also an option to allow authentication when the device is in the local network or is connected with a specific WiFi. If you want to learn more, have a look here: Multi-factor unlock Microsoft Learn Documentation
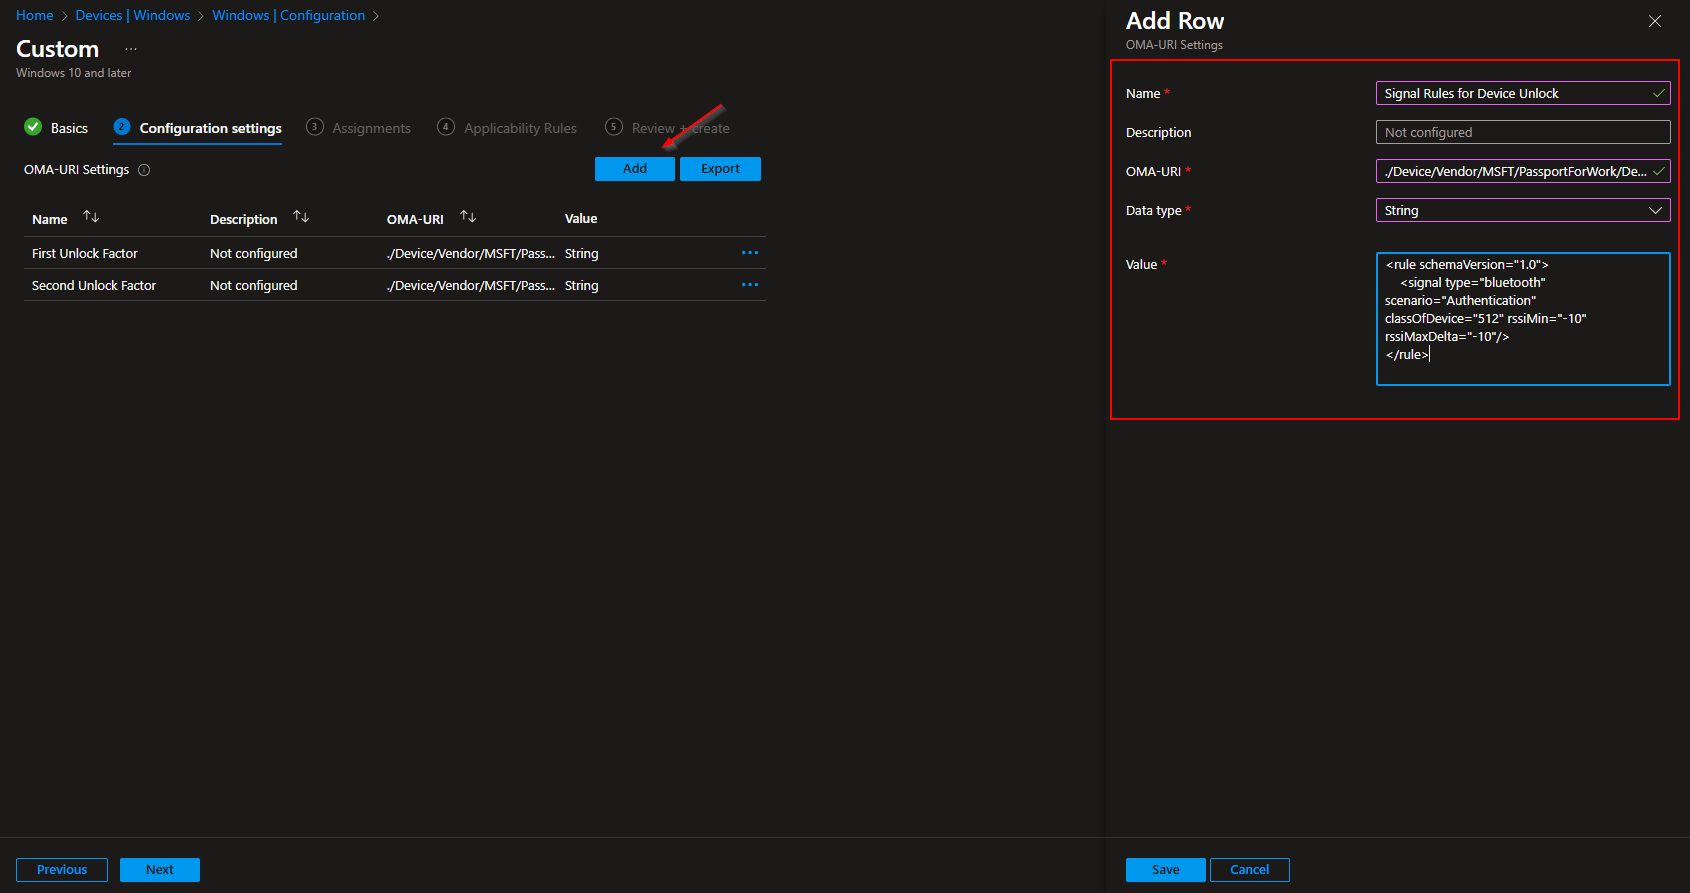
- Click on Add
- Name: Signal Rules for Device Unlock
- Description: Optional
- OMA-URI: ./Device/Vendor/MSFT/PassportForWork/DeviceUnlock/Plugins
- Data type: String
- Value: <rule schemaVersion=”1.0″> <signal type=”bluetooth” scenario=”Authentication” classOfDevice=”512″ rssiMin=”-10″ rssiMaxDelta=”-10″/> </rule>
Change the Value if you want to allow other Factors or not all.
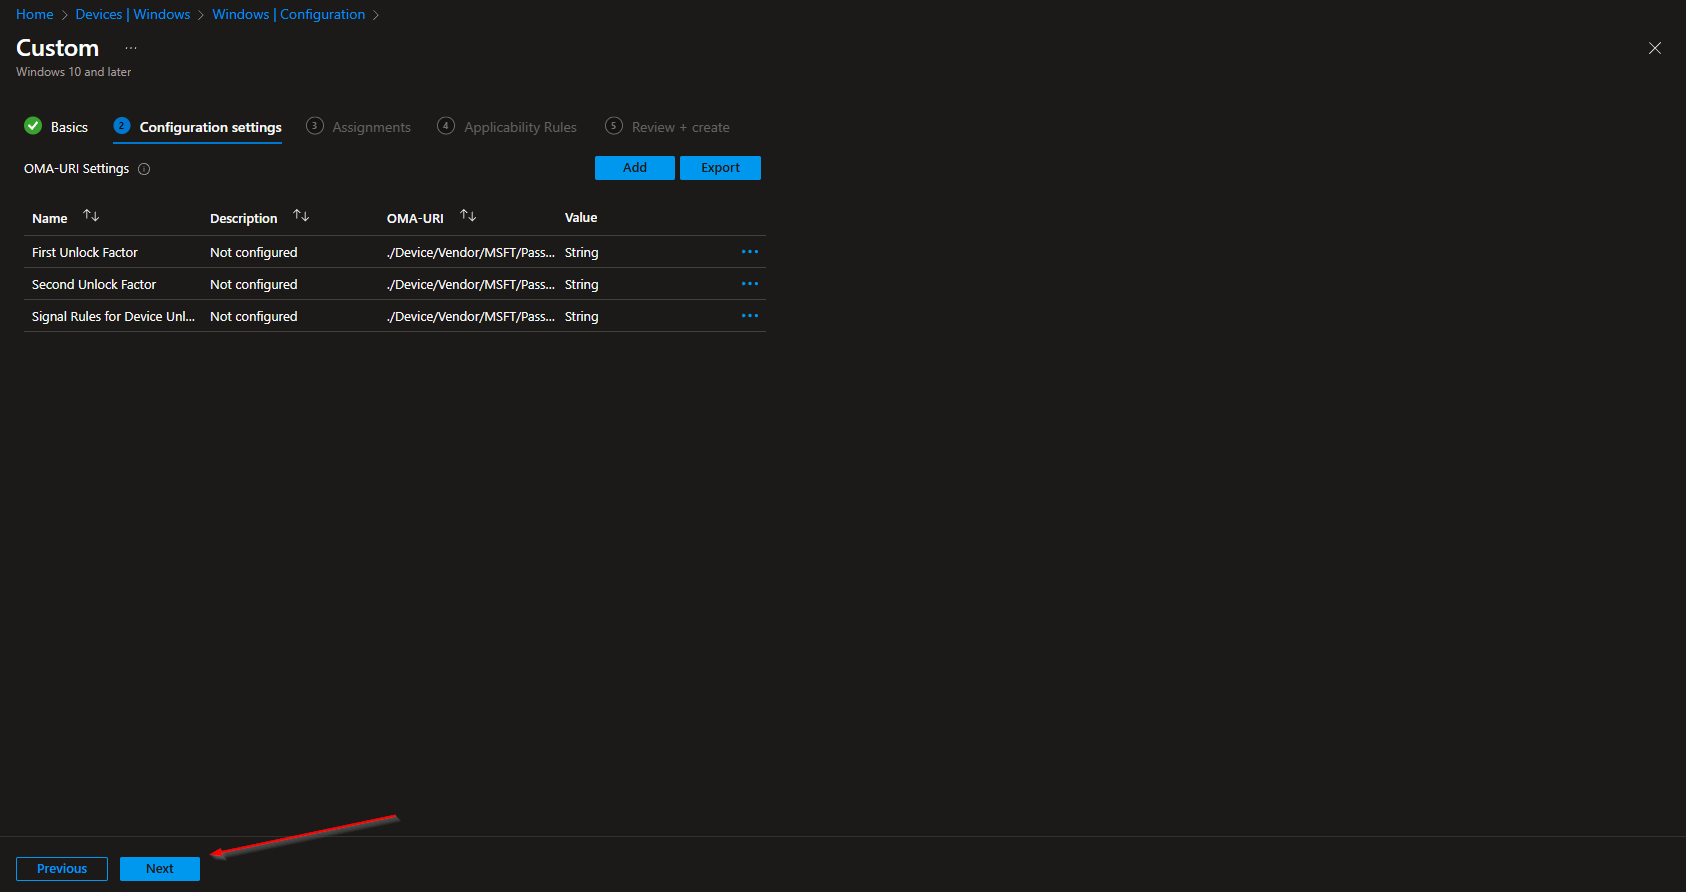
Perfect, you have now 3 OMA-URI Configuration settings. You can now click on Next.
- Define your Scope if applicable and click on Next
- On the Assignments tab assign the Policy to a Group or to All Users / All Devices
- And Review + Create the Policy
Congratulations! You have successfully deployed the policy.
Conclusion
In this blog post we learned about How to configure Multi-factor unlock with Microsoft Intune. By enabling this feature, organizations can greatly improve their device security and compliance posture by enforcing additional authentication factors at unlock.
Did you enjoy this article? Don’t forget to follow us and share this article. If you have any questions or need further assistance, feel free to reach out or leave a comment below.


This has been around for a while right? We’ve had this for a while at a school, but we always were frustrated than you can just log in with your password with no extra step… Or did they fix that yet? I’d love to know!
No, this isn’t new. When signing in with a password, no additional verification is required. This is due to a Windows Hello for Business feature. Unfortunately, passwords are handled separately.