How to change the printer’s driver on Universal Print connector. Sometimes there is a need to replace a printer’s driver on Universal Print connector with another driver. This may be done if:
- The existing driver is causing compatibility issues with Universal Print.
- There is an alternate driver which enables more print options for the printer via Universal Print.
Table of Contents
What are we going to set up?
In this blog post we will show you, How to change the printer’s driver on Universal Print connector. We are going to change the printer’s driver on the device where the connector is installed.

Steps to change the printer driver on connector
To change the printer’s driver on the Universal Print connector we just have to change it in the printers settings. We can do this in the control panel or in the Windows settings. For this tutorial we will show you how to change it in the Windows setting.
- Download and install the new print driver
- Go to Settings > Devices > Printers & Scanners
- Select the printer for which you need to update the driver.
- Click on Manage
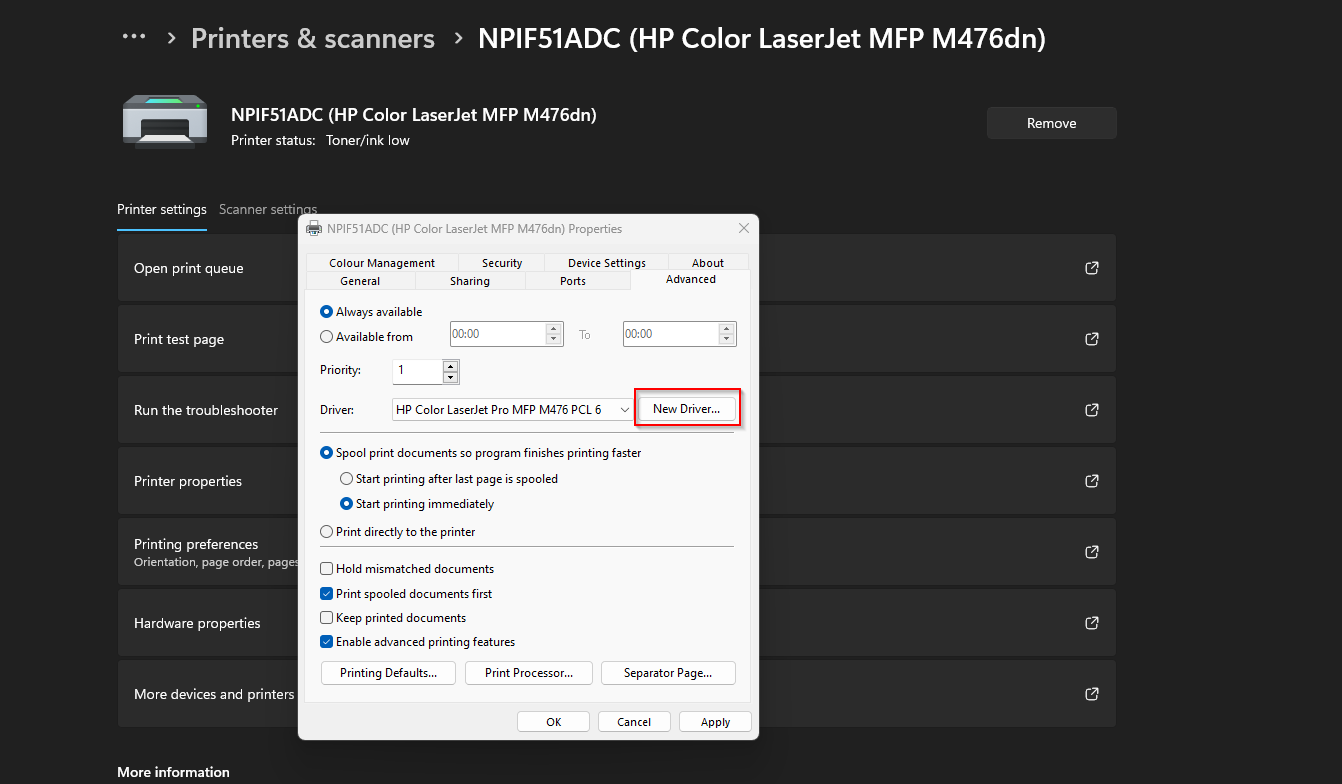
- Click on Printer Properties and go to Advanced tab
- Select the driver (or install the New Driver if not already installed)
- Click Apply and close the dialog
- Print a test page to ensure the driver is working fine
- Open Task Manager and select Services tab.
- Find the Print Connector service. Stop and restart the service. This will ensures that the printer’s capabilities are updated from the new print driver and loaded in Universal Print.

Reinstall printer on Windows clients where corresponding Universal Print printer was already installed
Uninstall and re-install the Universal Print printer. This is required for the Windows client to download the new printer capabilities from Universal Print.You are all set! Try printing from a Windows client which has the Universal Print printer re-installed.