
Welcome to our new blog post How to configure DKIM record for Microsoft 365. In this article, we will walk through how to enable DKIM signing for your own domain in Microsoft 365. We will create the two CNAME records at your DNS provider and then turn on the signing in the Microsoft Defender portal.
Table of Contents
What Is DKIM?
DKIM (DomainKeys Identified Mail) adds a digital signature to every mail you send. The receiving mail server reads the public key from your DNS and checks the signature. If it is valid, the receiver knows that the mail really comes from your domain and was not changed on the way.
Microsoft 365 signs all outgoing mails automatically, but by default with your onmicrosoft.com domain. For your own domain you have to enable DKIM yourself.
Why Configure DKIM for Your Domain?
DMARC only passes if the domain in the signature matches the domain in the From address. Without DKIM for your own domain your mails depend on SPF alone, and SPF breaks as soon as a mail is forwarded. Large providers like Google and Yahoo also require SPF, DKIM and DMARC from bulk senders. Without it your mails end up in the junk folder more often.
Prerequisites
- Your custom domain is added to Microsoft 365
- The Exchange Administrator or Security Administrator role
- Access to the DNS settings of your domain
How to configure DKIM record for Microsoft 365
Step 1: Get the CNAME values
First we read the two CNAME values from the Microsoft Defender portal.
- Go to security.microsoft.com
- Click on Email & collaboration
- Click on Policies & rules
- Click on Threat policies
- Click on Email authentication settings
- Select the DKIM tab
- Click on your domain
- Slide the toggle to Enabled. A dialog with the CNAME values appears, click on OK
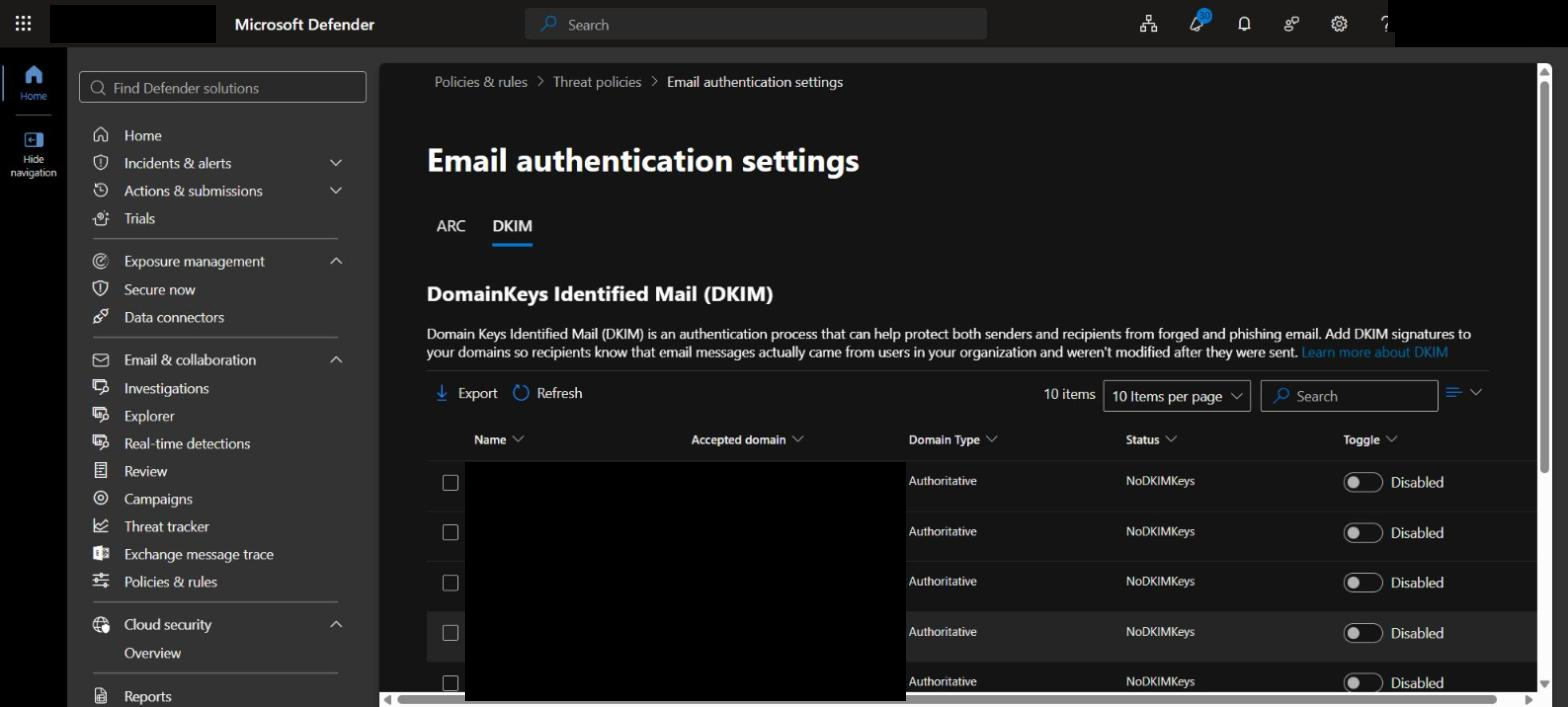
The status changes to CnameMissing. Click on the domain again and copy the two values from the Publish CNAMEs section. If you prefer PowerShell, you get the same values with:
Connect-ExchangeOnline
Get-DkimSigningConfig -Identity contoso.com | Format-List Name,Enabled,Status,Selector1CNAME,Selector2CNAME
Step 2: Create the CNAME records
Now create two CNAME records at your DNS provider. Always copy the values from your tenant. The format depends on when the domain was added:
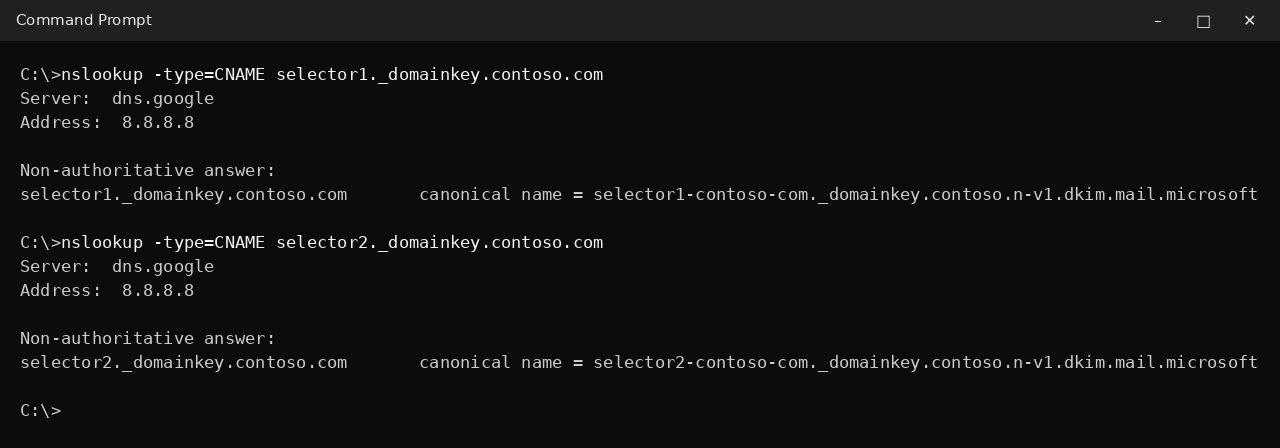
Host name: selector1._domainkey
Points to: selector1-contoso-com._domainkey.contoso.n-v1.dkim.mail.microsoft

Host name: selector2._domainkey
Points to: selector2-contoso-com._domainkey.contoso.n-v1.dkim.mail.microsoft
Domains that were added before May 2025 use the older format, which ends with your onmicrosoft.com domain, for example selector1-contoso-com._domainkey.contoso.onmicrosoft.com.
- Enter only selector1._domainkey as host name. Most providers add the domain automatically
- Create both records. The second selector is needed for the key rotation
- Use a TTL of 3600 seconds or more
Step 3: Enable DKIM signing
Wait a few minutes until the records are published, then go back to the Microsoft Defender portal.
- Click on your domain on the DKIM tab
- Slide Sign messages for this domain with DKIM signatures to Enabled
- Click on OK
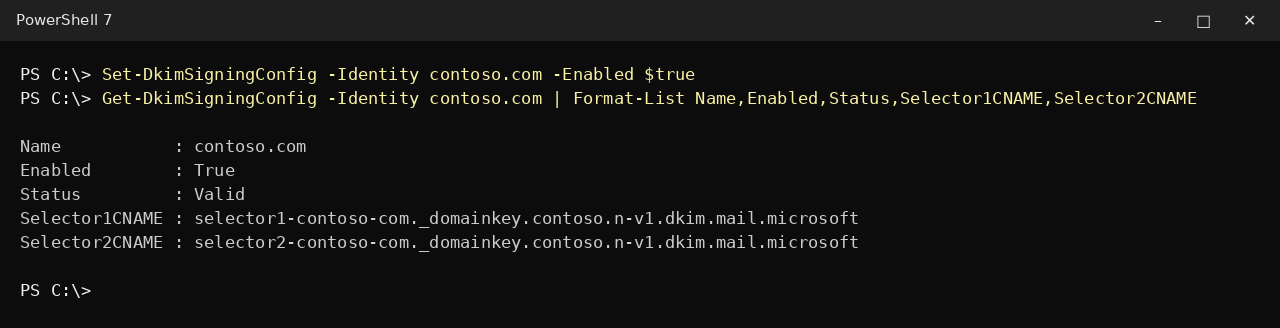
The status changes to Signing DKIM signatures for this domain. With PowerShell you enable it with:
Set-DkimSigningConfig -Identity contoso.com -Enabled $true
Step 4: Check the result
Check the DNS records from a command prompt:
nslookup -type=CNAME selector1._domainkey.contoso.com
nslookup -type=CNAME selector2._domainkey.contoso.com
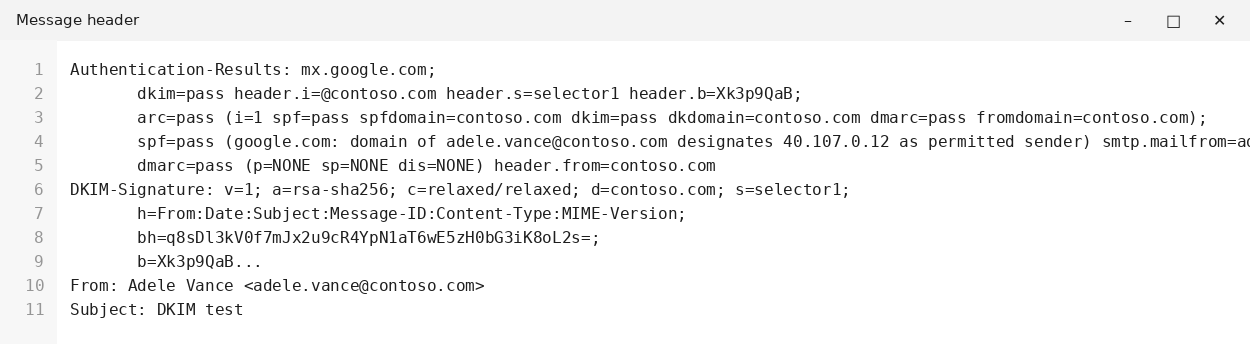
Then send a test mail to an external mailbox, for example Gmail, and open the message header. In Authentication-Results you should see dkim=pass with your domain, and the DKIM-Signature header shows d=contoso.com and s=selector1.
Conclusion
In this blog post we learned how to configure DKIM record for Microsoft 365. You now know how to create the two CNAME records, enable DKIM signing for your domain and check the result. As a next step configure DMARC. More details are available here: Set up DKIM to sign mail from your Microsoft 365 domain. You might also like: How to disable Direct Send in Microsoft 365, How to add External Email Warning and Tag within Microsoft 365. Did you enjoy this article? Don’t forget to follow us and share this article. If you have any questions or need further assistance, feel free to reach out or leave a comment below.