Welcome to our new blog post about How to configure Forced Tunneling with Route Table in Azure. When deploying workloads in Microsoft Azure, controlling outbound internet traffic from your virtual network is a critical part of maintaining security and compliance. By default, Azure routes internet-bound traffic directly from virtual machines (VMs) to the internet. While this may suit many scenarios, organizations with strict network security policies often require all outbound traffic to flow through an on-premises firewall or proxy server for inspection and logging. This is where Forced Tunneling comes into play. In this post, we’ll walk through how to configure Forced Tunneling in Azure, and why it’s an essential tool for secure and compliant cloud networking.
Table of Contents
What is Forced Tunneling
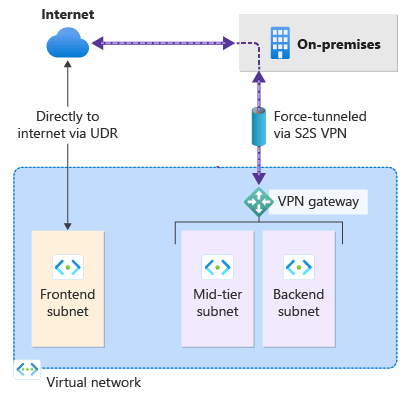
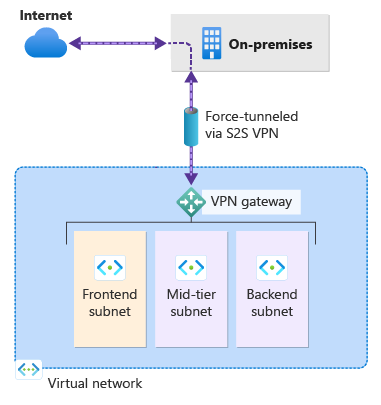
Forced Tunneling is a network configuration in Azure that allows administrators to redirect outbound traffic from a virtual network (VNet) to an on-premises location, typically a firewall or proxy, before it reaches the internet. Instead of using Azure’s default system routes that send outbound traffic directly to the internet, Forced Tunneling replaces those routes with user-defined routes (UDRs) pointing to a VPN Gateway or ExpressRoute connection. This approach gives organizations greater control over data egress, enabling centralized logging, traffic inspection, and policy enforcement. It is particularly valuable in hybrid network setups where strict governance and monitoring of internet access are required.
Forced Tunneling Options
There are several ways to implement Forced Tunneling in Azure. Below is a quick overview of the available configuration options.
| Option | Description | Advantages | Disadvantages | More Informations |
|---|---|---|---|---|
| Default Site | Manually sets a specific VPN connection as the Forced Tunneling route. | Simple to configure, predictable routing behavior. | No dynamic route updates; manual setup required. | Blog Post |
| Route Table | Uses User-Defined Routes to direct traffic to a specific next hop (e.g., VPN, NVA). | Fine-grained control over traffic paths; works with many setups. | Must be managed per subnet; does not support dynamic updates. | Blog Post |
| BGP Peer | Uses Border Gateway Protocol to dynamically exchange routing information. | Automatically updates routes; scalable for larger setups. | More complex to configure; requires BGP knowledge. | Microsoft Learn |
How to configure Forced Tunneling with Route Table in Azure
In this section we will show you, how you can configure Forced Tunneling with the Route Table option. After this configuration the defined subnets will be forced to go trough the defined VPN Tunnel.
Step 1: Create a VNet, subnets, local network gateway and a VPN gateway
Before configuring Forced Tunneling, you need to have a Virtual Network (VNet) with at least two subnets (one for workloads and one for the gateway), a Local Network Gateway representing your on-premises network, and a VPN Gateway with an active connection.
We won’t cover how to create these resources in this guide, as they are considered prerequisites. If your environment already includes these components and the VPN connection is established, you’re ready to move on to the next step.
Step 2: Create a Route Table
In this section we will configure the Forced Tunneling. Make sure you have the Ressources created which were meantioned in Step 1. We will configure the Forced Tunneling with Route Table. Just follow the steps below.
- Go to portal.azure.com
- Create a new resource
- Search for Route table and click on create
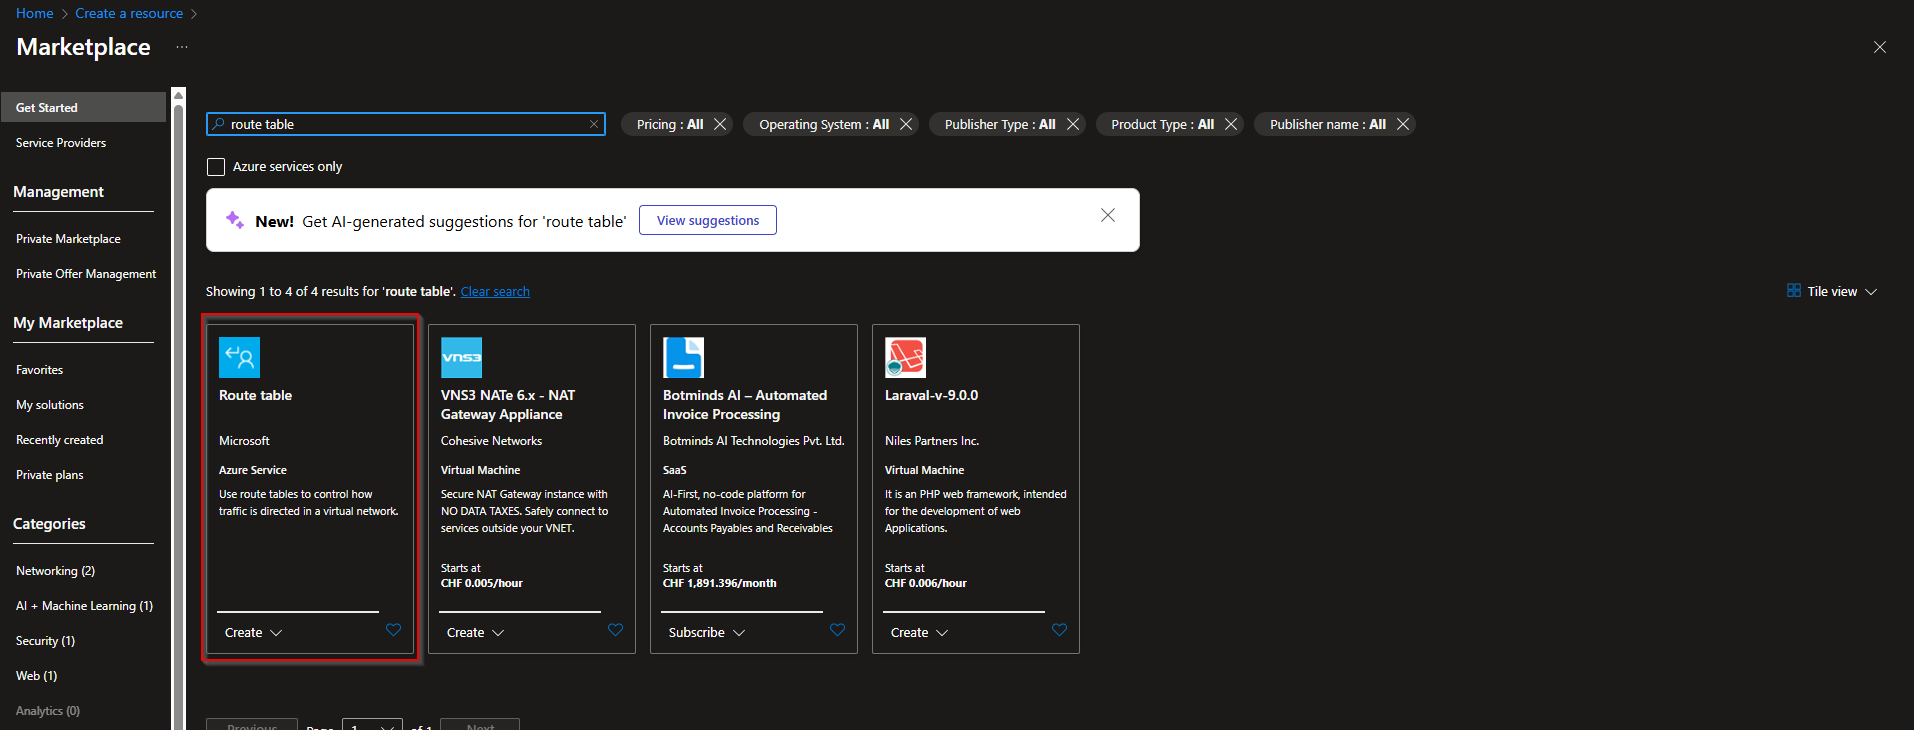
Follow the instruction and finish the setup. You now have a new Route Table.
- Go to your new Route Table
- Navigate to Settings and Routes
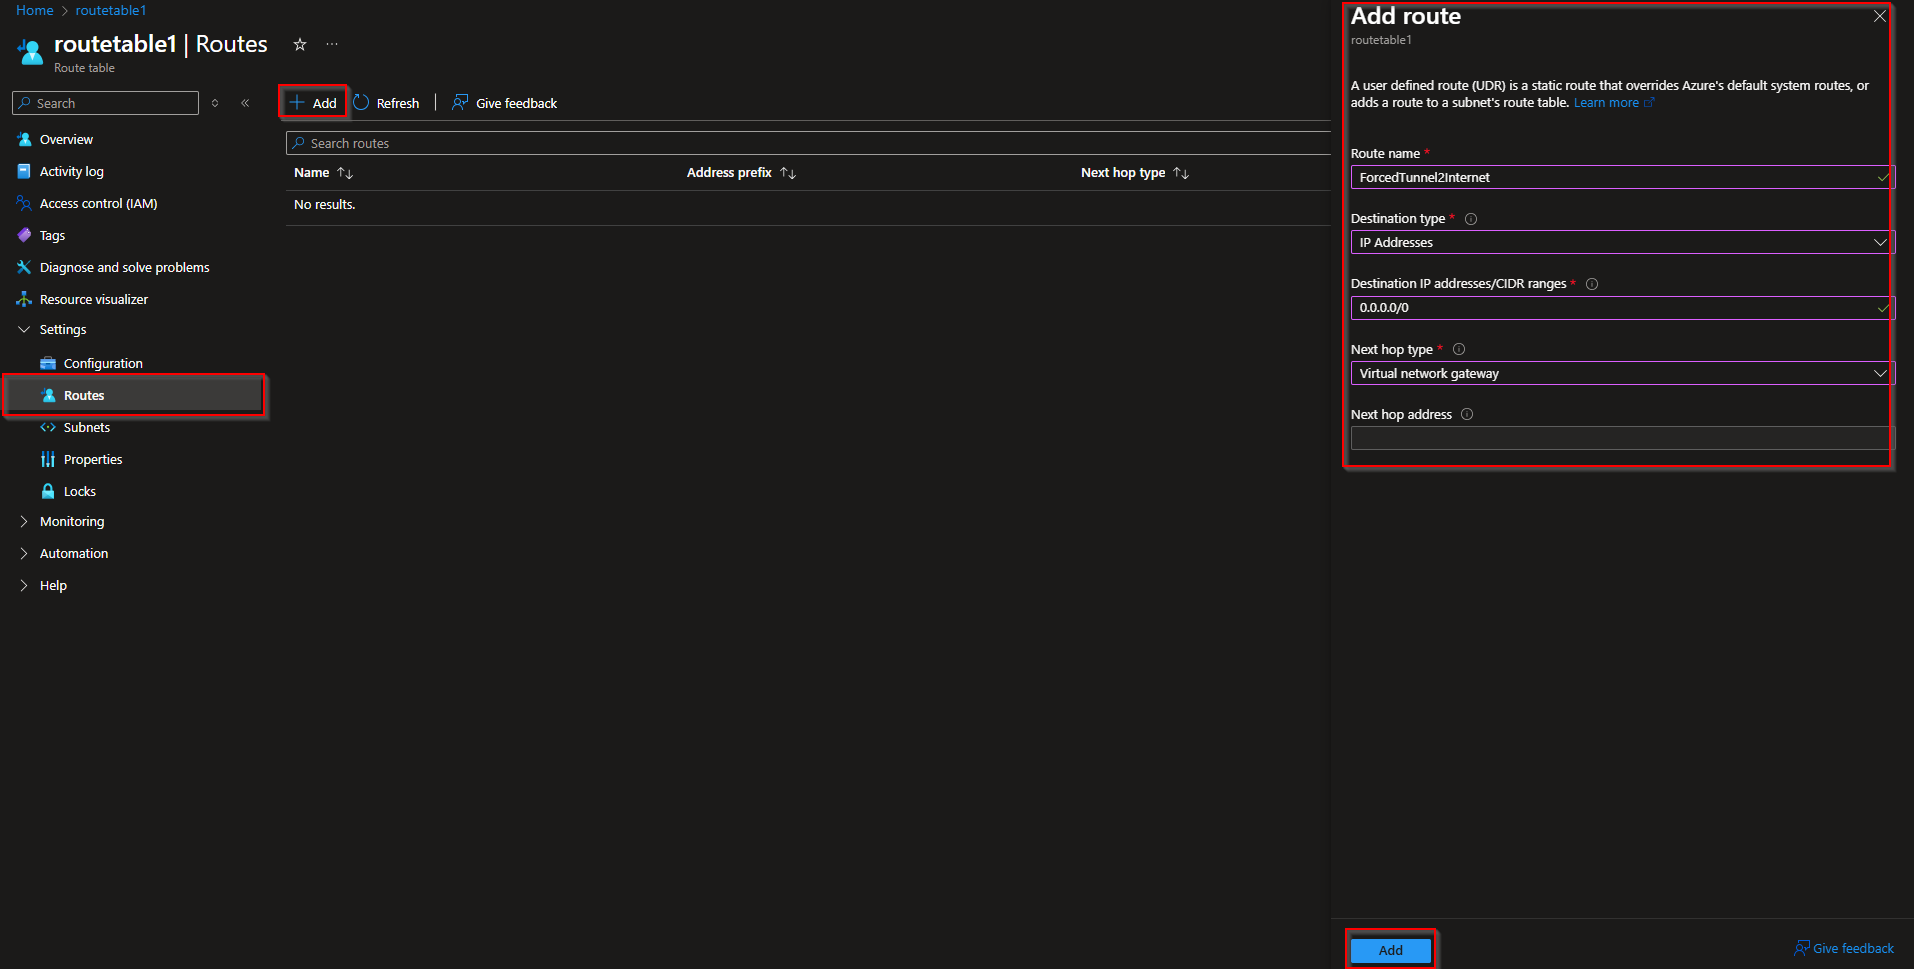
- Click on Add
Now configure the route as shown here.
- Route name: ForcedTunnel2Internet
- Destination type: IP Addresses
- Destination IP addresses/CIDR ranges: 0.0.0.0/0
- Next hop type: Virtual network gateway
Step 3: Associate the Route Table to a Subnet
Last we will only need to Associate the subnet to this route table. Follow the steps.
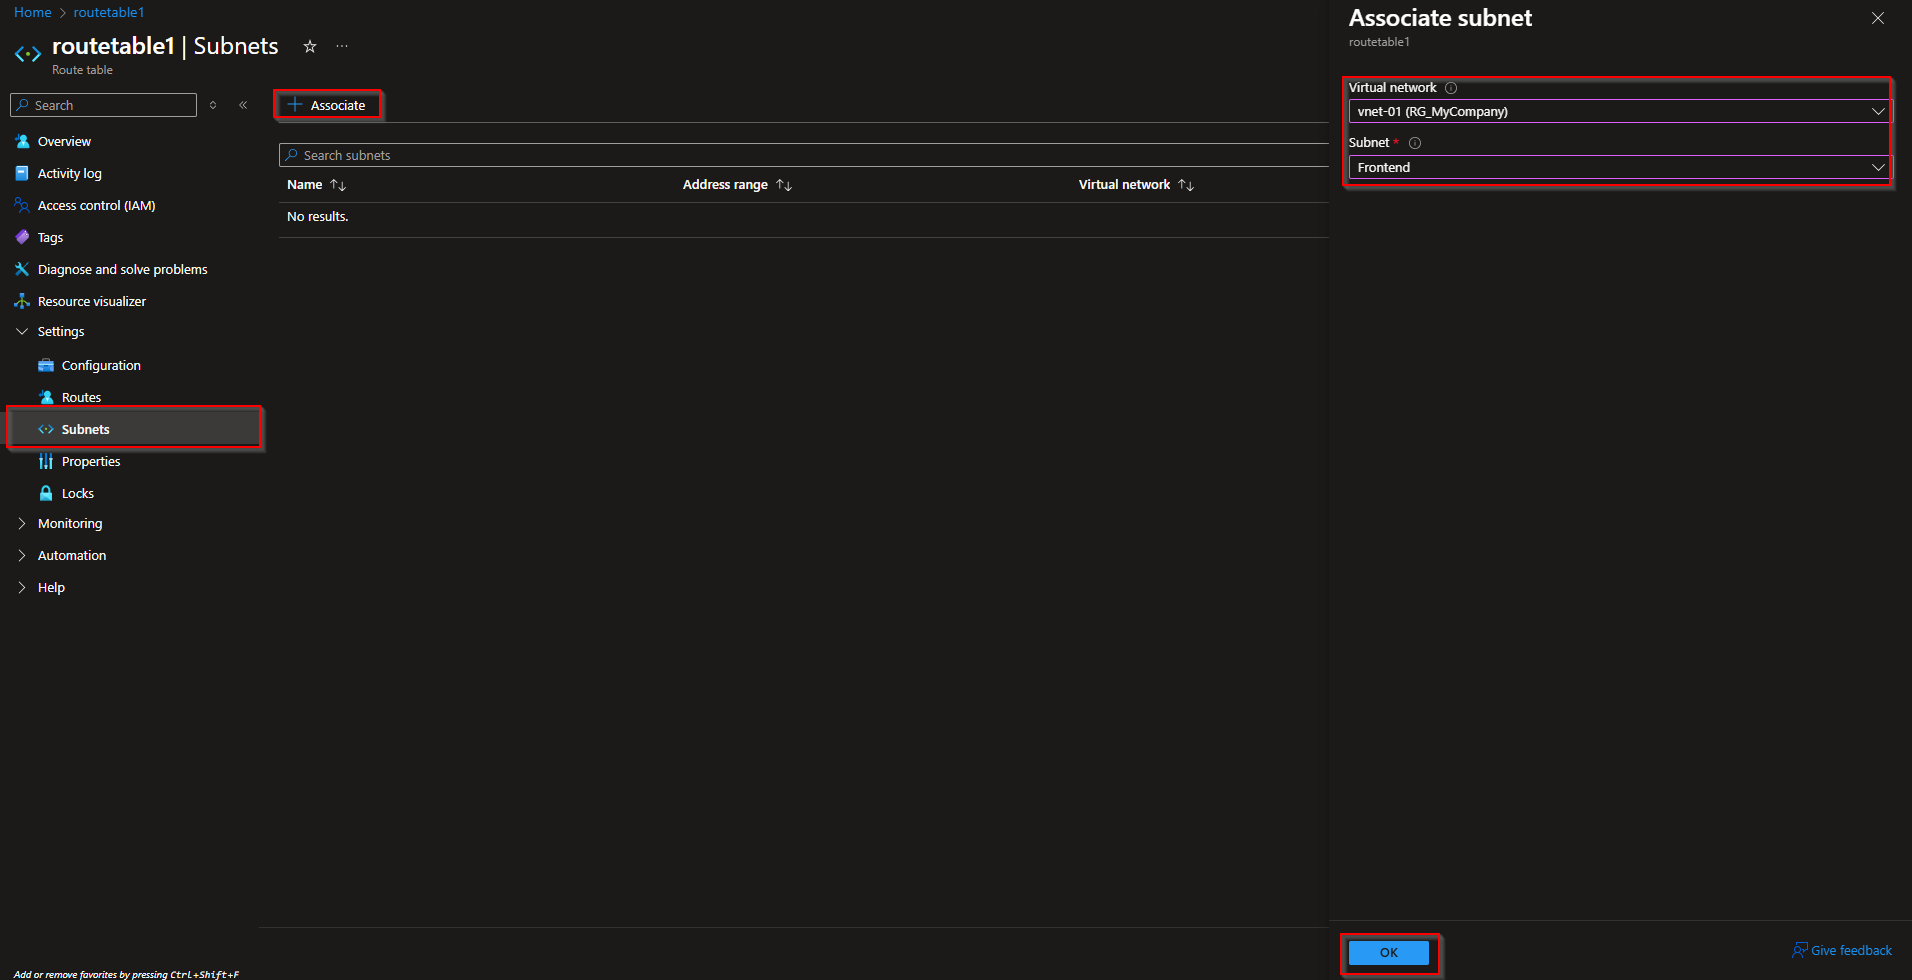
- In the Route Table Settings navigate to Subnets
- Click on Associate
- Choose the Virtual network and the Subnet you want to Force Tunnel on
- Click on Ok
Congrats, you have successfully configured Forced Tunneling with the Route Table. All the traffic from the defined subnet is forced over the VPN.
Conclusion
In this blog post we Learn about How to configure Forced Tunneling with Route Table in Azure. Forced Tunneling is a powerful feature in Azure that allows you to control and inspect outbound traffic by routing it through your on-premises infrastructure. By preparing your environment with the necessary network components and configuring a Route Table for your VPN connection, you can enforce enterprise-grade security and compliance policies. Additionally, the ability to exclude specific subnets gives you flexibility for hybrid scenarios where not all traffic needs to be tunneled. With these steps in place, your Azure environment is better aligned with your organization’s network and security standards. Did you enjoy this article? Dont forget to follow us and share this article. If you have any questions or need further assistance, feel free to reach out or leave a comment below.