
Welcome to our new blog post How to disable Windows Hello for Business with Microsoft Intune. In this article, we will walk through how to disable Windows Hello for Business with Microsoft Intune, either for all devices during enrollment or for selected groups of devices.
Table of Contents
What Is Windows Hello for Business?
Windows Hello for Business replaces the password on a Windows device with a PIN or a biometric gesture. On Microsoft Entra joined devices it is enabled by default. That is why users are asked to set up a PIN right after the first sign-in, also during Windows Autopilot.
Why Disable Windows Hello for Business?
From a security point of view Windows Hello for Business is a good thing and we recommend using it. But there are situations where the prompt is not wanted: shared devices and kiosks where many users sign in, devices for training rooms, or a rollout where you want to introduce Windows Hello later, together with a proper communication. In these cases you disable the enrollment and enable it again for the groups that are ready.
Prerequisites
- Windows 10 or Windows 11 devices that are enrolled in Microsoft Intune
- A Microsoft Intune Plan 1 subscription
- The Intune Service Administrator role for the tenant-wide policy
- A group with the devices for which Windows Hello for Business should be disabled
How to disable Windows Hello for Business with Microsoft Intune
There are two ways. Step 1 changes the tenant-wide policy that applies to all devices at enrollment. Step 2 creates a profile for selected groups, which also reaches devices that are already enrolled.
Step 1: Disable Windows Hello for Business for all devices
The tenant-wide policy is applied only at enrollment time. It does not change devices that are already enrolled.
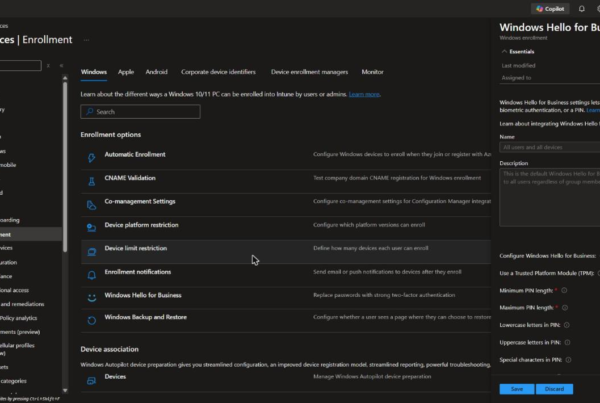
- Go to intune.microsoft.com
- Click on Devices
- Click on Enrollment
- Select the Windows tab
- Click on Windows Hello for Business
- Set Configure Windows Hello for Business to Disabled
- Click on Save
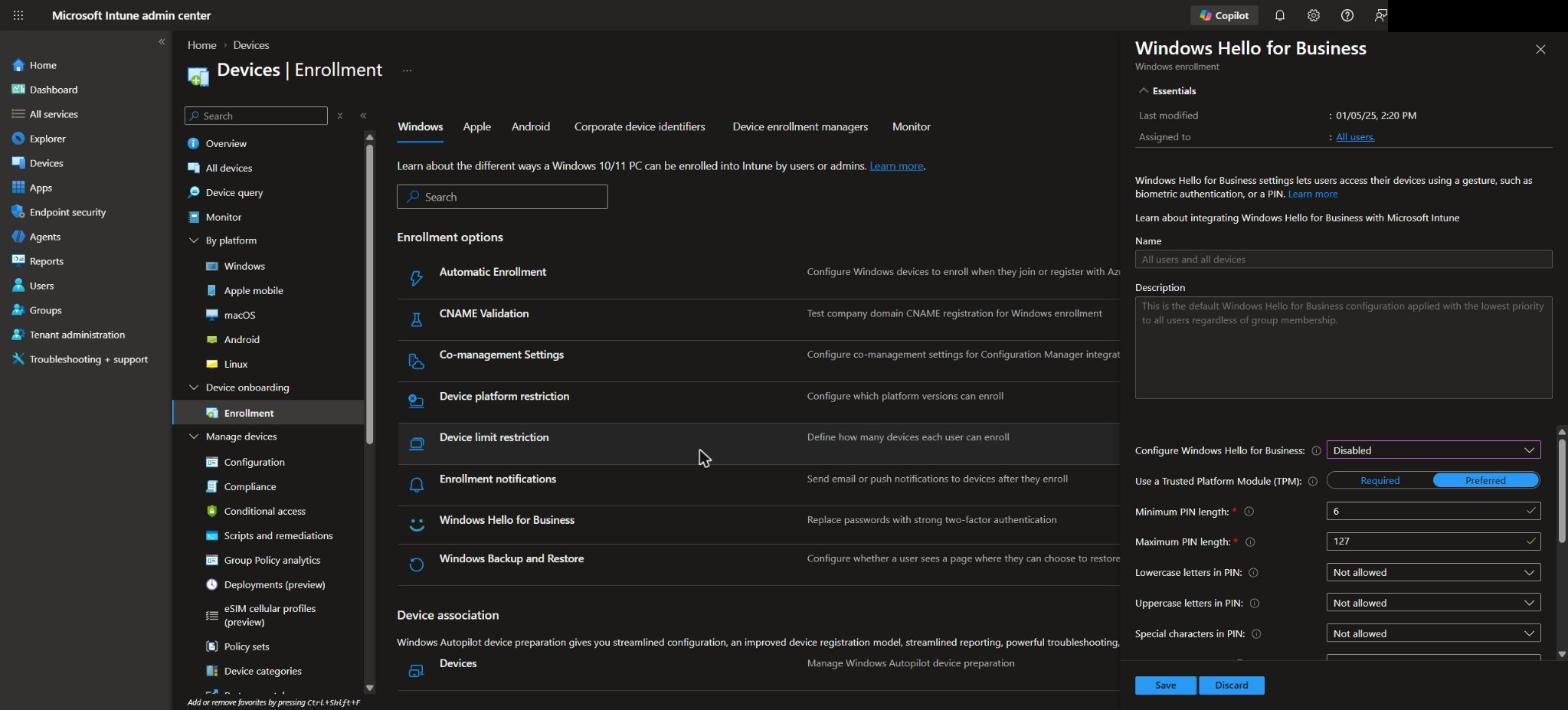
With Not configured Intune does not control the setting at all, and Windows keeps its default behaviour, which is enabled on Microsoft Entra joined devices.
Step 2: Disable Windows Hello for Business for selected groups
In this section we will create a configuration profile with the Settings catalog. Just follow the steps below.
- Go to intune.microsoft.com
- Click on Devices
- Click on Windows
- Click on Configuration
- Click on Create and New Policy
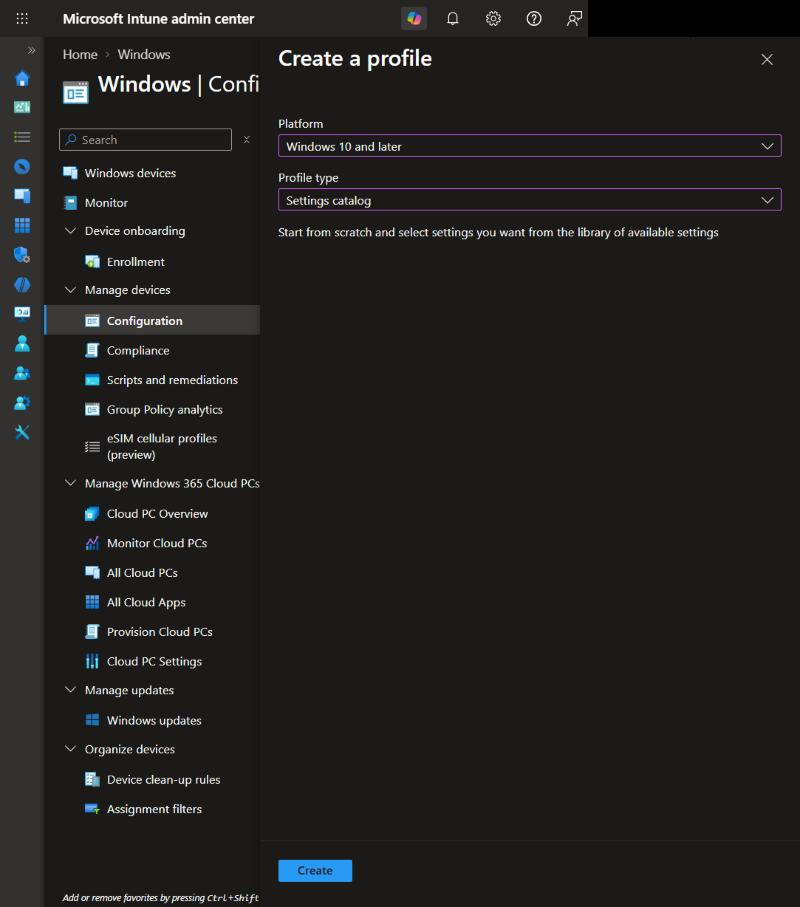
- For Platform choose Windows 10 and later
- For Profile type choose Settings catalog
- Click on Create
On the Basics page give it a Name, for example Disable Windows Hello for Business, and a Description (Optional) and click on Next.
On the Configuration settings page:
- Click on Add settings
- Search for Windows Hello For Business
- Select the category Windows Hello For Business
- Select Use Windows Hello For Business (Device)
- Close the settings picker
- Set Use Windows Hello For Business (Device) to false
- Click on Next
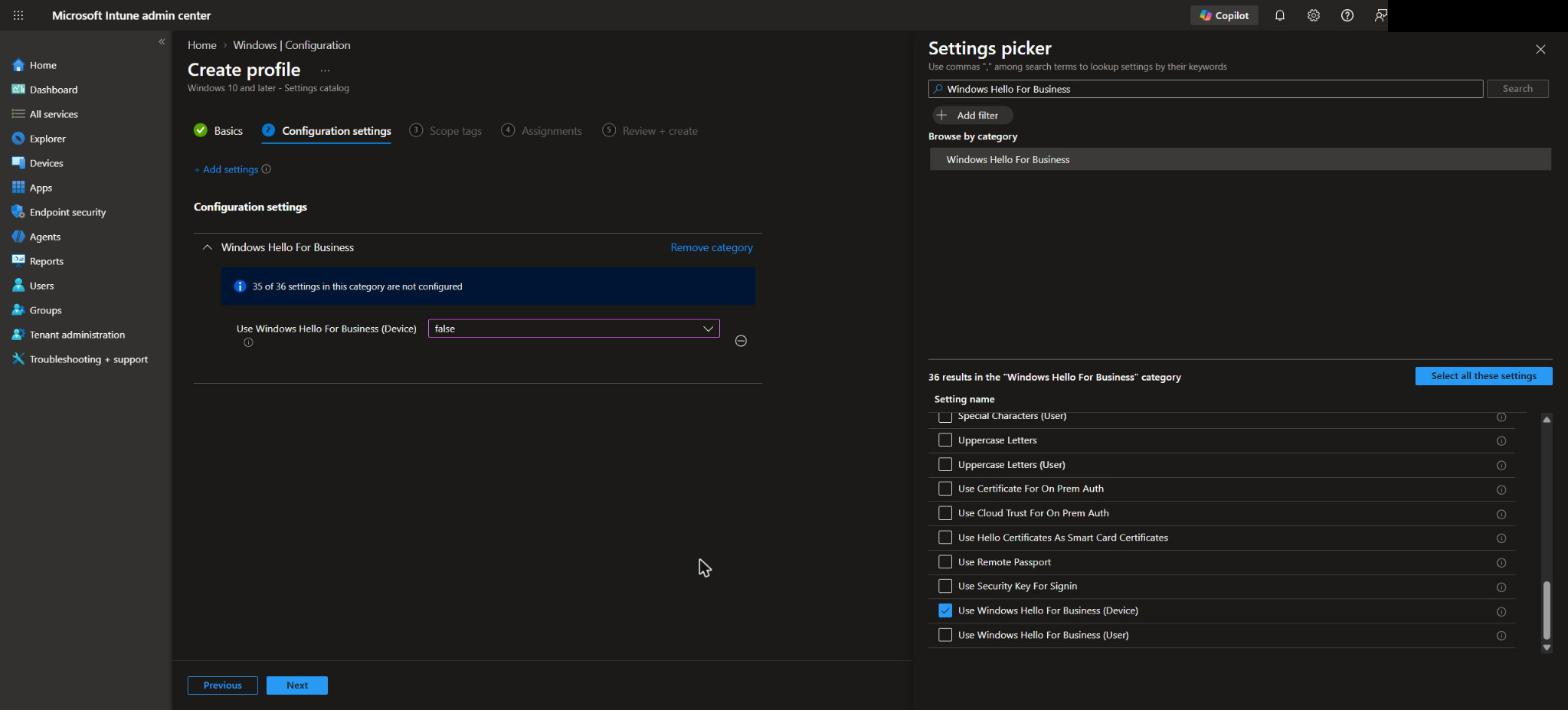
There is also a user setting with the same name. A user policy takes precedence over a device policy, so do not configure both with different values.
Step 3: Assign the policy
Now we assign the policy and finish the wizard.
- On the Scope tags page, add your scope tags if applicable and click on Next
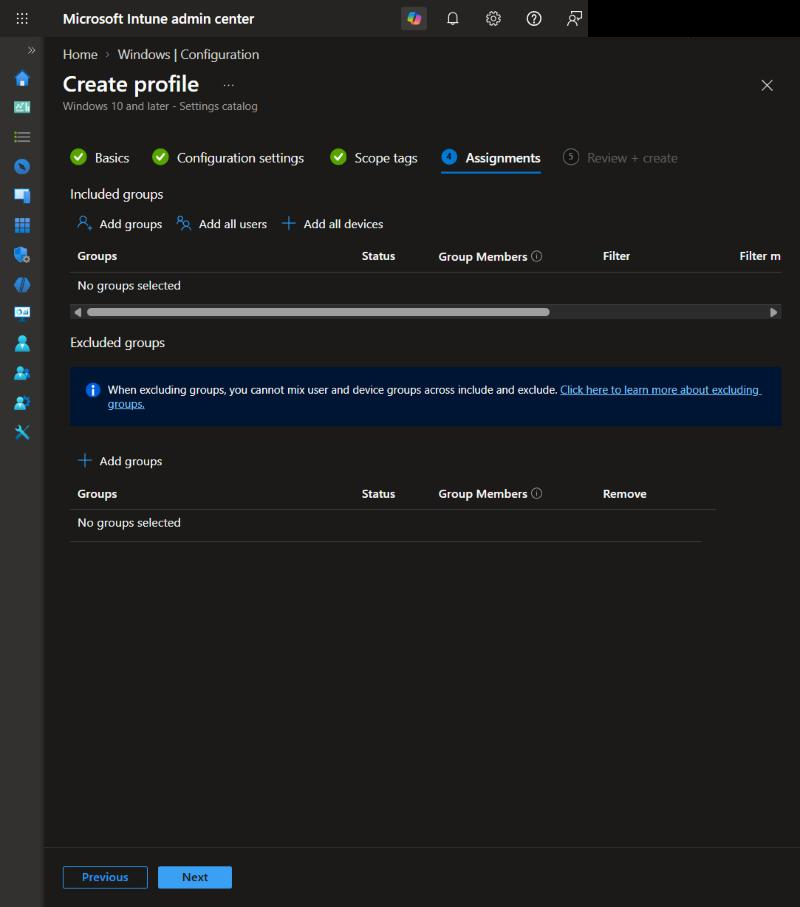
- On the Assignments page, select the group you want to deploy the policy to. We recommend starting with a test group
- Click on Next
- Click on Review + create
Step 4: Check the result on the device
After the next sync the setting arrives on the device. To speed this up, open the Company Portal app on a test device and click on Sync, or select the device in the Intune admin center and click on Sync.
- Sign in to a test device with a user that has not set up a PIN yet
- The prompt to set up Windows Hello for Business does not appear anymore
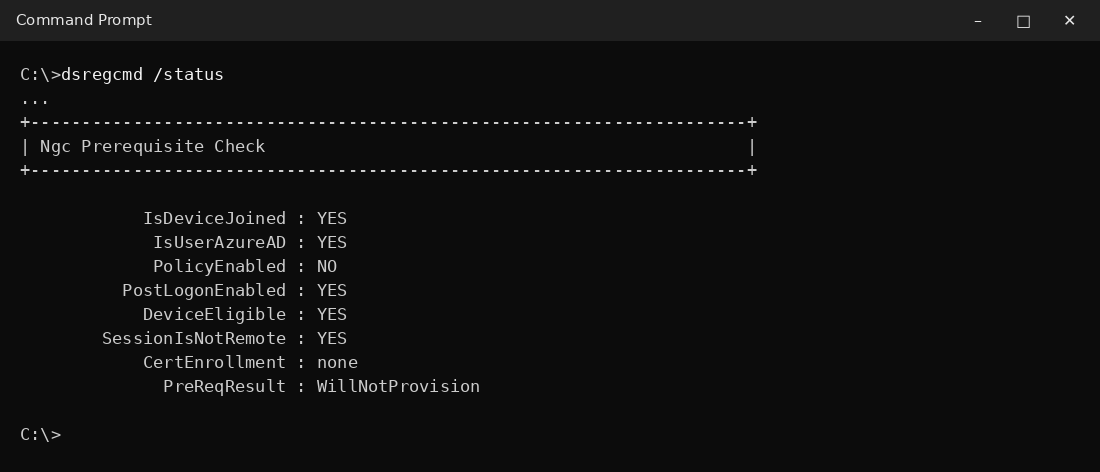
- Open a Command Prompt and run dsregcmd /status. In the section Ngc Prerequisite Check the value PolicyEnabled shows NO
Important: the policy only prevents new enrollments. A user who has already set up a PIN keeps it. To remove an existing Windows Hello container, the user can run certutil.exe -deleteHelloContainer and then sign out.
Conclusion
In this blog post we learned how to disable Windows Hello for Business with Microsoft Intune. You now know how to disable Windows Hello for Business tenant-wide or for selected groups and what happens to existing PINs. More details are available here: Configure Windows Hello for Business, Windows Hello for Business in Intune. You might also like: How to configure Multi-factor unlock with Microsoft Intune. Did you enjoy this article? Don’t forget to follow us and share this article. If you have any questions or need further assistance, feel free to reach out or leave a comment below.